Table of Contents
Advertisement
Quick Links
Advertisement
Table of Contents

Related Manuals for BZB Gear BG-4KPTZ-12XUHP


Summary of Contents for BZB Gear BG-4KPTZ-12XUHP
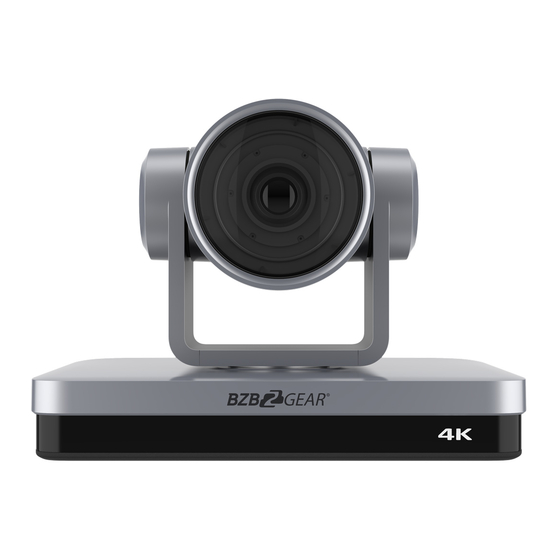
- Page 1 BG-4KPTZ-12XUHP 4K UHD PTZ CAMERA User Manual...
- Page 2 Attentions This manual introduces functions, installations and operations for this 4K camera in details. Please read this manual carefully before installation and use. 1. Cautions 1.1 Avoid damage to product caused by heavy pressure, strong vibration or immersion during transportation, storage and installation.
-
Page 3: Table Of Contents
Content 1. CAMERA INSTALLATION ..........................4 1.1 C ........................... 4 AMERA NTERFACES 1.2 P ......................4 OWER NITIAL ONFIGURATION 1.3 V ............................5 IDEO UTPUT 1.4 M ..........................5 OUNTING RACKETS 2.PRODUCT OVERVIEW ........................... 7 2.1 P ..........................7 RODUCT NTRODUCTION 2.1.1 Dimension ............................ - Page 4 4.2.7 System Configuration ......................... 31 4.2.8 Logout ..............................32 5. SERIAL PORT COMMUNICATION AND CONTROL .................. 33 5.1 VISCA P ..........................33 ROTOCOL 5.1.1 VISCA Protocol Return Command ..................... 33 5.1.2 VISCA Protocol Control Command ....................33 5.1.3 VISCA P ....................
-
Page 5: Camera Installation
1. Camera Installation 1.1 Camera Interfaces Figure 1.1 Product Interfaces 1. Remote Control Receiving Indicator 8. Rotary DIP Switch 2. Camera Lens 9. RS232 Control Interface (input) 3. Tripod Screw Hole 10. RS232 Control Interface (output) 4. Screw Hole for Tripod 11. -
Page 6: Video Output
1.3 Video Output 1) Network output a. Network cable connection: as shown in Figure 1.1 label 7. b. Webpage Login: open your browser and enter 192.168.5.163 (factory default) in the address bar; press Enter to enter into the login page, click on the “player is not installed, please download and install!" and follow the installation steps for installation. - Page 7 2)Ceiling Mounting...
-
Page 8: Product Overview
2.Product Overview 2.1 Product Introduction 2.1.1 Dimension Figure 2.1 Product Dimension... -
Page 9: Accessories
2.1.2 Accessories Standard Accessories Optional Accessories Power adapter Wireless Remote Control IR Remote Control Wall Mount RS232 Cable Ceiling Mount User Manual USB3.0 Cable 2.2 Main Features This series camera is a new UHD 4K camera with 12X optical zoom and 80.4° wide angle lens. It has perfect functions, superior performance and rich video output interfaces. - Page 10 1/2.5-inch SONY CMOS sensor Sensor Effective Pixels 8.51M megapixel 16:9 HDMI video format 4KP@60fps/4KP@50fps/4KP@30fps/4KP@25fps/1080P@60fps/1080P@50fps/1080 I@60fps/1080I@50fps/1080P@30fps/1080P@25fps/720P@60fps/720P@50fps USB3.0 interface video format YUY2/NV12: 1920×1080@30/25fps/1280×720@30/25fps/960×540@30/25fps/640×360@30/25fps/ 640×480@30/25fps/320×176@30/25fps MJPEG/H.264/H.265: Video Format 3840×2160@30/25fps/1920×1080@30/25fps/1280×720@30/25fps/960×540@30/25fps /640×360@30/25fps/640×480@30/25fps/320×176@30/25fps USB3.0 is compatible with USB2.0 video format YUY2/NV12: 640×360@30/25fps/640×480@30/25fps/320×176@30/25fps MJPEG/H.264/H265: 3840×2160@30/25fps/1920×1080@30/25fps/1280×720@30/25fps/960×540@30/25fp s/640×360@30/25fps/640×480@30/25fps/320×176@30/25fps Minimum 0.05Lux (F1.8, AGC ON) Illumination 2D﹠3D DNR...
-
Page 11: Interfaces Instruction
Serial VISCA/Pelco-D/Pelco-P Communicatio Baud Rate: 115200/38400/9600/4800/2400 n protocol Communicatio UVC (Video), UAC (Audio) n Protocol Power HEC3800 outlet (DC12V) Interface Supply Adapter AC110V~AC220V to DC12V/2.5A Input Voltage DC12V±10% Input Current <1A Power <12W Consumption PTZ Parameter Pan Rotation -110°~+110° Tilt Rotation -30°~+30°... -
Page 12: Rs-232 Interface
Figure2.5 Wiring Diagram 2.4.2 RS-232 Interface 1)RS-232 Interface Definition Connection to PC or Camera Controller Camera WindowsDB-9 1.DTR 1.DCD 2.DSR 2.RXD 3.TXD 3.TXD 4.GND 4.DTR 5.RXD 5.GND 6.GND 6.DSR 7.IR OUT 7.RTS 8.NC 8.CTS 9.RI... - Page 13 2)RS-232 Mini-DIN 8-pin Port Definition Port Definition Data Terminal Ready Data Set Ready Transmit Data Signal Ground Receive Data Signal Ground IR Commander Signal IR OUT No Connection 3)RS232(DB9) Port Definition Definition Port Data Carrier Detect Receive Data Transmit Data Data Terminal Ready System Ground Data Set Ready...
-
Page 14: Application Instruction
3. Application Instruction 3.1 Video Output 3.1.1 Power-On Initial Configuration The remote control receiving indicator flashes after power on, the pan-tilt turns left to the lowest left to the lowest, and then turns to the HOME position (both the horizontal and vertical positions are in the middle), while the movement first shrinks and then stretches. -
Page 15: Keys Introduction For Ir Remote Control
One to One Code Matching: Press the "set" and "*" keys combined for 3 seconds, LED indicator starts flashing. Camera receive the signal and power on, LED indicator will go off if code matching successfully. The camera can be controlled by this wireless remote control only after one to one code pairing. - Page 16 2. Camera Selection Select the camera address to control. 3. Focus Control Auto: auto focus mode Manual: manual focus mode Focus + (near):Press【FOCUS +】 key (Valid only in manual focus mode) Focus - (far): Press【FOCUS -】 key (Valid only in manual focus mode) Press and hold the keys: focusing action will continue until the key is released.
- Page 17 6. Pan/Tilt Control Up: press Down: press Left: press Right: press Back to middle position: press“【HOME】” Press and hold the up/down/left/right key, the pan/tilt movements will move from slow to fast, until it gets to the endpoint. It will stop as soon as the key is released. 7.
-
Page 18: Menu Introduction
9. Key Combination 1) 【#】+【#】+【#】: Clear all presets 2) 【*】+【#】+【6】: Restore factory defaults 3) 【*】+【#】+【3】: Menu set to Chinese 4) 【*】+【#】+【4】: Menu set to English 5) 【*】+【#】+【9】: Flip switch 6) 【*】+【#】+Auto: Enter aging mode 7) 【#】+【*】+Auto: Exit aging mode 8) 【*】+【#】+Manual: Restore the default user name, password, and IP address 9) 【#】... -
Page 19: System Setting
MENU ================ Language English (Setup) (Camera) (P/T/Z) (Video Format) (Version) (Restore Default) [↑↓]Select[← →]Change Value [Menu]Back [Home]OK Language: Language setting, Chinese / English Setup: System parameter setting Camera: Camera parameter setting P/T/Z: Enter into sub menu Version: Enter into sub menu Restore Default: Enter into reset setting, select YES or NO to confirm [↑↓] Select: For selecting menu [←... -
Page 20: Camera Setting
Protocol: VISCA/Pelco-P/Pelco-D/Auto Visca Address: VISCA=1~7 Pelco-P=1~255 Pelco-D=1~255 Baudrate: 2400/4800/9600/115200 Visca Address Fix: On/Off Auto Filp: On/Off 3.3.3 Camera Setting Move the pointer to the (CAMERA) in the Main Menu, click the 【HOME】key and enter the (CAMERA) as follow, CAMERA ================= (Exposure)... - Page 21 EXPOSURE ================= Mode Auto Flicker 50Hz G.Limit 关闭 [← →]Change Value [↑↓]Select [Menu]Back Mode: Auto, Manual, Shutter priority, Iris priority and Brightness priority. EV: On/Off (only available in auto mode) Compensation Level: -7~7 (only available in auto mode when EV is ON) BLC: ON/OFF for options (only available in auto mode) Dynamic Range: 1~8, close Anti-Flicker: OFF/50Hz/60Hz for options (only available in Auto/Iris priority/Brightness priority modes)
- Page 22 Saturation: 60%,70%,80%,90%,100%,110%,120%,130%,140%,150%,160%,170%,180%,190%,200% Red fine-tuning: -10~10 (only available in automatic mode) Blue fine-tunable: -10~10 (only available in automatic mode) RED GAIN: 0~255(only available in Manual mode) BLUE GAIN: 0~255(only available in Manual mode) AWB Sensitivity: high/middle/low Chroma: 0~14 3) Image Move the pointer to the (IMAGE) in the Menu, click the 【HOME】 and enter into the (IMAGE sub menu) as follow, IMAGE ================...
-
Page 23: P/T/Z
FOCUS ================= Focus Mode Auto AF-Zone Center AF-Sensitivity [← →]Change Value [↑↓]Select [Menu]Back Focus Mode: Auto/manual AF-Zone: Up/middle/down AF-Sensitivity: High/middle/low 5)Noise Reduction Move the pointer to the (NOISE REDUCTION) in the Menu, click the【HOME】and enter the (NOISE REDUCTION) as follow, NOISE REDUCTION =================... -
Page 24: Video Format
P/T/Z ================ Speed by zoom Zoom speed Image Freezing Acc Curve Slow [← →]Change Value [↑↓]Select [Menu]Back Depth of Field: Only effective for the remote controller, On/ Off; (When zooming in, the PT control speed by remoter will become slow) Zoom Speed: Set the zoom speed for the remote controller, 1~8 Image Freezing: On/Off Accelerating Curve: Fast/Slow... -
Page 25: Network Connection
VERSION ================= MCU Version 3.1.0 2019-11-23 Camera Version 1.0.0 2019-12-4 AF Version 1.0.0 2019-08-20 [Menu]Back MCU Version: Display MCU version information Camera Version: Display camera version information AF Version: Display the focus version information 3.3.7 Restore Default Move the pointer to the (RESTORE DEFAULT) in the Main Menu, click the【HOME】and enter the (RESTORE DEFAULT) as follow, RESTORE DEFAULT =================... - Page 26 The computer must be on the same subnet as the camera to connect successfully. The device will not be accessible otherwise. The camera default IP address is 192.168.5.163, therefore the computer must be connected to the 192.168.5.x subnet. To connect to the camera open the Local Area Connection Properties on the computer. For Windows users right-click on the internet connection in the lower right corner of the desktop.
-
Page 27: Web Browser Login
4.2 Web Browser Login 4.2.1 Web Client 1)Web Client Login Enter 192.168.5.163 in the address bar of your internet browser and click Enter. If logged in as administrator (Default Username/Password: admin), users can preview, playback, and configure in the Web Client. If logged in as a normal user (Default Username/Password:user1 or user2), users can only preview and playback with no options for configuration. -
Page 28: Playback
Default username/password: admin PTZ control can be carried out, zoom, focus, video capture, sound, zoom, full screen and set the preset position, run, and delete; you can preview, playback, configuration, logoff. 2) Login as normal user Default username/password: user1 or user2 PTZ control can be carried out, zoom, focus, video capture, sound, zoom, full screen and set the preset position, run, and delete;... -
Page 29: Video Configuration
D:\MyIPCam\) Click the Save button to make settings effective. 2) Audio Configuration Switch: Choose to enable the audio or not. Compressing Format: Set audio compressing format and the device will reboot automatically after change (default MP3, AAC, G.711A optional) Sampling Frequency: Set sampling frequency and the device will reboot automatically after change (default 44100, 8000, 16000, 32000 and 48000 optional, G.711A default 8000) Sampling Precision: Set sampling precision (default 16bits) Compressing Code Rate: Set audio compressing code rate (default 64bits, 32, 48, 96, 128bits optional) - Page 30 2) Stream Release Switch: To turn on/off the main / secondary stream. Protocol: primary / secondary stream applies RTMP protocol. Host Port: server port number (default 1935, 0-65535 optional) Host Address: server IP addresses (default 192.168.5.11) Stream Name: choose a different stream name (live / av0, live / av1 optional). User: Set the username.
-
Page 31: Network Configuration
Red Gain: Set the red gain, effective when it is manual (default 145, 0-255 optional). Blue Gain: Sets the Blue gain, effective when it is manual (default 56, 0-255 optional). d. Image: Brightness, contrast, sharpness, black and white mode, the gamma curve, Horizontal Flip and Vertical Flip can be set. -
Page 32: System Configuration
Soap Port: Set Soap port (default 1936, 0-65535 optional) RTMP Port: Set RTMP port (default 1935, 0-65535 optional) RTSP Port: Set RTSP port, the device will restart automatically after changed (default 554, 0-65535 optional). Visca Port: Set Visca port, the device will restart automatically after changed (default 3001,0-65535 optional). Click on the "Save"... -
Page 33: Logout
2) System Time Date Format: Set the date format (YYYY-MM-DD default That year - month - day, MM-DD-YYYY namely Month - Day - Year, DD-MM-YYYY date - month - year Optional). Date separator: set the date separator (default '/','.','-' Optional). Time Zone: Set the time zone (default East eight districts, other time zones optional). -
Page 34: Serial Port Communication And Control
5. Serial Port Communication and Control The camera could be controlled through RS232/RS485 interface; RS232C serial parameter are as follows: Baud rate: 2400/4800/9600/115200 bits / sec; Start bit: 1; data bits: 8; Stop bit: 1; Parity: None. After power on, the camera first goes left, then back to the middle position. Self-test is finished after the zoom moved to the farthest and then back to the nearest position. - Page 35 Command Function Command packet Note Near (Variable) 8x 01 04 08 3p FF Direct 8x 01 04 48 0p 0q 0r 0s FF pqrs: Focus Position Auto Focus 8x 01 04 38 02 FF Manual Focus 8x 01 04 38 03 FF One Push mode 8x 01 04 38 04 FF 8x 01 04 47 0p 0q 0r 0s...
- Page 36 Command Function Command packet Note 8x 01 04 3E 03 FF Reset 8x 01 04 0E 00 FF 8x 01 04 0E 02 FF Exposure Compensation Amount Setting Down 8x 01 04 0E 03 FF Direct 8x 01 04 4E 00 00 0p 0q FF pq: ExpComp Position 8x 01 04 33 02 FF Back Light...
-
Page 37: Visca Protocol Inquiry Command
Command Function Command packet Note Flip-HV 8x 01 04 A4 03 FF P: 0~E Video format 0:1080P60 8:720P30 1:1080P50 9:720P25 2:1080i60 A:1080P59.94 Set camera video 3:1080i50 B:1080i59.94 CAM_VideoSystem 8x 01 06 35 00 0p FF system 4:720P60 C:720P59.94 5:720P50 D:1080P29.97 6:1080P30 E:720P29.97 7:1080P25... - Page 38 y0 50 0D FF Bright CAM_ShutterPosInq 8x 09 04 4A FF y0 50 00 00 0p 0q FF pq: Shutter Position CAM_IrisPosInq 8x 09 04 4B FF y0 50 00 00 0p 0q FF pq: Iris Position CAM_Gain LimitInq 8x 09 04 2C FF y0 50 0p FF p: Gain Positon CAM_ BrightPosiInq...
-
Page 39: Pelco-D Protocol Command List
Note: [X] in the above table indicates the camera address to be operated,【y】=【x + 8】. 5.2 Pelco-D Protocol Command List Function Byte1 Byte2 Byte3 Byte4 Byte5 Byte6 Byte7 0xFF Address 0x00 0x08 Pan Speed Tilt Speed Down 0xFF Address 0x00 0x10 Pan Speed Tilt Speed... -
Page 40: Maintenance And Troubleshooting
DownLeft 0xA0 Address 0x00 0x14 Pan Speed Tilt Speed 0xAF DownRight 0xA0 Address 0x00 0x12 Pan Speed Tilt Speed 0xAF Zoom In 0xA0 Address 0x00 0x20 0x00 0x00 0xAF Zoom Out 0xA0 Address 0x00 0x40 0x00 0x00 0xAF Stop 0xA0 Address 0x00 0x00... - Page 41 a. Check whether the video output cable or video display is normal. 3) Video dithering when zoom-in or zoom-out a. Check whether the camera installation position is solid. b. Whether there is shaking machine or objects around the camera. 4) Remote control not works a.
-
Page 42: Warranty
7. Warranty BZBGEAR wants to assure you peace of mind. All BZBGEAR cameras and camera-related products include our Stress-Free Three-Year Warranty. For complete warranty information, please visit BZBGEAR.com/warranty. For questions, please call 1.888.499.9906 or email support@bzbgear.com. 8. Mission Statement BZBGEAR wants to assure you peace of mind. All BZBGEAR cameras and camera-related products include our Stress-Free Three-Year Warranty. -
Page 43: Copyright Statement
Copyright Statement All the contents in this manual and its copyright are owned by the company. No one is allowed to imitate, copy, or translate this manual without the company’s permission. This manual contains no guarantee, standpoint expression or other implies in any form. Product specification and information in this manual is for reference only and subject to change without notice.
Need help?
Do you have a question about the BG-4KPTZ-12XUHP and is the answer not in the manual?
Questions and answers