Table of Contents
Advertisement
Quick Links
Advertisement
Table of Contents

Related Manuals for Car-Interface c.LOGiC lite CI-C1-CCC


Summary of Contents for Car-Interface c.LOGiC lite CI-C1-CCC
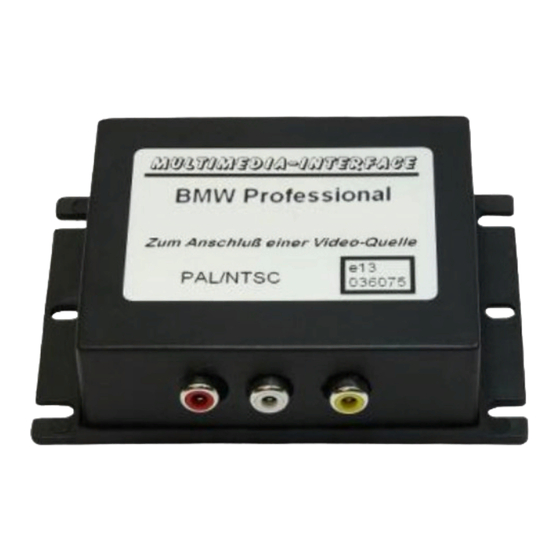
- Page 1 c.LOGiC lite interfaces CI-C1-CCC CI-C1-CIC/CI-C1-CXC-TV1 CI-C1-E65/CI-C1-E65-TV Compatible with BMW Professional navigation systems with iDrive and 6.5”/8.8” monitor Interface-set AV and reverse camera input with device control and video-in-motion Version 20.09.2017 CI-C1-CXC-TV1...
-
Page 2: Table Of Contents
Contents 1. Prior to Installation 1.1. Delivery contents 1.2. Check compatibility of vehicle and accessories 1.3. Check dip switch settings of the CAN-box 2. Installation 2.1. Installation 1series (E87), 3series (E90/E91/E92), 6series (E63/E64), X5(E70), X6(E71) at example 5series (E60/E61) 2.1.1. Vehicles 5series w/o TV-tuner port 2.1.2. -
Page 3: Prior To Installation
1. Prior to installation Read the manual prior to installation. Technical knowledge is necessary for installation. The place of installation must be free of moisture and away from heat sources. 1.1. Delivery contents Take down the SW-version and HW-version of the interface boxes, cross the delivery contents and store this manual for support purposes. -
Page 4: Check Compatibility Of Vehicle And Accessories
1.2. Check compatibility of vehicle and accessories Requirements Vehicle 1series (E87) only CCC, 3series (E90/91/92), 5series (E60/61), 6series (E63/64), 7series (E65/66), X5 (E70), X6 (E71), Z4 (E89) Navigation navigation system Professional CCC, E65 or CIC with 6.5” or 8.8” monitor Limitations factory-TV-tuner has to be removed if installed... -
Page 5: Installation 1Series (E87), 3Series (E90/E91/E92), 6Series (E63/E64), X5(E70), X6(E71) At Example 5Series (E60/E61)
2.1. Installation 1series (E87), 3series (E90/E91/E92), 6series (E63/E64), X5(E70), X6(E71) at example 5series (E60/E61) Needed parts 1. fibre optical interface C1C-M36 2. CAN interface TV-436 3. CAN interface harness TV-BM01 Version 20.09.2017 CI-C1-CXC-TV1... - Page 6 2.1.1. Installation 5series w/o TV-tuner port optical interface-harness C1C-BM02 for CCC-Navigation or C1C-BM03 for CIC-Navigation is needed Remove trim strip and step by step using a plastic wedge. Do not proceed to quickly to avoid breaking clamps of the trim strip. Next remove screws 1 and 2 (see picture) Remove climate control panel.
- Page 7 Disconnect Quadlock connector from the back of the navigation computer. The Quadlock connector includes different chambers. If present, remove the white, black and the optical inserts, from the vehicle harness’ Quadlock connector. Plug the vehicle harness’ Quadlock connector into the male Quadlock connector of the CAN interface harness TV-BM01 Version 20.09.2017 CI-C1-CXC-TV1...
- Page 8 In the female Quadlock connector there is two compartments for inserts. Plug white insert of the interface harness C1C-BMW0X into compartment for “Einsatz 1”. If white insert in vehicle harness is present, remove video wires from white insert of fibre optical interface harness and connect them to relating chambers in white vehicle harness’...
-
Page 9: Installation 7Series (E65/E66)
2.1.2. Installation 5series with TV-tuner port (factory TV-tuner removed) optical interface harness C1C-BM01 is needed Installation of CAN interface analogue to chapter 2.1.1. Installation 5series w/o TV-port . Transfer white (if present), black and optical inserts from vehicle Quadlock connector to the Quadlock connector of the CAN interface harness TV-BM01. - Page 10 Board monitor removal The CAN interface is connected to the backside of the OEM screen. Remove 3 TORX screws at the OEM screen. Remove cover grill (only plugged). Place soft towel beneath the board monitor to avoid scratches Flip down the board monitor. NOTE: The OEM screen gets stuck with its connector at the upper side of the cockpit.
- Page 11 Remove 12-pin insert from black vehicle harness connector. Insert 12-pin insert into black connector of the CAN interface harness TV-BM65. Insert the completed black connector into CAN interface harness TV-BM65. Connect 12-pin insert from CAN interface harness TV-BM65 into black connector from vehicle harness.
- Page 12 2.2.1. Installation 7series w/o TV-Port fibre optical interface-harness C1C-BM02 is needed The fibre optical interface installation is made at the navigation computer, which is located at the left side in the trunk behind a cover and has to be removed. The video lead (red - video signal, black - video ground) has to be removed from the white insert of C1C-BM02.
-
Page 13: Vehicles With Factory Rear-View Camera
3. Connections Obey the direction arrows of the optical connectors! NEW! Remote signal and rear-view camera input + functions 4pin Molex connector pink – remote signal +12V, high when navigation is on grey – connect to ground to activate 2-pin camera-input green –... -
Page 14: Vehicles With Factory Rear-View Camera And Factory-Tv-Tuner
Connect the 2pin AMP connector with the 2pin AMP male plug of the harness C1C-BMW0x. Automatic switching to camera video will work from interface mode and from OEM mode. 3.2. Vehicles with factory rear-view camera and factory TV-tuner The factory rear-view camera is connected to the white 18pin AMP connector of the factory TV-tuner. -
Page 15: Device Control
4. Device control The c.Logic lite interface for BMW has the possibility to remotely control up to 2 pre- programmed devices. The device list in the device control table shows the pre-programmed remote channels and the related IR-remote cables. An IR-remote cable STA-xxx must be ordered separately for every device which shall be controlled. -
Page 16: Assigning Device Control
5.3. Assigning device control After selecting the interface as current AV source, push the iDrive knob to open the device control menu. Select control levels (setup) DEV1 and (setup) DEV2 one after another and assign related IR- codes as described in device control table. Note: The IR-control channel is preset to RC-Code 41 compatible DVB-T tuners. -
Page 17: Button Assignment Table Idrive
5.5. Button assignment table iDrive iDrive Aktion Gerät DVB-T iPod MENU long Setup Setup Setup Setup MENU short Return to factory Return to factory iDrive Return to factory Return to factory iDrive functions iDrive functions functions iDrive functions OPTIONS long *2 Audio Audio Info...
Need help?
Do you have a question about the c.LOGiC lite CI-C1-CCC and is the answer not in the manual?
Questions and answers