Advertisement
Quick Links
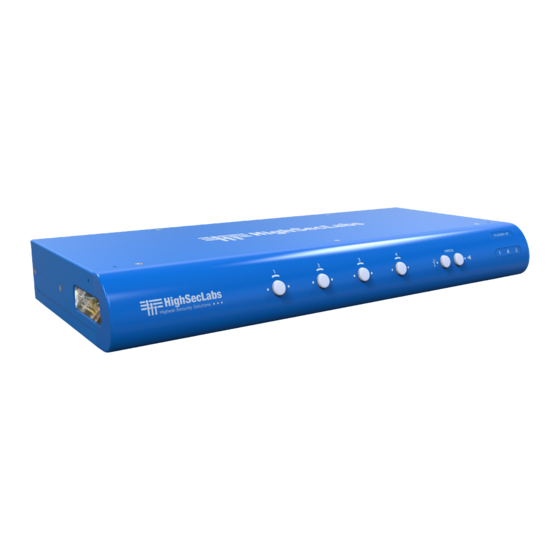
SC21H-3 · SC42DU/DHU/PHU-3 | QUICK SETUP GUIDE
Secure KVM Combiner
Models:
SC21H-3 – Secure 2-Port HDMI Video KVM Combiner, PP 3.0
SC42DU-3 – Secure 4P to 2P DVI Video KVM Combiner w/fUSB
SC42DHU-3 – Secure 4P DVI to 2P HDMI Video KVM Combiner w/fUSB
SC42PHU-3 – Secure 4P DP/HDMI to 2P HDMI Video KVM Combiner w/fUSB
HDC14468 Rev. 1.0
Advertisement

Related Manuals for HighSecLabs SC42DU-3


Summary of Contents for HighSecLabs SC42DU-3
- Page 1 Models: SC21H-3 – Secure 2-Port HDMI Video KVM Combiner, PP 3.0 SC42DU-3 – Secure 4P to 2P DVI Video KVM Combiner w/fUSB SC42DHU-3 – Secure 4P DVI to 2P HDMI Video KVM Combiner w/fUSB SC42PHU-3 – Secure 4P DP/HDMI to 2P HDMI Video KVM Combiner w/fUSB...
- Page 2 SEC TIONS Table of Contents TaBle of ConTenTS Introduction . . . . . . . . . . . . . . . . . . . . . . . . . . . . . . . . . . . . . . . . . . . . . . . . . . . . . . . . . . 2 Operation .
- Page 3 SEC TIONS Table of Contents InTRoDUCTIon HSL Secure KVM Combiner Interact with multiple computers presented on the same display at the same time using a single set of USB, audio, keyboard, video and mouse peripherals. The KVM Combiner switch offered by HSl provides increased productivity in challenging multi-computer environments where users are required to view and interact with several computers at the same time while maintaining the highest isolation between computers and...
-
Page 4: Step 1 - Cable Installation
SEC TIONS Table of Contents InSTallaTIon Installing the Combiner Step 1 – Cable Installation 1. Connect console port peripherals: 2. Computer channel ports: • Connect video, keyboard, mouse and audio peripherals to the • for each PC, connect the video, keyboard, mouse, fUSB and audio combiner’s console ports. -
Page 5: Installation
SEC TIONS Table of Contents InSTallaTIon Step 2 – Combiner Setup Overview The Setup Menu: accessible through the lower left screen corner allows configuring various system settings, such as, output resolution, screen duplication, cursor color and more. Setup Menu Description: Main Admin Menu: select which setting to configure (system settings / channel settings). -
Page 6: Step 3 - Power On The Combiner
SEC TIONS Table of Contents InSTallaTIon Step 3 – Power ON the Combiner Move mouse to switch PCs • Turn on all the PCs. • Connect the power supply and power on the combiner PC #4 (approximate boot time is 30 seconds). Multiple Sources PC #2 •... - Page 7 SEC TIONS Table of Contents InSTallaTIon Step 4 – Configure Display Output Important Notes: 1. It is highly recommended to use the same screen resolution settings 2. Selecting a resolution that is not supported by your screen will across all levels as described below. result in a blank display which might require connecting a monitor that supports the selected resolution or resetting the combiner to factory default.
- Page 8 SEC TIONS Table of Contents InSTallaTIon • Enter System mode: type: { CTRL | CTRL | o }. When active, an • Set Channel Resolution: Click Setup -> Channel# and select operation taskbar appears at the bottom of the screen. the screen resolution for the selected •...
- Page 9 SEC TIONS Table of Contents InSTallaTIon Step 5 – Working with Dual Displays • Set Screen Extending Mode: click Setup -> System -> Output Connecting two displays to the combiner’s console output ports allows Resolution and select Extend Displays. working in extended or Duplicate mode. Note: Skip this section if your combiner model does not support dual screens In extended view mode the incoming channel presentation is split or you’ve connected only one display.
-
Page 10: Step 6 - Reset To Factory Defaults
SEC TIONS Table of Contents InSTallaTIon Step 6 – Reset to Factory Defaults Reset to factory defaults clears the device settings and restores the device to its original configuration. • System reset: Clears behavioral characteristics such as mouse settings and display presets. Type { L CTRL | L CTRL | F11| r } key combination. -
Page 11: Operating The Combiner
SEC TIONS Table of Contents oPeRaTIon Operating the Combiner Step 1 – Operation Modes Overview • Operation-taskbar: operation modes determine the device state. – Toggle between channels by clicking on a channel number. In System mode combiner settings can be modified, the mouse is –... - Page 12 SEC TIONS Table of Contents oPeRaTIon Step 2 – View Modes Overview • Custom View mode: Custom views allow rearranging, positioning View modes determine how multiple sources are presented on the combiner’s screen. Toggle between view modes in a mouse click, using and saving screens as needed by the user for future work.
- Page 13 SEC TIONS Table of Contents oPeRaTIon Step 3 – Toggling Options Most useful toggling options: once you have connected all the sources and completed the initial steps, you can start working with the combiner. The next section Action Keyboard Mouse explains how to switch between operation modes and operate the Description combiner using its versatile view and control options.
- Page 14 SEC TIONS Table of Contents oPeRaTIon Most useful toggling options (Cont .): Action Keyboard Mouse Description Select a channel - CTRL | CTRL | Channel# (1-16) 1. Click to select a channel. Resize channel Reduce scaling - 2. Press and hold the side &...
- Page 15 SEC TIONS Table of Contents oPeRaTIon Step 4 – Complete toggling options table Toggle between view modes in a mouse click, using keyboard shortcuts or touch screen gestures. Action / Mode Keyboard Mouse Touch Screen 1. In Scale view: Tap 4 times on the enlarged window.
- Page 16 SEC TIONS Table of Contents oPeRaTIon Action / Mode Keyboard Mouse Touch Screen Enable Cursor Navigation VDT CTRL | CTRL | F11 | c Note: allow 10 seconds delay after enabling for the 1st time . Disable Cursor Navigation VDT CTRL | CTRL | F11 | b In System mode: Click the channel window.
- Page 17 SEC TIONS Table of Contents oPeRaTIon Action / Mode Keyboard Mouse Touch Screen 1. Click to select a channel. Resize channel 2. Place the mouse cursor at the channel’s lower 1. First, switch to System mode, Tile Tap and hold the lower right corner of a specific right corner.
- Page 18 SEC TIONS Table of Contents oPeRaTIon Action / Mode Keyboard Mouse Touch Screen Drag & rearrange channel windows 1. Click to select a channel. Tap and hold the upper left corner of a channel * First, switch to System mode, 2.
- Page 19 SEC TIONS Table of Contents oPeRaTIon Action / Mode Keyboard Mouse Touch Screen Dual Screen CTRL | CTRL | F11 | l Duplicate Screens (On/Off) Dual Screen Duplicate Primary CTRL | CTRL | F11 | j | j Project primary display on both displays Dual Screen Duplicate Secondary...
- Page 20 SEC TIONS Table of Contents oPeRaTIon Action / Mode Keyboard Mouse Touch Screen Freeze channel layer CTRL | CTRL | F11| F | (1-16) Enable Right CTRL L CTRL | L CTRL | F11| i once enabling the Right CTRl, touch screen gestures switch to the left screen side.
- Page 21 SEC TIONS Table of Contents oPeRaTIon Step 5 – Customize Channel Window Layout each channel’s window layout can be customized beyond the default Tile / Scale view modes and saved as a custom view mode preset. Setup Channel 1 Channel 2 Channel 3 Channel 4 Scale Tile...
- Page 22 SEC TIONS Table of Contents oPeRaTIon 5 .2 Resize channel window & content at the same time: Setup Channel 1 Channel 2 Channel 3 Channel 4 Scale Tile Setup Channel 1 Channel 2 Channel 3 Channel 4 Scale Tile Action Description Keyboard Mouse Touch Screen...
- Page 23 SEC TIONS Table of Contents oPeRaTIon 5 .3 Drag and Rearrange channel windows: Setup Channel 1 Channel 2 Channel 3 Channel 4 Scale Tile Action Description Keyboard Mouse Touch Screen In Scale view: Tap 4 times on the enlarged window. Click the side-mouse button to toggle Enter System Mode CTRL | CTRL | o...
- Page 24 SEC TIONS Table of Contents oPeRaTIon 5 .4 Save custom views as presets: Save custom screen layouts as presets by long-pressing the 1/2/3 buttons. Action Description Keyboard Mouse Touch Screen In Scale view: Tap 4 times on the enlarged window. Click the side-mouse button to toggle between Enter System Mode CTRL | CTRL | o...
- Page 25 SEC TIONS Table of Contents oPeRaTIon 5 .5 Freeze channel layer In scenarios where a specific channel window has to remain on top of others, for example when a live camera has to be constantly viewed, it is possible to freeze the selected channel window and pinpoint its position so that it remains on top when switching between active sources. Action Description Keyboard Mouse...
- Page 26 SEC TIONS Table of Contents oPeRaTIon 5 .6 Presentation mode: In presentation mode, when changing active channels, every channel is automatically enlarged to full screen size. once in full screen, use the key sequence CTRL | CTRL | Channel# (1-16) or push the front panel buttons to switch back to Tile mode and then repeat the CTRL | CTRL | Channel# (1-16) sequence to enlarge another channel (see example below).
- Page 27 SEC TIONS Table of Contents CoMBIneR CaSCaDIng Introduction Child Child Cascade combiners to view and control multiple sources on a single Combiner 1 Combiner 2 display, using one set of keyboard, mouse and audio. • Keep all combiner-features throughout the cascaded chain (View modes, VDT…etc.) •...
- Page 28 SEC TIONS Table of Contents CoMBIneR CaSCaDIng Cascading Setup Scheme fUSB Cable Audio Cable Mouse Cable Installation & Setup: Display Cable Keyboard Cable • Step 1 - Connect PCs to Child Combiners. Child Combiner • Step 2 - Connect the Child Combiners to the Computers Computer/Source ports on the Root combiner.
- Page 29 SEC TIONS Table of Contents CoMBIneR CaSCaDIng • Step 4 - enable VDT by typing Child Combiner 4 Child Combiner 3 Child Combiner 2 Child Combiner 1 { CTRL | CTRL F11 | c } key sequence on all combiners. Remember to use RIgHT CTRl on the Root Combiner.
- Page 30 Highseclabs.com ©2017 all rights reserved. HSl logo and product names are trademarks or service trademarks of HighSeclabs ltd (HSl). all other marks are the property of their respective owners. Images for demonstration purposes only. This document may contain confidential and/or proprietary information of HSl Corporation, and its receipt or possession does not convey any right to reproduce, disclose its contents, or to manufacture or sell anything that it may describe.
Need help?
Do you have a question about the SC42DU-3 and is the answer not in the manual?
Questions and answers