
Related Manuals for HighSecLabs SM40N-4


Summary of Contents for HighSecLabs SM40N-4
- Page 1 SECURE KM SWITCHES | USER MANUAL Models: SM20N-4 – Secure 2-Port KM Switch, PP 4.0 SM40N-4 – Secure 4-Port KM Switch, PP 4.0 SM80N-4 – Secure 8-port KM Switch, PP 4.0 HLT31927 Rev. 1.1...
- Page 2 SECTIONS Table of Contents TabLE of ConTEnTS Introduction . . . . . . . . . . . . . . . . . . . . . . . . . . . . . . . . . . . . . . . . . . . . . . . . . . . . . . . . . . 2 HSL Secure KM Switch .
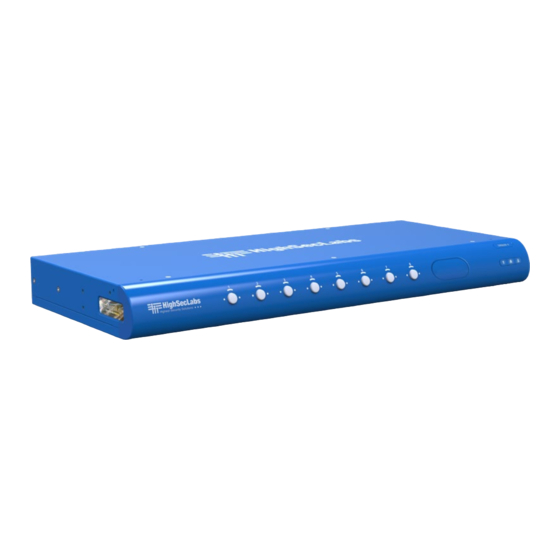
- Page 3 SECTIONS Table of Contents InTRoDUCTIon HSL Secure KM Switch Work simultaneously with multiple computers connected to multiple displays using one set of USb, keyboard and mouse peripherals. Keyboard Mouse (KM) switch offered by HSL allows interacting with multiple computers in real-time while maintaining the highest isolation between computers and peripherals.
- Page 4 SECTIONS Table of Contents InSTaLLaTIon Installing the KM General • Verify that all peripherals and computers are turned off prior to • Connect peripherals which are due to be shared by the KM to the connecting them to the product. Console ports.
- Page 5 Multiple PC #2 • Computer video connection: Directly connect a monitor to Sources Restricted each computer. Multi-monitor computers require driver installation, currently available only for Windows PC #3 (https://highseclabs.com/downloads/km-multi- Con dential display-drivers/). PC #1 Internet SECURE SECURE Single KM SWITCH KM SWITCH Keyboard &...
- Page 6 SECTIONS Table of Contents InSTaLLaTIon Step 3 – Power ON your system • Connect all peripherals and computers to the KM prior to powering it up. Power on the KM by plugging it to the aC wall outlet. by default, after product power-up, the active channel will be computer #1, indicated by the applicable front panel push button LED lit.
- Page 7 SECTIONS Table of Contents InSTaLLaTIon Step 4 – Presets Configuration • Presets reflect the layout and boarders of computer displays to the Presets allow: • Support of various display layouts. align displays vertically (on top) and Horizontally (along side). Preset #1 (Default) Preset #1 (Default) •...
- Page 8 L Ctrl | L Ctrl | F11 | Fx1 / x2 | x3 where x1,x2,x3 values • Multi-monitor computers require driver installation, currently available may vary according to the selected preset of your choice. only for Windows (https://highseclabs.com/downloads/km-multi-display- drivers/). Setting presets: 1.
- Page 9 SECTIONS Table of Contents InSTaLLaTIon 4/8 Port KM Presets list (Factory F11 | 2 | 1 F11 | 3 | 1 F11 | F1 F11 | 1 | 1 Default) F11 | 3 | 2 F11 | 2 | 2 F11 | F2 F11 | 1 | 2 F11 | 3 | 3...
- Page 10 SECTIONS Table of Contents InSTaLLaTIon 2 Port KM Presets list f11, 1, 1 f11, 1, 8 Note: only Windows computers support multiple displays with the f11, 1, 2 f11, 1, 9 f11, f1 f11, f6 f11, 1, 3 f11, 1, 0 f11, f2 f11, f7 f11, 1, 4...
- Page 11 SECTIONS Table of Contents InSTaLLaTIon Step 6 – Reset to Factory Defaults Reset to factory defaults clears the device settings and restores the Important Notes: device to its original configuration. 1. always use the left control key (CTRL) unless otherwise specified. •...
- Page 12 SECTIONS Table of Contents oPERaTIon Operating the KM Front Panel Push-Buttons • following power up, the default channel is #1. • Select any other channel by pressing the appropriate front panel push button. • The mouse cursor will be positioned at the center of the selected computer display.
- Page 13 SECTIONS Table of Contents oPERaTIon Smoothly switch between computers (Virtual Display Technology) • automatically switch control from one computer to another by To deactivate VDT mode: Change the mouse mode to Relative by dragging the mouse cursor over the computer’s display border. typing L CTRL | L CTRL | f11 | b •...
- Page 14 SECTIONS Table of Contents oPERaTIon Keyboard shortcut options Action Description Keyboard (absolute) - L CTRL | L CTRL | F11 | c Toggle between mouse modes (Relative) - L CTRL | L CTRL | F11 | b (Increase) - L CTRL | L CTRL | F11 | + Increase / Decrease mouse speed (Decrease) - L CTRL | L CTRL | F11 | - Change presets (Example)
- Page 15 Highseclabs.com ©2023 all rights reserved. HSL logo and product names are trademarks or service trademarks of HighSecLabs Ltd (HSL). all other marks are the property of their respective owners. Images for demonstration purposes only. This document may contain confidential and/or proprietary information of HSL Corporation, and its receipt or possession does not convey any right to reproduce, disclose its contents, or to manufacture or sell anything that it may describe.
Need help?
Do you have a question about the SM40N-4 and is the answer not in the manual?
Questions and answers