HighSecLabs SC21H-3 Quick Setup Manual
Secure 2-port kvm combiner
Hide thumbs
Also See for SC21H-3:
- User manual (43 pages) ,
- Quick installation manual (2 pages) ,
- Quick setup manual (30 pages)

Related Manuals for HighSecLabs SC21H-3


Summary of Contents for HighSecLabs SC21H-3
- Page 1 SC21H-3 | QUICK SETUP GUIDE SECTIONS Table of Contents Secure 2-Port KVM Combiner Models: HDC15012 Rev. 1.1 HSL Secure 2-Port KVM Combiner Quick Setup Guide SC21H-3 – Secure 2-Port HDMI Video KVM Combiner, PP 3.0...
- Page 2 Table of Contents SECTIONS TABLE OF CONTENTS Introduction HSL Secure 2-Port KVM Combiner Switch Installation Installing the Combiner Operation Operating Modes Overview Operating in User Mode Selecting Display Layouts Full-Screen Mode Side-By-Side Mode Picture-In-Picture Mode Custom Mode Switching Channel Control Configuring the Settings - in Admin Mode On-Screen Display Modes Channel Menu Options...
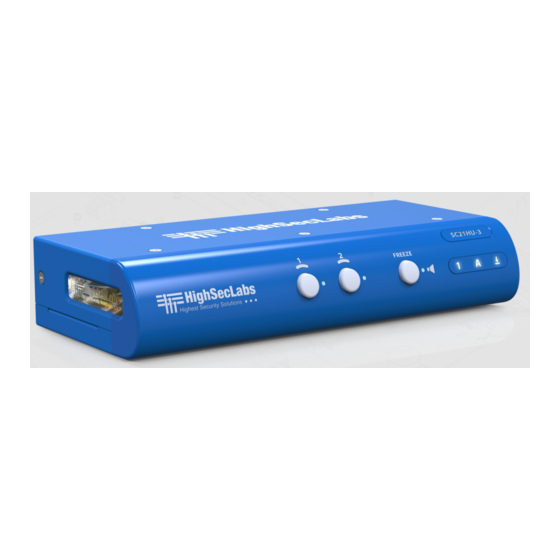
- Page 3 Table of Contents SECTIONS INTRODUCTION HSL Secure 2-Port KVM Combiner Switch HSL’s Secure 2-Port KVM Combiner enables viewing and controlling two computers: • On the same display • Using a single set of keyboard, mouse, USB, and audio peripherals HSL’s KVM Combiner is the only product that combines a scaler, multi-viewer, KVM switch, and video-wall controller - built into one.
- Page 4 Table of Contents SECTIONS INSTALLATION Installing the Combiner Step 1 - Combiner Installation Verify that all peripherals and computers are turned OFF before connecting them to the Combiner. To the Combiner’s Console ports, connect the keyboard, display, mouse, and audio peripherals. To the Combiner’s computer ports - for each of the two computers - connect the keyboard, display, mouse, and audio cables.
- Page 5 Table of Contents SECTIONS INSTALLATION Step 2 - Power ON the Combiner Turn ON both PCs. Connect the power supply and power ON the Combiner. The Combiner boots up, as follows: • If you are using the Combiner for the first time, the default display mode is picture-in- picture (PiP).
- Page 6 Table of Contents SECTIONS OPERATION Operation Modes Overview The Combiner operates in two modes: • User mode (default) - User mode is the KVM Combiner’s normal use mode. User mode lets you: Change between a wide variety of display layouts ...
- Page 7 Table of Contents SECTIONS OPERATION Operating in User Mode The User mode (default) is the KVM Combiner’s normal use mode. To enter User mode, press: Left Ctrl | Left Ctrl | u Note: To clear all settings and restore the device to its original configuration, press: Left Ctrl | Left Ctrl | F11 | r This section shows you how to: •...
- Page 8 Table of Contents SECTIONS OPERATION Full-Screen Mode Selecting Display Layouts In full-screen mode, only one of the two computers is There are four display modes available in User mode: displayed (in full-screen). • Full-screen To display in full-screen mode: • Side-by-side •...
- Page 9 Table of Contents SECTIONS OPERATION Side-By-Side Mode Picture-In-Picture Mode In side-by-side mode, one computer is displayed on the LEFT, In picture-in-picture (PiP) mode, one computer is displayed and the other, on the RIGHT. full-screen, while the other is displayed as a floating small- sized window, in the lower right-hand corner.
- Page 10 Table of Contents SECTIONS OPERATION Custom Mode Then, to swap positions, press: Left Ctrl | Left Ctrl | w For the example above, Channels #1 and #2 swap places. Custom mode lets you display a pre-configured custom- designed layout. Note: To learn how to configure a custom-designed layout Channel Channel and save it as a preset for future use, see the Main Menu...
- Page 11 Table of Contents SECTIONS OPERATION Switching Channel Control Switching Channel Control - Using Keyboard Shortcuts In User mode, you can switch keyboard-and-mouse control - To eliminate the need to press the Combiner’s front-panel from one computer to the other - by using the following buttons, you can switch between channels, using: keyboard shortcuts: •...
- Page 12 Table of Contents SECTIONS OPERATION Configuring the Settings - in Admin Mode The Admin mode lets you set, for example, the channel: Channel #1 Channel #2 • Display resolution • Window size and layout • Frame and title display • Aspect ratio Admin Mode In Admin mode, the mouse CANNOT be used to control the...
- Page 13 Table of Contents SECTIONS OPERATION On-Screen Display Modes The Channel and Main display modes determine how channel windows are presented on the Combiner screen. • Channel menu: Lets you change the frame, title, and aspect ratio as well as letting you swap between display modes.
- Page 14 Table of Contents SECTIONS OPERATION Channel Menu Options Option Action This section explains how to use the Channel menu Swaps the channel windows’ positions. options. Swap Inputs (Same as Left Ctrl | Left Ctrl | w) Note: To clear all settings and restore the device to its original configuration, press: Left Ctrl | Left Ctrl | F11 | r For the selected channel, shows or hides the colored channel Show / Hide Frame...
- Page 15 Table of Contents SECTIONS OPERATION Main Menu Options Option Action This section explains how to use the Main menu options. Select one of the two screen resolutions from the list. 1080 - > 1920x1200 Maximizes channel #1 to full-screen. Note: To clear all settings and restore the device to its Full-Screen Mode Note: To swap full-screen view to channel #2, press: original configuration, press: Left Ctrl | Left Ctrl | F11 | r...
- Page 16 Table of Contents SECTIONS OPERATION Additional Settings To configure additional settings, refer to the HSL Secure Products Administrator Guide. For example, for each channel window, you can set: • The frame width • The frame color • The window’s title text label •...
- Page 17 Highseclabs.com ©2019 All rights reserved. HSL logo and product names are trademarks or service trademarks of HighSecLabs Ltd (HSL). All other marks are the property of their respective owners. Images for demonstration purposes only. This document may contain confidential and/or proprietary information of HSL...
Need help?
Do you have a question about the SC21H-3 and is the answer not in the manual?
Questions and answers