Table of Contents
Advertisement
Quick Links
Advertisement
Table of Contents

Related Manuals for Siqura PD900 Series


Summary of Contents for Siqura PD900 Series
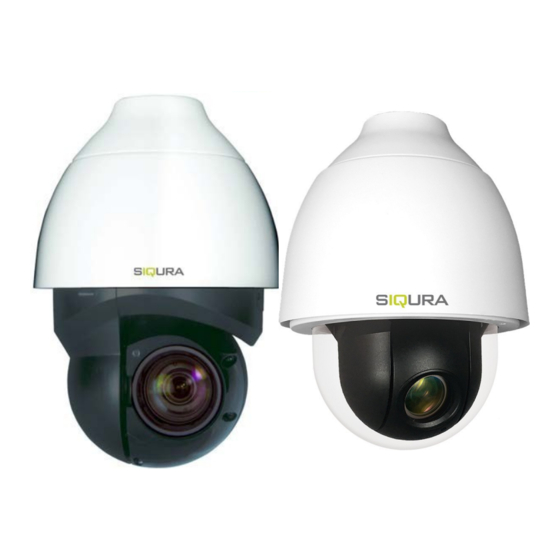
- Page 1 PD900 Series PTZ Dome Camera...
- Page 2 Note: To ensure proper operation, please read this manual thoroughly before using the product and retain the information for future reference. Copyright © 2021 TKH Security B.V. All rights reserved. PD900 Series User Manual v1.3 (20210304) AIT55 Nothing from this publication may be copied, translated, reproduced, and/or published by means of printing, photocopying, or by any other means without the prior written permission of TKH Security.
-
Page 3: Table Of Contents
Contents ABOUT THIS MANUAL ..........................5 PRODUCT OVERVIEW ..........................7 WEB INTERFACE ............................9 ............................. 10 3.1.1 Function items on home page ......................10 3.1.2 Function buttons on Home page ...................... 11 ..............................13 YSTEM 3.2.1 System .............................. 13 3.2.2 Security ............................. - Page 4 Contents 3.4.2 White Balance ..........................44 3.4.3 Picture Adjustment ........................... 45 3.4.4 IR Function ............................46 3.4.5 Noise Reduction ..........................47 3.4.6 WDR Function ........................... 47 3.4.7 Digital Zoom ............................. 47 3.4.8 Backlight ............................47 3.4.9 Image Stabilizer ..........................47 3.4.10 Profile ............................
-
Page 5: About This Manual
About this manual What's in this manual This is version 1 of the user assistance provided for PD900 Series, including PD900, PD910 and PD920 cameras. The manual gives you all the information you need to operate and configure the camera. - Page 6 PD900 Series Page 6...
-
Page 7: Product Overview
Product overview With the latest H.265 encoding technology, Siqura has more innovative on PD900 series for completely new outlook to refresh the our experience on PTZ dome. In PD900 series, the bubble-less mechanical is introduced for the crystal clear images without any distortion. No matter it is at night or in any low or zero lux environments, the camera provides effective illumination to objects 200 meters away. - Page 8 PD900 Series Page 8...
-
Page 9: Web Interface
Web interface The built-in web interface makes it easy to operate and configure the product over the network. This chapter describes the lay-out and features of the web interface. The default web login username is Admin and the password is 1234. In This Chapter Home Page ...................... -
Page 10: Home Page
PD900 Series Home Page Click the Home tab to open the Home page. The Home page includes a number of drop-down menus and function buttons. Sections 3.1.1 and 3.1.2 provide detailed information on these functions and buttons. Home page 3.1.1... -
Page 11: Function Buttons On Home Page
Web interface Manual Click MANUAL to manually adjust the focus with the NEAR and FAR buttons. Zoom (Zoom Triggered AF) Click ZOOM to activate the Auto Focus mode every time zoom is adjusted. Iris Adjustment Click CLOSE or OPEN to control the brightness of the image. Or click RESET to go back to the default value. 3.1.2 Function buttons on Home page Button... - Page 12 PD900 Series Full Screen Click the Full Screen button to set the image display size to full screen. Alternatively, right-click the live video pane and select Fullscreen to go full screen. To exit full screen mode: click Esc on the keyboard, or ...
-
Page 13: System
Web interface Set Center Mode Right-click the live video pane and select Set Center Mode. Now you can position the area of interest in the center of the live video pane by clicking on the point of interest. To leave the Set Center Mode, right-click the live video pane again and select Set Emulated Joystick Mode. -
Page 14: Security
PD900 Series Time format Choose a time format (yyyy/mm/dd or dd/mm/yyyy) from the drop-down menu. The date and time format displayed in the top right corner of the live video pane will be changed accordingly. Sync with Computer Time Select this option to synchronize the video date and time with the date and time of the PC. -
Page 15: Https
Web interface Manage user Delete user Pull down the User name drop-down list and select the user that you wish to delete. Click the Delete button to remove the selected name. Edit user Pull down the User name drop-down list and select the user you wish to edit. Click the Edit button and a pop-up window will appear. -
Page 16: Ip Filter
PD900 Series Install Signed Certificate Click the Create Certificate Request button to create and submit a certificate request in order to obtain a signed certificate from a CA. Provide the requested information in the create dialog. Refer to Provide the Certificate Information below for more details. -
Page 17: Ieee 802.1X
Web interface Example: Filtering a group of consecutive IP addresses The steps below show what will be filtered when 192.168.2.81/30 is entered. Step 1: Convert 192.168.2.81 to binary numbers. The binary numbers are 11000000.10101000.00000010.01010001. Refer to Appendix B: IP Addresses from Decimal to Binary for converting the IP addresses to binary numbers. -
Page 18: Network
OK button and the camera system will be restarted. A new IP address will be assigned to the camera. Close the web browser and search the camera using the Siqura Device Manager tool, which can be downloaded at https://siqura.com. Refer to the steps below to connect the camera with the SDM2 software. -
Page 19: Qos
Web interface Run the SDM2 program. After the SDM2 window has appeared, click the Edit and Manual Scan for Devices menu option to manually search for the camera based on the IP address, if known. All the found IP devices will be listed on the page automatically if the Device auto detection is enabled. -
Page 20: Snmp
PD900 Series DSCP Settings The DSCP value lies in the range of 0 to 63. The default DSCP value is 0, which means DSCP is disabled. The camera uses the following QoS Classes: VideoDSCP The class consists of applications such as MJPEG over HTTP, RTP/RTSP and RTSP/HTTP. -
Page 21: Upnp
Web interface Traps for SNMP v1/ v2/ v3 Traps are used by the camera to send massages to a management system for important events or status changes. Enable Traps Check the box to activate trap reporting. Trap address Enter the IP address of the management server. -
Page 22: Mail
PD900 Series Provider Select a DDNS host from the provider list. Host name Enter the registered domain name in the field. Username/E-Mail Enter the username or E-mail required by the DDNS provider for authentication. Password/Key Enter the password or key required by the DDNS provider for authentication. - Page 23 Web interface Alarm Switch Select the alarm pin to be configured from the drop-down menu. The default setting for the Alarm Switch function is Off. Select On to enable the function. You can also activate the function in accordance with the schedule previously set in the Schedule setting pane.
-
Page 24: Motion Detection
PD910 For instance, if the custom parameter is set to “action=1&group=2”, and the HTTP server name is “http://192.168.0.1/admin.php”, the notification will be sent to the HTTP server as “http://192.168.0.1/admin.php? action=1&group=2” when an alarm is triggered. Record Video Clip Check this option and select a video recording storage type; SD Card or NAS (Network-Attached Storage). The alarm-triggered recording will be saved to the SD card or the NAS. - Page 25 Web interface Motion Detection By default, the Motion Detection function for each Motion Detection setting is set to Off. Select On to enable Motion Detection. You can also activate the function in accordance with the schedule previously set in the Schedule setting pane (see section 3.2.11).
- Page 26 PD900 Series Time interval (sec) [0-7200] Denotes the interval between each detected motion. The default interval is 10. Motion Indication Bar When the Motion Detection function is activated and motion is detected, the signals will be displayed on the motion indication bar.
-
Page 27: Network Failure Detection
Web interface the alarm is released. Set the Image frequency as the upload frame rate. Enter a value between 1 and 15 (frames per second). Note: Make sure SMTP configuration has been completed. See section 3.2.5 for more details. Send HTTP Notification ... -
Page 28: Periodical Event
PD900 Series Detection Type Enter the IP device address and the period of the ping. The camera will ping the IP device every N minute(s). If it fails up to three times, the alarm will be triggered automatically. Set a value between 1 and 99 (minutes). -
Page 29: Manual Trigger
Web interface Note: The Pre-trigger buffer generally ranges from 1 to 20 frames. However, if the frame rate of MJPEG on the Streaming page (Video Configuration) is set to 6 or smaller, the range will change accordingly. Note: Make sure SMTP configuration has been completed. See section 3.2.5 for more details. File Name Enter a file name in the File name field, e.g. - Page 30 PD900 Series blank space. The images of the duration will be uploaded to FTP when the alarm input is triggered. Select Upload during the trigger active to continue uploading the image to FTP during the trigger active until the alarm is released.
-
Page 31: Audio Detection
Web interface Add date/time suffix File name: imageYYMMDD_HHNNSS_XX.jpg Y: Year, M: Month, D: Day H: Hour, N: Minute, S: Second X: Sequence Number Add sequence number suffix (no maximum value) File name: imageXXXXXXX.jpg X: Sequence Number Add sequence number suffix up to# and then start over ... - Page 32 PD900 Series in the blank space. The images of the duration will be uploaded to FTP when the audio event occurs. Select Upload during the trigger active to continue uploading images to FTP during the trigger active until the event stops.
-
Page 33: Storage Management
Web interface Overwrite The original image in the FTP site will be overwritten by the newly uploaded file with a static filename. Save Click the Save button to confirm all Audio Detection settings. 3.2.9 Storage Management The Storage management category on the left gives access to the Storage management parameters. The Storage management button has a drop-down menu with the following items: SD Card ... -
Page 34: Network Share (Nas)
PD900 Series Sort Click the Sort button, and the files in the Recording list will be listed in name and date order. The capital letter A / M / N / R / V / U at the beginning of the name denotes the type of recording (see below). -
Page 35: Recording
Web interface Sort Click the Sort button, and the files in the Recording list will be listed in name and date order. The capital letter A/M/N / R/ V/ U at the beginning of name denotes the sort of recording as below. Initial Recording type Initial... -
Page 36: Schedule
PD900 Series To delete a schedule, select it from the list and click the Delete button. Disable Recording Schedule Select Disable to terminate the recording function. Click the Save button to confirm the selection. 3.2.11 Schedule The schedule category on the left gives access to the Schedule parameters. -
Page 37: File Location (Snapshots And Web Recording)
Web interface Note: You must select By schedule in the parameter setting page of each feature to enable the schedule function. 3.2.12 File Location (Snapshots and Web Recording) The File Location category on the left gives access to the file location parameters. You can specify a storage location on the PC or the hard drive for the snapshots and the live video recordings. -
Page 38: Software Version
Click the Windows Start button and activate the Control Panel. In the Control Panel window, double-click the Add or Remove Programs button. A window with the currently installed programs will pop up. Select Siqura Viewer in the list and click the Remove button to uninstall the existing Viewer. -
Page 39: Streaming
Web interface Export Files You can save the system settings by exporting a configuration file (.bin) to a specific location for future use. Click the Export button. The File Download window will pop up. Click the Save button and specify a location for saving the configuration file. -
Page 40: Video Configuration (Video Format & Resolution)
PD900 Series 3.3.1 Video Configuration (Video Format & Resolution) The Video Configuration category on the left gives access to the video configuration parameters. Encoding Select Yes from the drop-down menu to enable Stream 2~Stream 4 encoding. Or select No to disable the streaming encoding. -
Page 41: Video Rotation
Web interface Profile You can set H.265/H.264 Profile to High Profile or Main Profile, depending on the compression needs. With the same bit rate, the higher the compression ratio, the better the image quality. The default setting is Main Profile. Note: Make sure the higher compression ratio is supported by the system before setup. -
Page 42: Video Ocx Protocol
PD900 Series Include Image Check the box to enable image display on the live video pane. Select the alignment position (left or right) for the image from the drop-down list. Include azimuth Check the box to enable azimuth display on the live video pane and set the azimuth alignment position. Azimuth shows the pan/tilt degree and the shooting position of the camera, such as NE 050/00 (“NE”... -
Page 43: Camera
Web interface Bit Rate Selectable audio transmission bit rates include 16 kbps, 24 kbps, 32 kbps, 40 kbps, uLAW (64kbps), ALAW (64kbps), AAC (128 kbps), PCM (128 kbps), PCM (256 kbps), PCM (384 kbps) and PCM (768 kbps). Higher bit rates will offer a higher audio quality and require bigger bandwidth. -
Page 44: Exposure
PD900 Series 3.4.1 Exposure In the Exposure page, you can select the Full Auto mode or adjust the parameter of the P-Iris Priority, Iris Priority and Shutter Priority mode for optimized video output in accordance with the operating environment. Auto Mode Max Gain ... -
Page 45: Picture Adjustment
Web interface ATW Mode (Auto Tracing White Balance) With the Auto Tracking White Balance function, the white balance in a scene will automatically be adjusted when the temperature color changes. The ATW Mode is suitable for environments with a light source having a color temperature in the range of roughly 2500K to 10000K. -
Page 46: Ir Function
PD900 Series Sharpness The sharpness level of the images can be set to a value between +0 and +15. The edge of the objects is enhanced as the sharpness level increases. Contrast The contrast level of the images can be set to a value between -6 and +19. -
Page 47: Noise Reduction
Web interface IR Heating With the IR Heating function, the IR will be turned on and served as the heating source for camera body when the ambient temperature is lower than 4 degree Celsisus. Different levels of IR heating are provided, including On and Intense mode. Under intense mode, the intensity of IR is stronger and the camera stays at day mode when temperature is lower than 4 degree Celsisus. -
Page 48: Profile
PD900 Series Select On from the Stabilizer drop-down list to enable the Image Stabilizer function. Select On from the Auto Calibration drop-down list to activate the Auto calibration function. Alternatively, you can click the Calibrate button for manual calibration. Be sure to keep the camera stand still for 3 seconds for calibration accuracy. -
Page 49: Preset
Web interface PTZ page 3.5.1 Preset The camera supports up to 256 Preset Points. Preset Setting Follow these steps to set up a Preset Point: Move the cursor to the live view pane. Left-click and drag the red pointer with the PTZ controls to the desired position and adjust the fine zoom / focus ratio. -
Page 50: Auto Pan
PD900 Series Cruise Run Select the programmed Cruise Path from the drop-down list and click the Run button. The camera will start touring around as recorded. To view the camera touring in full screen mode, move the cursor to the live view pane, right-click and left-click to select Fullscreen. -
Page 51: Home Function
Web interface Sequence Run Select the configured Sequence Line from the drop-down list and click the Go button. The camera will start moving forward each scene sequentially as programmed. To view the camera executing a Sequence Line in full screen mode, move the cursor to the live view pane, right-click and left-click to select Fullscreen. - Page 52 PD900 Series Set Switch to On and click the Set button to activate the Privacy Mask function. Select a color for the mask from the Color drop-down list and click the Set button to apply the color setting. Enter the mask number, e.g. 1. If a Zoom Factor is needed, select On to enable it. Then, click the Add button and a privacy mask will be displayed on the live video pane on the right.
-
Page 53: Ptz Setting
Web interface 3.5.8 PTZ Setting Flip You can continuously track an object when it passes under the camera by setting Flip to Mechanical (M.E.) mode. Note: The Flip setting can only be controlled manually. If a Preset Position or a point for another function (e.g. Sequence) is set at a position that can only be reached by FLIP motion, and the Flip function is turned off, the position cannot be reached anymore. - Page 54 PD900 Series Page 54...
-
Page 55: Appendix A: Install Upnp Components
Appendix A: Install UpnP Components Follow these instructions to install UPnP components on Windows Vista, Windows XP or Windows 7: Open the Window s Control Panel and double-click Add or Remove Programs. Click Add/Remove Windows Components in the Add or Remove Programs window. Select Networking Services from the Components list in the Windows Components Wizard window and then click Details. - Page 56 PD900 Series Page 56...
-
Page 57: Appendix B: Addresses From Decimal To Binary
Appendix B: Addresses from decimal to binary Follow the example below to convert IP addresses to binary numbers. Use the calculator on your computer (Start> All Programs> Accessories> Calculator) for conversion. For Windows XP and Windows Vista, click View on the calculator and click Scientific. ... - Page 58 PD900 Series Page 58...
-
Page 59: Appendix C: Jpg Picture Pull Authentication
Appendix C: JPG Picture Pull Authentication Follow these instructions to enable/disable the required authentication for the JPG pictures pull function: Configure one of the video stream to MJPEG in the camera and then use the Google Chrome browser to enter the below API command to enable or disable the required JPG picture pull authentication: API Command to Enable Required Authentication: ... - Page 60 PD900 Series Page 60...
-
Page 61: Appendix D: Rtsp Video Streams Url
Appendix D: RTSP Video Streams URL Use the following command to establish an RTSP video stream connection to each of the available video transmissions in the PD900 Series camera: rtsp://ip_address:port_number/streamx, where x corresponds to each stream channel 1 to 4. - Page 62 PD900 Series Page 62...
-
Page 63: Appendix E: Ntcip Protocol Compliance
Appendix E: NTCIP Protocol Compliance The National Transportation Communications for ITS Protocol (NTCIP) provides a communications standard that ensures the interoperability and interchangeability of traffic control and Intelligent Transportation Systems (ITS) devices. This appendix provides information about the conformance groups which are supported by the PD9x0 series cameras. - Page 64 positionIrisLens Note: Camera control through NTCIP on Siqura multichannel products is limited to video channel 1. SNMP MIB NTCIP has its own SNMP MIB. This database is used to store information, which is used to control cameras and other devices in the transportation management system. An electronic version of the MIB is available from a NEMA FTP site.
Need help?
Do you have a question about the PD900 Series and is the answer not in the manual?
Questions and answers