Table of Contents
Advertisement
Quick Links
Advertisement
Table of Contents

Related Manuals for Siqura PD9 0 Series


Summary of Contents for Siqura PD9 0 Series
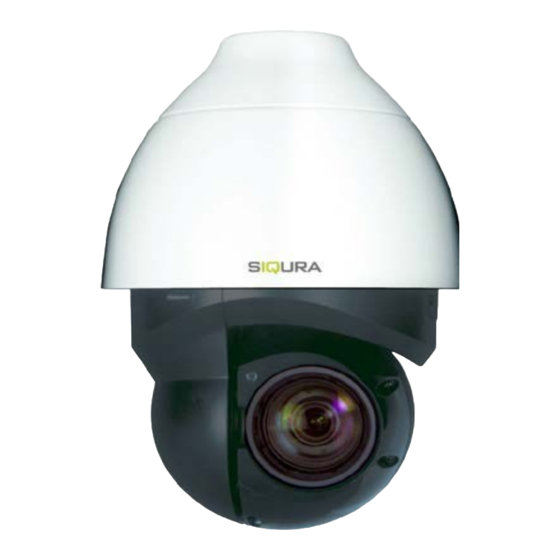
- Page 1 PD9x0 Series PTZ Dome Camera...
- Page 2 Any brand names mentioned in this manual are registered trademarks of their respective owners. Liability Siqura accepts no liability for claims from third parties arising from improper use other than that stated in this manual. Although considerable care has been taken to ensure a correct and suitably comprehensive description of all relevant product components, this manual may nonetheless contain errors and inaccuracies.
-
Page 3: Table Of Contents
Contents ABOUT THIS MANUAL ..........................4 FUNCTIONS OVERVIEW ..........................5 ..............................5 EATURES ..........................6 ACKAGE CONTENTS ............................9 IMENSIONS ............................10 ONNECTORS CONNECT CABLES..........................…... 12 ..........................…..14 ONNECT POWER ........................….. 14 ONNECT THERNET CABLE RS-485 ....................15 ONNECT UDIO LARM Sure Protection .........................….. -
Page 4: About This Manual
How to delete previously-installed Viewer software and to enable Siqura Viewer installation Where to find more information Find additional manuals, and the latest firmware for this product at http://siqura.com. We advise you to make sure that you have the latest version of this manual. Who this manual is for These instructions are for all professionals who will install PD9x0 Series cameras. -
Page 5: Functions Overview
Dimensions ............... 11 Connectors ................ 12 With the latest H.265 encoding technology, Siqura has more innovative on PD9x0 series for completely new outlook to refresh the our experience on PTZ dome. In PD9x0 series, the bubble-less mechanical is introduced for the crystal clear images without any distortion. -
Page 6: Package Contents
PD9x0 Series Package contents Make sure that the package contains the following items: PD900 PD900 Series Camera unit Quick start guide M4 security screw with rubber 2-Pin power terminal block (DC 12V use) 3-Pin power terminal block (AC 24V use) 14-Pin Alarm/Audio I/O terminal block Security Torx 1.5”threaded tube adapter... - Page 7 PD9x0 Series PD910 PD910 Series Camera unit Quick start guide 14-Pin Alarm/Audio I/O terminal block M4 security screw with rubber 3-Pin power terminal block (AC 24V use) 2-Pin power terminal block (DC 12V use) 1.5”threaded tube adapter Rubber Stopper Page 7...
- Page 8 PoE adapter 1.5”threaded tube adapter SFP adapter Caution: If you use an external power supply, contact Siqura to make sure that the power supply has the proper power specifications. Make sure that the power supply complies with LPS requirements. WARNING: FOR “PoE”...
-
Page 9: Dimensions
PD9x0 Series Dimensions The dimensions of the camera are as shown below. Unit: mm Dimensions PD900 camera Dimensions PD910/PD920 camera Page 9... -
Page 10: Connectors
This connector is used to burn firmware into the camera Console Connector when the camera is returned for repair/maintenance. Please contact the camera manufacturer for further information. RJ-45 Port (Contact Siqura for For network and PoE+ connections a compatible PoE injector.) Power (AC 24V) AC 24V power connection Analogue video output Audio/Alarm I/O &... - Page 11 PD9x0 Series Connector Definition Power (DC 12V) DC 12V power connection RJ-45 (Contact Siqura for a Network and UPoE connections compatible PoE injector.) Power (AC 24V) AC 24V power connection Reset Button Press the button with a proper tool for at least 20 seconds to restore the system.
-
Page 12: Connect Cables
Connect cables This section gives instructions for connecting the camera. In This Chapter Connect power ..............12 Connect Ethernet cable ............12 Connect Audio/Alarm I/O ............ 13 Surge protection ..............13 Caution: The camera shall be installed by qualified personnel only. Installation shall be in accordance with local procedures. - Page 13 PD9x0 Series Seal the cable entry hole of the mounting kit (see below) with thread seal tape to prevent water from entering the camera. If the long sky mounting or J-type(Candy Cane type) bracket is used, the rubber stopper is ...
-
Page 14: Connect Power
PD9x0 Series Connect power To power up the camera: Connect the DC 12V or the AC 24V power adaptor to the power connector of the camera and the power outlet. See the diagram and pin definitions below for AC 24V power connection. Definition AC 24V L AC 24V N... -
Page 15: Connect Audio /Alarm I/Oand Rs-485
PD9x0 Series Connect Ethernet cable For Ethernet cable connection, follow these steps: Connect one end of the Ethernet cable to the RJ-45 connector of the camera. Plug the other end of the cable to the network switch or PC. Note: In some cases, Ethernet crossover cable may be needed when connecting the camera directly to the PC. -
Page 16: Sure Protection
PD9x0 Series Surge Protection Protection against lightning strikes (direct and indirect) Additional protection against direct or indirect lightning strikes is required according the IEC 62305 series standards, or equivalent standards. Consideration shall be given to the following: The use of properly earthed air-termination rods for pole mounted or high mounted ... -
Page 17: Installation With Nps-Npt Coupler
Installation with NPS-NPT coupler This section gives instructions of properly installing the coupler to prevent the water ingress. In This Chapter Before Installation ..............12 Application ................12 Caution: The camera shall be installed by qualified personnel only. Installation shall be in accordance with local procedures. The models are IP66-rated to prevent water from entering the camera. -
Page 18: Application
PD9x0 Series Application Loading the applicator gun: make sure the applicator is setup with correct plunger attachment for cartridge. 1. Puncture seal in nozzle and remove the pull-tab seal at the bottom of the cartridge. Load into applicator and fix retaining ring (if applicable). Assemble the nozzle (if applicable) and cut tip to create between a 1/8”... - Page 19 PD9x0 Series It is recommended that a Teflon tape or similar plumbing pipe dope is used to seal the NPS side of the coupling to the camera pipe adapter. Ensure that the coupling covers the Teflon tape and is locked down tight. It is suggested that after hand tightening, a pipe wrench is used to gain another ¼...
-
Page 20: System Requirements
System requirements Before you access the camera via a web browser, make sure that you have a good network connection and that the system requirements given below are met. Items System requirement Personal computer Minimum: ® Intel Core i5-2430M @ 2.4 GHz ... -
Page 21: Get Access To The Camera
For initial access to the camera, a client program called Siqura Viewer will automatically be installed on the PC when connecting to the camera. If the web browser does not allow for installation of the Siqura Viewer, check the Internet security settings or ActiveX controls and plug-ins settings (refer to chapter 8). - Page 22 PD9x0 Series Home page of the camera Zoom and focus adjustment After accessing the camera, the live image will be displayed on the home page. If needed, use the zoom and focus function buttons on the home page to adjust the zoom and focus settings of the camera.
-
Page 23: Set Video Resolution
Set video resolution You can set the video resolution on the Video configuration page of the camera’s web interface. The Video configuration page is found under the Streaming tab. Video configuration page The default video resolution values are as shown below. Megapixels (MP) Mode Default value... -
Page 24: Export/Import Configuration Files
Export/Import configuration files You can export configuration files to a specific location and retrieve data by uploading an existing configuration file to the camera. This is especially convenient if you want multiple cameras to have the same configuration. In This Chapter Export configuration file ............ -
Page 25: Technical Support
Delete previously-installed Siqura Viewer ......23 Allow ActiveX control installation .......... 23 Delete previously-installed Siqura Viewer If Siqura Viewer has been installed previously on your PC, the Siqura Viewer software has to be removed from your PC before you access the camera. Delete Siqura Viewer Follow these steps: In the Windows Start menu, open the Control Panel. - Page 26 PD9x0 Series Change ActiveX controls and plug-ins settings Start Internet Explorer. Select Tools in the menu bar. Select Internet options. Select the Security tab and then Internet. Click on Custom level. The Security Settings window will appear. Set the following items under ActiveX controls and plug-ins to Prompt or Enable. Note that items may vary depending on the Internet Explorer version.
Need help?
Do you have a question about the PD9 0 Series and is the answer not in the manual?
Questions and answers