Table of Contents
Advertisement
Advertisement
Table of Contents

Summary of Contents for Siqura PD910
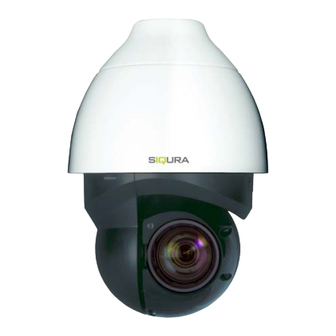
- Page 1 PD910 3MP bubbleless PTZ dome camera with 40x zoom...
- Page 2 Any brand names mentioned in this manual are registered trademarks of their respective owners. Liability Siqura accepts no liability for claims from third parties arising from improper use other than that stated in this manual. Although considerable care has been taken to ensure a correct and suitably comprehensive description of all relevant product components, this manual may nonetheless contain errors and inaccuracies.
-
Page 3: Table Of Contents
Contents ABOUT THIS MANUAL ..........................5 FUNCTIONS OVERVIEW ..........................7 ..............................7 EATURES ............................. 8 ACKAGE CONTENTS .............................. 9 IMENSIONS .............................. 9 ONNECTORS CONNECT CABLES........................... 11 ............................12 ONNECT POWER ......................... 12 ONNECT THERNET CABLE RS-485 ....................13 ONNECT UDIO LARM SYSTEM REQUIREMENTS........................ - Page 4 Contents Page 4...
-
Page 5: About This Manual
About this manual What's in this manual This is version 1 of the installation assistance provided for the PD910 camera. The manual gives you all the information you need to install the product. It tells you: How to connect cables ... - Page 6 PD910 Page 6...
-
Page 7: Functions Overview
Functions overview This chapter gives an overview of the functions offered by the PD910 camera. It also gives information about the package contents, camera dimensions and connectors. In This Chapter Features ................7 Package contents ............... 8 Dimensions ............... 9 Connectors ................ -
Page 8: Package Contents
3-Pin power terminal block (AC 24V use) 14-Pin Alarm/Audio I/O terminal block Caution: If you use an external power supply, contact Siqura to make sure that the power supply has the proper power specifications. Make sure that the power supply complies with LPS requirements. -
Page 9: Dimensions
Functions overview Dimensions The dimensions of the camera are as shown below. Dimensions PD910 camera Connectors This section shows and explains the various connectors and the reset button of the camera. Connectors PD910 camera Page 9... - Page 10 PD910 Connector Definition Power Connector (DC 12V) DC 12V power connection RJ-45 (Contact Siqura for a Network and UPoE connections compatible PoE injector.) Power connector (AC 24V) AC 24V power connection Default button Press the button with a proper tool for at least 20 seconds to restore the system.
-
Page 11: Connect Cables
Connect cables This section gives instructions for connecting the camera. In This Chapter Connect power ..............12 Connect Ethernet cable ............12 Connect Audio/Alarm I/O ............ 13 Caution: The camera shall be installed by qualified personnel only. Installation shall be in accordance with local procedures. The outdoor models are IP66-rated to prevent water from entering the camera. -
Page 12: Connect Power
PD910 Seal the cable entry hole of the outdoor mounting kit (see below) with thread seal tape to prevent water from entering the camera. Connect power To power up the camera: Connect the DC 12V or the AC 24V power adaptor to the power connector of the camera and the power outlet. -
Page 13: Connect Audio /Alarm I/Oand Rs-485
Connect cables Check the status of the power and the network activity indicator LEDs. If a LED is unlit, check the corresponding connection. The green link LED is lit when there is a good network connection. The orange network LED flashes to indicate that there is network activity. ... - Page 14 PD910 Page 14...
-
Page 15: System Requirements
System requirements Before you access the camera via a web browser, make sure that you have a good network connection and that the system requirements given below are met. Items System requirement Personal computer Minimum: Intel ® Core i5-2430M @ 2.4 GHz ... - Page 16 PD910 Page 16...
-
Page 17: Get Access To The Camera
For initial access to the camera, a client program called Siqura Viewer will automatically be installed on the PC when connecting to the camera. If the web browser does not allow for installation of the Siqura Viewer, check the Internet security settings or ActiveX controls and plug-ins settings (refer to chapter 8). - Page 18 PD910 Home page of the camera Zoom and focus adjustment After accessing the camera, the live image will be displayed on the home page. If needed, use the zoom and focus function buttons on the home page to adjust the zoom and focus settings of the camera.
-
Page 19: Set Video Resolution
Set video resolution You can set the video resolution on the Video configuration page of the camera’s web interface. The Video configuration page is found under the Streaming tab. Video configuration page The default video resolution values are as shown below. Megapixels (MP) Mode Default value... - Page 20 PD910 Page 20...
-
Page 21: Export/Import Configuration Files
Export/Import configuration files You can export configuration files to a specific location and retrieve data by uploading an existing configuration file to the camera. This is especially convenient if you want multiple cameras to have the same configuration. In This Chapter Export configuration file ............ - Page 22 PD910 Page 22...
-
Page 23: Technical Support
Delete previously-installed Siqura Viewer ......23 Allow ActiveX control installation .......... 23 Delete previously-installed Siqura Viewer If Siqura Viewer has been installed previously on your PC, the Siqura Viewer software has to be removed from your PC before you access the camera. Delete Siqura Viewer Follow these steps: In the Windows Start menu, open the Control Panel. - Page 24 PD910 Change ActiveX controls and plug-ins settings Start Internet Explorer. Select Tools in the menu bar. Select Internet options. Select the Security tab and then Internet. Click on Custom level. The Security Settings window will appear. Set the following items under ActiveX controls and plug-ins to Prompt or Enable. Note that items may vary depending on the Internet Explorer version.


Need help?
Do you have a question about the PD910 and is the answer not in the manual?
Questions and answers