Table of Contents
Advertisement
Quick Links
Advertisement
Table of Contents

Subscribe to Our Youtube Channel
Related Manuals for Siqura BC2xSeries


Summary of Contents for Siqura BC2xSeries
- Page 1 User Manual Siqura BC2x Series 1/3” CCD Color Box Camera...
-
Page 3: Table Of Contents
Contents CONTENTS PREFACE .......................1 1.1....................2 HANGE CAUTIONS .....................3 OVERVIEW ....................5 3.1......................5 EATURES IP CAMERA CONFIGURATION AND OPERATION ...........7 4.1. IP C ..................7 CCESSING THE AMERA 4.1.1. Device Search software setup ..............7 4.1.2. Changing the IP camera's Network property ..........9 4.2. - Page 4 Contents 6.1..............37 IDEO ESOLUTION AND OTATE 6.1.1. Video resolution ..................38 6.1.2. Video rotate type .................. 38 6.2..................40 IDEO OMPRESSION 6.3................... 42 IDEO TREAM ROTOCOL 6.4................... 43 IDEO RAME 6.5..............44 UDIO ODE AND ETTINGS CAMERA SETTINGS ..................
-
Page 5: Preface
All specifications are subject to change without notice. Notice To work with a Siqura BC2x Series camera, an installer or technician must have a basic knowledge of CCTV systems and their components, electrical wiring, and low-voltage electrical connections, and have read this manual completely... -
Page 6: Change Log
Preface Regulations This device complies with Part 15 of the FCC Rules. Operation is subject to the following two conditions: (1) this device may not cause harmful interference, and (2) this device must accept any interference received, including interference that may cause undesired operation. -
Page 7: Cautions
Cautions CAUTIONS Only qualified service personnel or system installers should install and connect this product. Handle the camera carefully. Do not abuse the camera. Avoid striking, shaking, etc. as the camera can be damaged by improper handing or storage. Do not disassemble the camera. To prevent electric shock, do not remove screws or covers. -
Page 9: Overview
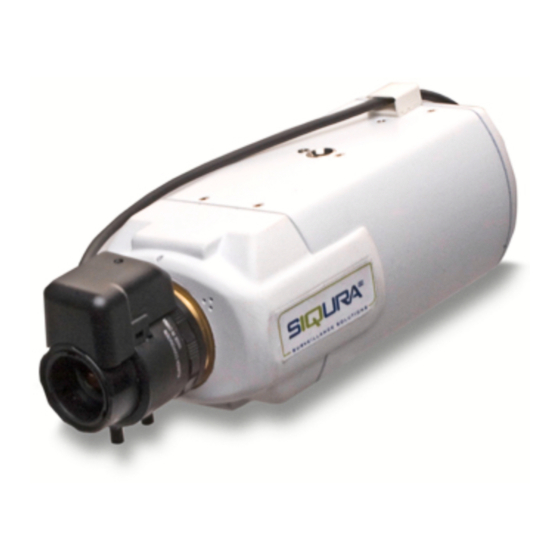
Overview OVERVIEW The Siqura BC2x Series Cameras feature a 1.3 Megapixel progressive scan image sensor that delivers unparalleled image quality. Utilising this progressive scan sensor, it produces images of rapid moving objects with minimum motion blurring. Dual streaming enables users to view both MJPEG images and MPEG-4 video to achieve superior image quality and conserve bandwidth. -
Page 11: Ip Camera Configuration And Operation
, found in DeviceSearch.exe the supplied CD's DeviceSearch folder. This application will detect and list all the Siqura BC2x cameras found in the network. The Device Search application is also available on the Software Downloads page of www.optelecom-nkf.com. - Page 12 IP Camera Configuration and Operation If a security alert window displays, as shown in figure 4.2, click to continue. Unblock Figure 4.2 Device search security alert Click again. Device Search All the found IP devices will be listed in the page, as shown in the figure below. The IP Camera's default IP address (not shown in figure 4.3) is in the series.
-
Page 13: Changing The Ip Camera's Network Property
IP Camera Configuration and Operation Right click a found device and select to access the camera directly via the web Browse browser, as shown in figure 4.4. Figure 4.4 Browse found devices The user is prompted for username and password. The default login and password for the administrator are Admin / 1234. - Page 14 IP Camera Configuration and Operation To change the IP Camera's network property In the device list, select the IP Camera you would like to change. Right-click the selected item and choose as shown in figure 4.5. Network Setup Meanwhile, record the IP Camera's MAC address for future identification. Figure 4.5 Changing network properties In the Network Setup page, select , and click...
-
Page 15: Browser-Based Viewing
Next When installation is complete, click Finish The Siqura home page will display as shown in figure 4.8. 4.3. Siqura BC2x User Interface Across the top of the main page, shown in figure 4.8, are the main menu items: Home, System, Streaming, Camera, and Logout. - Page 16 IP Camera Configuration and Operation At the bottom of the main page, users can adjust video display size (x1, x1/2 and full screen), select the video format (MPEG-4 and MJPEG), talk to a remote site (described in section 5.2 User Management) and save snapshots (only supported at MJPEG over RTSP as described in section 5.9 Image Capture).
-
Page 17: System Settings
System Settings SYSTEM SETTINGS The System tab is comprised of 15 categories, listed in the left-hand column of the webpage. Each category is explained separately in the following sections. please note The System configuration page is only accessible to the Administrator. 5.1. -
Page 18: Manual
System Settings 5.1.2. Manual The Administrator can also set video date, time and day manually. Note that the entry format for date and time should reflect that shown next to the entry field. 5.2. User Management To add and delete users and to configure user permissions, click in the left User management hand column. -
Page 19: Add User
User names and passwords are limited to 16 characters in length. This camera supports a maximum of twenty user accounts. 5.2.3. User permissions The Siqura BC2x/FD2x series of cameras support four permissions: Home, System, Streaming, and Camera. Home This permission is always enabled for all users. -
Page 20: Manage Users
System Settings 5.2.4. Manage users To delete a user In the left-hand menu, click as shown in figure 5.2. User management From the list labeled , select the name of the user you wish to delete. Existing User Click to remove the user. Delete The application takes about 20 seconds to delete a user. -
Page 21: Network
System Settings To view user permissions In the left-hand menu, click , as shown in figure 5.2. User management Click the button. View privacy A pop-up window displays a list of users and their permissions as shown in figure 5.4. Figure 5.4 User permissions The four numbers after the username denote the four privileges, Home, System, Streaming and Camera, respectively. -
Page 22: Acquire Ip Address Automatically (Dhcp)
5.3.1. Acquire IP address automatically (DHCP) By default, the Siqura BC2x series cameras use a fixed IP address, but the administrator can configure the camera to use DHCP to acquire its IP address. -
Page 23: Use A Fixed Ip Address
System Settings 5.3.2. Use a fixed IP address To configure the camera with a static (fixed) IP address In the left-hand menu, select as shown in figure 5.6. Network Select Use fixed IP address In the text box labeled , type the camera's IP address. IP address Enter the , and... -
Page 24: Ddns
System Settings HTTP port This can be any port other than the default port . If the port is changed, the user must be notified of the change for the connections to be successful. For example, if the Administrator changes the HTTP port of an IP dome camera with an IP address of 192.168.0.100 from 80 to 8080, the user must type in the address instead of http://192.168.0.100:8080... -
Page 25: Mail
System Settings To use DDNS Enable DHCP as described in section 5.3.1, Acquire IP address automatically. In the left-hand menu, select as shown in figure 5.7. DDNS Check the box labeled Enable DDNS Select the DDNS provider from the list labeled Provider. Type the registered domain name in the Host name field. -
Page 26: Ftp
System Settings The camera supports up to two SMTP configurations. Each configuration includes the following settings: • SMTP Server • Account Name • Password • E-mail Address For SMTP server details, contact your network service provider. 5.6. The Administrator can configure the camera to send alarm messages to a specific File Transfer Protocol (FTP) site when an alarm is triggered. -
Page 27: Alarm Configuration
System Settings To configure FTP settings In the left-hand menu, select as shown in figure 5.9. Enter the FTP details, which include server server port user name password , in the appropriate fields. remote folder Enable the or the or both. 1st FTP passive mode FTP passive mode Press... - Page 28 System Settings To configure alarms In the left-hand menu, select as shown in figure 5.10. Alarm configuration Under Alarm Switch, select to enable or disable the alarm function. Under Alarm Type, select the alarm type, , corresponding to Normal close Normal open the alarm application.
-
Page 29: Motion Detection
System Settings 5.8. Motion Detection The Motion detection function enables the camera to trigger an alarm when motion volume in a detected area reaches or exceeds a configured sensitivity threshold value. Figure 5.11 Motion detection settings To enable Motion Detection From the left-hand menu, select as shown in figure 5.11. - Page 30 System Settings Send message to FTP when motion detected • The message will be sent to the FTP site when the alarm is triggered. An administrator must configure the FTP site prior to enabling it in the motion detections settings. Figure 5.12a The configured motion Figure 5.12b Peaks rising above the set detection level.
-
Page 31: Image Capture
System Settings 5.9. Image Capture The IP dome camera has an image capture function. The default storage directory is: Images are captured using the Image Capture (camera icon) button in the Home and Camera pages. These images are saved to the location specified on the Image Capture screen as shown in figure 5.14. -
Page 32: Iris Adjustment
System Settings 5.10. Iris Adjustment With this feature, the camera automatically adjusts the iris to achieve consistent exposure output. To configure the auto iris lens From the left-hand menu, select as shown in figure 5.15. Iris Adjustment Ensure that the iris lens is in place. Superimpose a Gamma 1 grayscale chart upon the screen. -
Page 33: View Log File
System Settings 5.11. View Log File The log file provides useful information about configuration and connections after system launch. Figure 5.16 Log file To view the system log • In the left-hand menu, click as shown in figure 5.16. View log file The system log displays. -
Page 34: View System Parameters
System Settings 5.12. View System Parameters The BC2x camera's parameters are stored in its configuration file. To view all of the system's parameters Click in the left-hand menu. • View parameters The parameters display in the browser as shown in figure 5.17. Figure 5.17 System parameters... -
Page 35: Factory Default
System Settings 5.13. Factory Default The Factory default page, shown in figure 5.18, enables the administrator to return the camera's settings to those present when shipped from the factory. Figure 5.18 Factory defaults To restore the camera's default settings Click the button •... -
Page 36: Software Version
System Settings 5.14. Software Version To display the camera's software and firmware versions In the left-hand menu, select • Software version The camera's software and firmware versions are displayed as shown in figure 5.19. Figure 5.19 Software version... -
Page 37: Software Upgrade
System Settings 5.15. Software Upgrade Software upgrade can be carried out in the Software Upgrade page, as shown in figure 5.20. Figure 5.20 Software upgrade important Upgrading the software also resets factory defaults including IP address. Make sure to note all settings before proceeding. Make sure the upgrade software file is available before carrying out software upgrade. - Page 38 System Settings Click Software uploading will begin. Figure 5.21 Software upgrade please note Do not change the upgrade file name, or the system will fail to find the file. When notified that the file has uploaded successfully, click OK to continue.
- Page 39 System Settings From the list labeled , select the appropriate file Select binary file you want to upgrade as shown in figure 5.22. Figure 5.22 Select file to upgrade Click Upgrade The system will check whether the upgrade file exists or not. After the upgrade process is finished, the viewer will return to the Home page, and operation can continue.
-
Page 41: Video And Audio Streaming
Video and Audio Streaming VIDEO AND AUDIO STREAMING To view the camera's configurable video and audio items, press the tab at the top Streaming of the page. The items display in the left-hand column. In this section, the administrator can configure specific video resolution, video compression mode, video protocol, and audio transmission mode. -
Page 42: Video Resolution
Video and Audio Streaming 6.1.1. Video resolution To change the dual streaming format From the left-hand menu, select Video Format Select from the following dual streaming formats: • MJPEG 1280×960 (15fps) + MPEG-4 VGA (15fps) • MJPEG 1280×960 (15fps) + MPEG-4 QVGA (15fps) •... - Page 43 Video and Audio Streaming Figure 6.2b "Flipped" video image To select a video rotation type From the left-hand menu, select Video Format Choose one of the following video rotation types: • Normal video No rotation applied • Flip Rotates the image vertically •...
-
Page 44: Video Compression
Video and Audio Streaming 6.2. Video Compression Administrators can select the appropriate MJPEG/MPEG-4 compression mode on the Video Stream Protocol page shown in figure 6.3, depending on the application. Figure 6.3 Video compression... - Page 45 Video and Audio Streaming To change MJPEG compression settings From the Main menu, select and from the left-hand menu, select Streaming Video Compression Choose one of the following compression settings: • high compression, low bit rate, low quality • middle compression, default •...
-
Page 46: Video Stream Protocol
Video and Audio Streaming 6.3. Video Stream Protocol On the Video Stream Protocol page, shown in figure 6.4, users can select a protocol for streaming media over the network: (Real Time Streaming Protocol, using UDP transport) • RTSP (Hypertext Transfer Protocol, using TCP transport), •... -
Page 47: Video Frame Skip
Video and Audio Streaming please note MPEG-4 video can only be transmitted via RTSP, while MJPEG can be transmitted via RTSP or HTTP. When experiencing video streaming problem with the IP dome camera, select the option MJPEG over HTTP, for internet use. -
Page 48: Audio Mode And Bit Rate Settings
Video and Audio Streaming To enable MPEG-4 frame skip From the Main menu, select and from the left-hand menu, select Streaming Video Frame Skip In the section labeled MPEG-4 Frame Skip, select one of the following options: • No skipping, default •... - Page 49 Video and Audio Streaming To configure audio settings From the Main menu, select and from the left-hand menu, select Streaming Audio From the section labeled Transmission Mode, select one of the following: • Full-duplex - local and remote sites can communicate with each other simultaneously, i.e.
-
Page 51: Camera Settings
Camera Settings CAMERA SETTINGS Figure 7.1 shows the camera configuration page. To access this page, select from the Camera main menu. Details of each parameter setting are described in the following sections. Figure 7.1 Camera settings 7.1. Exposure The exposure is the amount of light received by the image sensor and is determined by the width of lens diaphragm opening (iris adjustment), the amount of exposure by the sensor (shutter speed) and other exposure parameters. -
Page 52: White Balance
Camera Settings Each exposure mode is specified as follows: Full Auto Mode In this mode, the camera's Shutter Speed, IRIS and AGC (Auto Gain Control) control circuits work together automatically to provide consistent video output. Auto Flickerless (50Hz)/(60Hz) Mode Television scanning (PAL & NTSC) and power supply systems (AC 50 & 60 Hz) are not the same in different countries and regions. -
Page 53: Backlight Setting
Camera Settings Auto Mode In this mode, white balance works within its color temperature range and calculates the best-fit white balance. Indoor/outdoor Mode Select for indoor or outdoor mode. Manual Mode In this mode, users can change the White Balance of an object manually. Lower numbers correspond to the blue (cooler hues) temperature ranges while the higher numbers correspond to the red (warmer hues) temperature ranges. -
Page 54: Sharpness Setting
Camera Settings 7.5. Sharpness Setting To change the image's sharpness Select a higher value for greater sharpness and a lower number to dull the image. Figure 7.6 Sharpness Press to confirm the new setting. option 7.6. Contrast Setting Contrast is the difference in brightness between the light and dark areas of an image. To change the image's contrast Select a higher value for greater contrast (and a lighter image) and a lower number for less contrast (and a darker... -
Page 55: Appendix A: Technical Specification
Technical Specification APPENDIX A: TECHNICAL SPECIFICATION Item BC20 BC22 BC24 BC24WDR Camera Image Sensor 1/3" CCD 1/3.8" CMOS 1/3" CCD Picture Elements 1280(H) x 960 (V) Resolution VGA, QVGA, CIF, 4xVGA (1.3Mpix), QVGA, CIF, QCIF QCIF Minimum Illumination 0.2 lux @ F1.2 0.6 lux @ F1.2 0.2 lux @ F1.2 Shutter Speed... - Page 56 Technical Specification Item BC20 BC22 BC24 BC24WDR Network Interface 10/100 Ethernet (RJ-45) TCP/IP, UDP, RTP, RTSP, HTTP, ICMP, FTP, SMTP, DHCP and IGMP Protocol Password Levels User and Administrator Internet Browser Internet Explorer (6.0+) User Accounts please note Weight and dimensions are approximate. All Specifications are subject to change without notice.
-
Page 57: Appendix B: Back Focus Adjustment
Back Focus Adjustment APPENDIX B: BACK FOCUS ADJUSTMENT When to adjust back focus Back Focus refers to the distance from the rear lens element to the camera focal plane. In most cases, it is required to adjust back focus only when the camera's lens cannot hold focus throughout its zoom range. - Page 58 © Optelecom-NKF B.V. 2008 *%199925410750-00%* Version 1.3 (082306-1c) Siq. BC2x UM (MW03SP3)
Need help?
Do you have a question about the BC2xSeries and is the answer not in the manual?
Questions and answers