Table of Contents
Advertisement
Advertisement
Table of Contents

Subscribe to Our Youtube Channel
Related Manuals for Siqura FD820M1(IR)


Summary of Contents for Siqura FD820M1(IR)
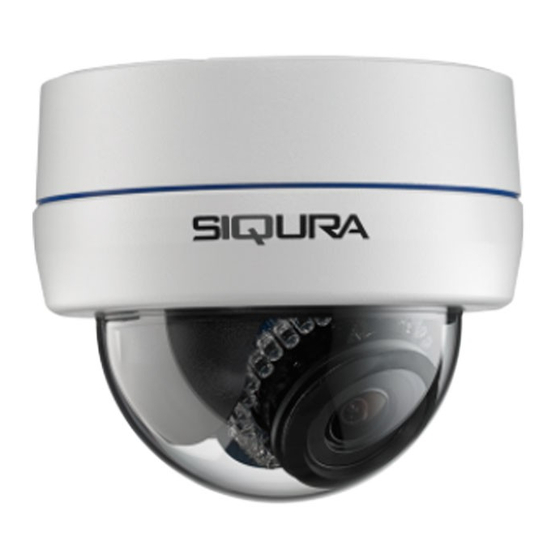
- Page 1 FD820M1(IR) High-definition fixed dome camera with Day/Night...
- Page 2 Any brand names mentioned in this manual are registered trademarks of their respective owners. Liability Siqura accepts no liability for claims from third parties arising from improper use other than that stated in this manual. Although considerable care has been taken to ensure a correct and suitably comprehensive description of all relevant product components, this manual may nonetheless contain errors and inaccuracies.
-
Page 3: Table Of Contents
Contents About this manual ..................Safety and compliance ................Safety ....................Cautions ..................... Compliance ..................Product overview ..................Models ....................Package contents ................. Dimensions ..................System requirements ................System compatibility ................Connectors and cabling ................Connectors ..................Power the camera ................Connect to network ................ -
Page 4: About This Manual
About this manual What this manual covers This manual describes how to install and connect the FD820, Siqura's HD fixed dome network camera. Instructions for configuration and operation of the FD820 can be found in the User Manual. The Technical Specifications for the FD820 are provided in the FD820 datasheet (download the latest version at www.siqura.com). -
Page 5: Safety And Compliance
Failure to comply with any precaution, warning, or instruction noted in the manual is in violation of the standards of design, manufacture, and intended use of the module. Siqura assumes no liability for the customer's failure to comply with any of these safety requirements. - Page 6 European Union (EU) to enact the Directive on the Restriction of the use of certain Hazardous Substances (RoHS) (2002/95/EC). Siqura offers products that comply with the EU’s RoHS Directive. The full version of the Siqura RoHS statement can be viewed at www.siqura.com.
-
Page 7: Cautions
Safety and compliance Cautions Handle the camera carefully Do not abuse the camera. Avoid bumping and shaking. The camera can be damaged by improper handling or storage. Do not disassemble the camera To prevent electric shock, do not remove screws or covers. There are no user serviceable parts inside. -
Page 8: Compliance
Safety and compliance Compliance... -
Page 9: Product Overview
Product overview This chapter introduces the FD820 and its features. In This Chapter 3.1 Models........................9 3.2 Package contents....................11 3.3 Dimensions......................12 3.4 System requirements.................... 12 3.5 System compatibility..................... 12 Models FD820M1 (-SFP) HD Outdoor fixed dome IP camera ●... - Page 10 Product overview FD820M1IRMP5 HD Outdoor fixed dome camera ● 1/2.5" Progressive scan CMOS imager ● 3.3 to 10.5 mm Motorised lens with push-to-focus ● 5 Megapixel resolution ● Dual-stream H.264 and MJPEG video ● Day/night with IR-cut filter ● Integrated IR illuminator (effective distance: 25 m) ●...
-
Page 11: Package Contents
Product overview Package contents FD820 Power terminal block Conduit 12 Vdc Power adapter Self-tapping screws (4x) Plastic screw anchors (4x) Rubber washers (6x) White rubber ring Security torx Quick Start Guide CD (software and documentation) -
Page 12: Dimensions
Internet Explorer 6.0 or later, Firefox, Chrome, Safari Network card 10Base-T (10 Mbps) or 100Base-TX (100 Mbps) operation Viewer ActiveX control plug-in for Microsoft IE Minimum requirements System compatibility To ensure system compatibility, you are advised to download the latest firmware at http:// www.siqura.com/. -
Page 13: Connectors And Cabling
Connectors and cabling This chapter describes the buttons and connectors on the printed circuit board (PCB) of the FD820 and gives instructions for connecting power, Ethernet, audio, and alarm I/O cables. In This Chapter 4.1 Connectors......................13 4.2 Power the camera....................14 4.3 Connect to network.................... -
Page 14: Power The Camera
Connectors and cabling Connector Pin No. Definition Remarks Reset button Press this button for at least 10 seconds to restore the system to its factory-default settings (including network settings). Analogue video output Alarm I/O Output + Alarm connection Output - Input + Input - Audio I/O... -
Page 15: Connect Audio
Connectors and cabling To connect directly to a PC ● Connect one end of a crossover Cat 5 cable to the RJ-45 connector of the IP camera and the other end of the cable to the PC. Refer to the following figure to determine whether you have established an Ethernet connection. -
Page 16: Microsd Card
Connectors and cabling For the location of this block and the alarm pin definition, see Connectors. To configure the alarm settings Log on to the webpages of the camera. For instructions on how to do this, see the User Manual. Go to the Application, Motion Detection, and Tampering webpages and configure the alarms as desired. -
Page 17: Install The Camera
Install the camera Please read the instructions provided in this chapter thoroughly before installing the FD820. In This Chapter 5.1 Surface Mount...................... 17 5.2 Long/Mini Wall Mount.................... 22 5.3 Recessed Ceiling Mount..................26 5.4 Corner Mount....................... 31 5.5 4S Mount Electrical Box..................35 Surface Mount The FD820 can be installed directly on a wall or ceiling. - Page 18 Install the camera Unscrew the module-fastened screw, as indicated in the figure, with the phillips-head screw driver. Press the sides of the snap-on camera module, as indicated in the figure, and detach it from the dome camera’s housing/plate. Mark the positions of the four screw holes found on the base of the dome camera at the installation location.
- Page 19 Install the camera In the marked locations, drill each hole slightly smaller than the supplied screw anchors, and insert the anchors into these holes. Fasten the dome camera’s housing/plate with the four supplied self-tapping screws. Use rubber grommets for outdoor installations. Thread the cables (power/Ethernet/audio/alarm) through either the side conduit entry or back conduit entry, as shown below.
- Page 20 Install the camera Attach the snap-on camera module into the dome camera’s housing, and tighten the module-fastened screw with the screw driver to secure the camera module. The terminal blocks should face the side conduit entry for the FD820 camera, as shown above.
- Page 21 Install the camera Pan adjustment range is nearly 360°; rotation angle range approaches to 270°. Tilt is adjustable between -10° ~ 90°. Pan adjustment Tilt adjustment Adjust the lens carefully within the limits mentioned above, or the cables underneath may be harmed. Return the inner cover to the camera module.
-
Page 22: Long/Mini Wall Mount
Install the camera Long/Mini Wall Mount This chapter describes pendant-style mounting of the FD820 cameras with a mini or long wall mount bracket. Kit package Contents WMO7 Long Wall Mount WM01A Mini Wall Mount ● M8x16 Hex Head Stainless Steel ●... - Page 23 Install the camera The WM01A Mini Wall Mount dimensions are provided in millimeters in the figures below. The FD820 compact pendant mount dimensions To install the FD820 on a hard wall or ceiling or a square mount electrical Unscrew the Security Torx Screws with the supplied Security Torx driver and open the dome cover.
- Page 24 Install the camera Fasten the pendant mount onto the wall securely Run the Ethernet cable through the wall mount as shown in the below. M8x30 Hex Head Machine Screw (for WM07 Long Wall Mount only): The WM07 Long Wall Mount is supplied with four M8x30 Hex Head Machine Screws for the convenience of installation by fastening the mount to the wall.
- Page 25 Install the camera Fix the camera housing with the supplied M8x16 hex head stainless steel screw and washers. Attach the snap-on camera module to the dome camera housing and tighten the module-fastened Torx screw. Connect the power and network outputs. The power cable is omitted if using PoE.
-
Page 26: Recessed Ceiling Mount
Install the camera Note: In case the zoom level and focal length are different with the dome cover on, adjust the zoom level and focal length through the dome cover. Recessed Ceiling Mount The FD820 camera can be installed directly on a wall or ceiling. Please note that the wall or ceiling must have enough strength to support the camera. - Page 27 Install the camera The FD820 recessed ceiling mount dimensions To install the FD820 on a hard ceiling Release the two captive security screws with the supplied security Torx and open the dome cover. FD820 camera Captive Security Screw Press both sides of the inner cover and remove it from the camera module. Unscrew the module-fastened screw with the phillips-head screw driver, as indicated in the figure below.
- Page 28 Install the camera Press the sides of the snap-on camera module, as indicated in the figure, and detach it from the dome camera’s housing/plate. Use a coin to screw off the conduit entry block for the FD820camera. Attach the camera housing/plate’s base to the recessed ceiling mount’s top plate, aligning the camera’s rear cable entry with the entry hole on the in-ceiling mount’s top plate.
- Page 29 Install the camera Position the supplied adhesive-backed ceiling sticker (Ø176 mm) onto the ceiling where the camera will be mounted, and cut the ceiling hole using the template as a guide. Insert the dome camera with the attached in-ceiling mount into the opening and run the Ethernet cable through the desired cable entry.
- Page 30 Install the camera Bottom views of installed in-ceiling mount Attach the snap-on camera module to the dome camera’s housing/plate. Install the camera module with the terminal blocks facing the side cable entry. Tighten the module-fastening screw. Connect the power and network outputs. Refer to Connectors for details regarding the camera connector definition.
-
Page 31: Corner Mount
Install the camera Adjust the camera’s pan/tilt holder to the desired angle. Pan adjustment range is nearly 360°; rotation angle range approaches to 270°. Tilt is adjustable between -10° ~ 90°. Adjust the lens carefully within the limits mentioned above, or the cables underneath may be harmed. - Page 32 Install the camera Corner Mount M4 Plastic Anchors (x 6) M4 Self-tapping Screws (x 6) M4 Mechanical Screws (x 4) Security Torx Mount dimensions The Corner Mount dimensions are provided in millimeters in the figures below. The FD820 corner mount dimensions Required Tools: ●...
- Page 33 Install the camera Drill six holes on the wall and the ceiling to install six M4 plastic anchors. Fix the corner mount on the ceiling by fastening six M4 self-tapping screws in the plastic anchors. Place the dome camera’s housing/plate in the corner mount. Note: The snap-on camera module is in the position shown in the image above.
- Page 34 Install the camera Tighten the four M4 mechanical screws to install the dome camera’s housing/plate in the corner mount. Place the camera module into the dome camera’s housing/plate until there is a “click” sound. Tighten the screw on the camera module to fix the camera module on the dome camera’s housing/plate.
-
Page 35: Mount Electrical Box
Install the camera Place the dome cover back in position, tighten the two Torx screws with the supplied Security Torx. Note: In case the zoom level and focal length are different with the dome cover on, adjust the zoom level and focal length through the dome cover. 4S Mount Electrical Box The indoor FD820 cameras can be installed in a 4S Mount Electrical Box. - Page 36 Install the camera Detach the snap-on camera module from the FD820 camera’s housing/plate by unscrewing the module-fastened Torx screw first. Press the sides of camera module and pull it slightly out of the housing/plate. Thread the power and/or Ethernet cables through either the side conduit entry or the back conduit entry and fasten the camera’s housing/plate to the electrical box with the two screws.
- Page 37 Install the camera Note: Adjust the lens carefully within the limits mentioned above, or the cables underneath may be harmed. Attach the snap-on camera module to the dome camera’s housing/plate. Install the camera module with the terminal blocks facing the side cable entry. Tighten the module-fastening screw.
- Page 38 Install the camera...
-
Page 39: Index
Index 4S Mount Electrical Box......35 About this manual........4 Cautions..........7 Compliance..........8 Connect alarm I/O........15 Connect audio........15 Connect to network.........14 Connectors..........13 Connectors and cabling......13 Corner Mount......... 31 Dimensions..........12 Install the camera........17 Long/Mini Wall Mount......22 microSD Card.........16 Models............
Need help?
Do you have a question about the FD820M1(IR) and is the answer not in the manual?
Questions and answers