Table of Contents
Advertisement
Advertisement
Table of Contents

Related Manuals for Siqura FD1103


Summary of Contents for Siqura FD1103
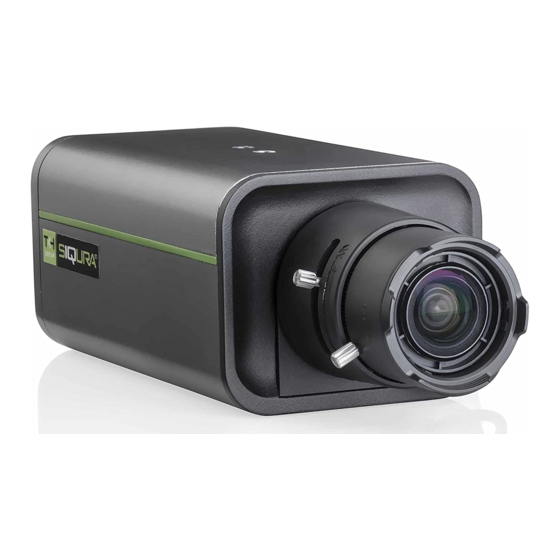
- Page 1 BC1103/BL1103/FD1103 3 MP Intelligent IP cameras...
- Page 2 Any brand names mentioned in this manual are registered trademarks of their respective owners. Liability Siqura accepts no liability for claims from third parties arising from improper use other than that stated in this manual. Although considerable care has been taken to ensure a correct and suitably comprehensive description of all relevant product components, this manual may nonetheless contain errors and inaccuracies.
-
Page 3: Table Of Contents
Connect the camera to a WAN ............... Get access to the camera ................Get access via web browser ..............Get access via Siqura Device Manager ............ Get access via UPnP ................Log on to the camera ................Install the videoplayer plug-in ............... - Page 4 Contents 10.4 Picture Overlay ..................10.5 Privacy Mask ..................10.6 ROI ....................10.7 Target Cropping .................. Events ....................... 11.1 Motion Detection ................. 11.2 Video Tampering ................. 11.3 Alarm Input ..................11.4 Alarm Output ..................11.5 Exception ................... 11.6 Audio Exception Detection ..............11.7 Defocus Detection ................
-
Page 5: About This Manual
All product-specific manuals, such as Quick Start Guides, Installation Manuals and User Manuals, are available as PDF download at www.siqura.com. We advise you to make sure that you have the latest version of this manual. To obtain the technical specifications of a camera, download the datasheet of the specific model. -
Page 6: Safety And Compliance
Safety and compliance This chapter provides safety instructions and compliance information. It also tells how to dispose of the product at the end of its service life. In This Chapter 2.1 Safety instructions....................6 2.2 Compliance information................... 8 Safety instructions These instructions are intended to make sure that the user can use the product correctly and avoid danger or property loss. - Page 7 Use the unit under conditions where the temperature remains within the range given in the Technical Specifications of this product. You can download the datasheet of the camera at www.siqura.com. ● Do not install the camera in a dusty or damp environment, and do not expose it to high electromagnetic radiation.
-
Page 8: Compliance Information
Safety and compliance Compliance information FCC compliance This equipment has been tested and found to comply with the limits for a digital device, pursuant to part 15 of the FCC Rules. These limits are designed to provide reasonable protection against harmful interference when the equipment is operated in a commercial environment. -
Page 9: Connect To Network
Connect to network This chapter gives instructions for connecting the camera to the network. In This Chapter 3.1 System requirements....................9 3.2 Connect the camera to a LAN................. 10 3.3 Connect the camera to a WAN................11 System requirements To open communication with the camera, you need: ●... -
Page 10: Connect The Camera To A Lan
Connect the two devices with a network cable. Open the web interface of the camera from a web browser on the computer. For details, see Get access via web browser. For information about Siqura Device Manager, see Get access via Siqura Device Manager. Default settings Out of the box, the camera has these settings: ●... -
Page 11: Connect The Camera To A Wan
Connect to network ● DHCP: enabled ● UPnP: enabled ● Logon: not required Add the camera to the intended subnet Via the web interface of the camera, you can change its network settings to add it to the subnet it will be used in. On the Network page, click the TCP/IP tab. -
Page 12: Dynamic Ip Connection
Connect to network Dynamic IP connection Before you start, obtain a dynamic IP address from an Internet Service Provider (ISP). With the dynamic IP address, you can connect the network camera via a modem or a router. To connect the network camera via a router Establish a connection between the network camera and the router. - Page 13 Connect to network To set private domain name resolution Install and run the IP Server software on a computer with a static IP. Access the network camera through the LAN through a web browser. On the DDNS tab of the Network page in the camera, select Enable DDNS. In the DDNS Type list, select IPServer.
-
Page 14: Get Access To The Camera
If no user accounts have been created, the Live View page is opened directly. Get access via Siqura Device Manager Siqura Device Manager is a Windows-based software tool that you can use to manage and configure Siqura IP cameras and video encoders. The tool automatically locates Siqura devices on the network and offers you an intuitive interface to set and manage network settings, configure devices, show device status, and perform firmware upgrade. -
Page 15: Change The Network Settings With Siqura Device Manager
If no user accounts have been created, the Live View page is opened directly. Change the network settings with Siqura Device Manager With Siqura Device Manager, you can directly change the network settings of the camera. To assign a static IP address Go to the list of detected devices, and then right-click the entry for the camera. -
Page 16: Get Access Via Upnp
Get access to the camera To assign a DHCP server Record the MAC address of the camera (see the Serial no. column in Siqura Device Manager) for future identification In the list of detected devices, right-click the device with the network property that you would like to change. -
Page 17: Log On To The Camera
Get access to the camera Log on to the camera By default, users can freely open the web interface of the camera. They are not required to log on. Admin account Out of the box, there is one user account. This is the built-in "admin" user with password "1234". -
Page 18: Install The Videoplayer Plug-In
Get access to the camera Note: The IP address of the camera gets locked after seven failed passwords attempts for the admin and five attempts for the user/operator. Install the videoplayer plug-in For (live) video viewing and operating the camera, a videoplayer plug-in is needed. If the plug-in is not detected you are prompted to download and install it. -
Page 19: Live View
Live View The Live View page is the home page of the web interface. It is shown when you successfully connect to the camera. What this page is for On the Live View page, you can view real-time video, capture images and configure various video settings. - Page 20 Live View Menu The vertical menu on the left gives access to the pages of the web interface. Clicking an entry directly opens the associated page. Live View window This area is used to display live video from the connected camera. Toolbar The horizontal bar at the bottom of the page contains two groups of buttons.
- Page 21 Live View Buttons (right side) Description Stops Live View (screen goes blank) Starts Live View Captures the image Starts a recording Stops a recording Enables digital zoom (e-PTZ) Disables digital zoom (e-PTZ) Opens Audio Volume control Enables you to control audio volume by dragging the slider Manual recordings and snapshots Clicking the Start Recording button starts a manual recording.
- Page 22 Live View Note: The direction buttons are not available if your camera model supports lens movement only. PTZ Speed slider Use the PTZ Speed slider to adjust the speed of pan/tilt movements. Drag to the right to increase speed and to the left to decrease speed. Zoom/Focus/Iris buttons Zoom out/in Focus far/near...
- Page 23 Live View Set preset Call preset Delete preset To set a preset In the PTZ control panel, select a preset number from the preset list. Use the PTZ control buttons to move the lens to the desired position. - Pan the camera to the right or left. - Tilt the camera up or down.
- Page 24 Live View Set patrol Add preset Start patrol Delete preset Stop patrol Move preset down Delete patrol Move preset up To create a patrol In the PTZ panel, click the Patrol tab. Select a Patrol Path number. Click Set. Click Add. In the Preset list, select a preset number.
-
Page 25: Playback
Playback What this page is for On the Playback page, you can view recorded video stored on a network disk or on the SD card. To search for recorded video On the Playback page, go to the calender on the right. Select the date you need. -
Page 26: Additional Functions
Playback Task Action Button To start playback Click Start To pause playback Click Pause To stop playback Click Stop To accelerate playback speed Click Fast forward To reduce playback speed Click Slow forward To advance one frame Click Single frame Additional functions The buttons below are located on the right side of the toolbar. -
Page 27: System
System The System page is the central place for viewing and configuring device and firmware related information and settings. On the various tabs, you can adjust the time settings, reboot the camera, restore the default settings, upgrade the firmware, view logs, and configure RS-485 and local settings. -
Page 28: Time Settings
System In Device No., type the camera number. Click Save. Reference information The non-editable content on this tab serves as reference information for maintenance or future configuration of the camera. Time Settings System > Time Settings What this tab is for On the Time Settings tab, you can set the device date and time manually or use an NTP server. -
Page 29: Upgrade & Maintenance
System Click Test. The connection to the time server is tested. If your settings are correct, click Save. Note: If the camera is connected to a public network, use an NTP server that has a time synchronisation function, such as the server at 224.0.1.1. If the camera is set up in a customised network, NTP software can be used to establish an NTP server for time synchronisation. -
Page 30: Reboot The Camera
System What this tab is for Use the Upgrade & Maintenance tab for the following tasks: ● Reboot the camera ● Restore the factory-default camera settings, ● Export/Import a camera configuration file ● Upgrade the camera firmware Reboot the camera If there are connectivity problems or if an error occurs, reboot the camera. -
Page 31: Rs-485
Reboot the camera when the import has completed. Upgrade the system We advise you to visit www.siqura.com and check if new firmware for your camera is available. To upgrade the system, download the latest firmware file to your computer and complete the steps below. -
Page 32: Log
System System > Log What this tab is for On the Log tab, you can view and export information kept in the system logs of the camera. This information is often useful when you are troubleshooting occurred issues. To perform a search In the Major Type and Minor Type lists, select the filter type to be applied. -
Page 33: Local Configuration
System Local Configuration System > Local Configuration What this tab is for On the Local Configuration tab, you can configure Live View settings and set the paths to the storage folders for snapshots, clips and downloads. Live View Parameters Use this section to set the protocol type and live view performance. To configure the Live View parameters Select the protocol to be used. - Page 34 System Record File Settings Use this section to set the file size and the paths to the storage folders for video you recorded with your web browser. To set the file size and the paths to your storage Set the packed size of manually recorded and downloaded video files to 256M, 512M or This sets the maximum file size for recordings to the selected value.
-
Page 35: Security
Security On the Security page, you can manage user accounts, configure authentication settings and enable an IP address filter. In This Chapter 8.1 User Management....................35 8.2 Authentication...................... 36 8.3 IP Address Filter....................38 User Management Security > User Management What this tab is for The User Management tab is the place where the admin user adds, modifies and deletes user accounts. -
Page 36: Authentication
Security Note: For better protection, especially in high-security systems, we advise you to change the password at regular intervals. User management Up to 31 user accounts can be created. Two user levels are available: Operator and User. Per user, different permissions can be assigned. To add a user account Click Add. -
Page 37: Anonymous Visit
Security RTSP Authentication From a security perspective, it may be undesirable that users can freely connect to the camera over RTSP to view a video stream. With RTSP Authentication, it is possible to restrict access to users with a valid account. On attempting to start an RTSP stream, users are prompted to provide a user name and password. -
Page 38: Ip Address Filter
Security IP Address Filter Security > IP Address Filter On the IP Address Filter tab, you can deny/allow access to the camera from specific IP addresses. To turn on the IP address filter Select Enable IP Address Filter. In the IP Address Filter Type list, select Forbidden or Allowed, as required. Set up the IP Address Filter list (see below). -
Page 39: Network
Network On the Network page, you can configure the TCP/IP, DDNS, SNMP, 802.1X, QoS, NAT, HTTPS, Mail, and FTP settings of the camera. In This Chapter 9.1 TCP/IP.........................39 9.2 DDNS........................41 9.3 PPPoE........................43 9.4 SNMP........................44 9.5 802.1X........................ 45 9.6 QoS........................45 9.7 NAT........................ -
Page 40: Basic Settings
Network What this tab is for On the TCP/IP tab, you can configure the basic network settings, the DNS server settings and the port settings. Basic settings The TCP/IP settings must be properly configured before you operate the camera over the network. -
Page 41: Ddns
Network DNS Server The Preferred DNS Server is the primary domain name server that translates domain names and host names into the corresponding IP addresses. The Alternate DNS Server is a second domain name server that is used if the Preferred DNS Server is unavailable. To configure the DNS Server settings In Preferred DNS Server and Alternate DNS Server, type the IP addresses of the two DNS servers. - Page 42 Network Note: Registration on the DDNS server is required before you configure the DDNS settings of the camera. To turn on DDNS Select Enable DDNS. In the DDNS Type list, select the DDNS type you will be using. Configure the DDNS settings for the selected type as described below . Click Save.
-
Page 43: Pppoe
Network PPPoE Network > PPPoE What this tab is for On this tab, you can configure the PPPoE settings of the camera. The Point-to-Point Protocol over Ethernet (PPPoE) enables users to transfer data securely. To turn on PPPoE Select Enable PPPoE. For PPPoE access, type the user name and password (2x). -
Page 44: Snmp
Network SNMP Network > SNMP What this tab is for On the SNMP tab, you can turn on SNMP and configure its settings to get the camera status, parameters and alarm related information and manage the camera remotely when it is connected to the network. -
Page 45: Qos
Network A reboot is required for the settings to take effect. 802.1X Network > 802.1X What this tab is for The camera supports the IEEE 802.1X standard. On this tab, you can turn on this feature so that the camera data is secured and user authentication is needed when connecting the camera to the network protected by IEEE 802.1X Before you continue The authentication server must be configured. -
Page 46: Nat
Network Differentiated Services Code Point (DSCP) Differentiated Services (DiffServ, or DS) is a method for adding QoS to IP networks. In routed networks, critical network traffic such as video and audio streams, which require a relatively uninterrupted flow of data, can get blocked due to other traffic. DiffServ can be used to classify network traffic and give precedence - that is, low-latency, guaranteed service, to high-priority traffic. -
Page 47: Https
Network UPnP UPnP is a networking architecture that provides compatibility among networking equipment, software and other hardware devices. The UPnP protocol allows devices to connect seamlessly and to simplify the implementation of the networks in the home and corporate environments. To turn on UPnP Select Enable UPnP™. - Page 48 Network Certificates To implement HTTPS on the camera, you need to install an HTTPS certificate. You can use a self-signed certificate or one created by a Certificate Authority (CA). CA-issued certificates provide a higher level of security and inspire more trust than self-signed certificates. Self- signed certificates are often installed for test purposes or as a temporary solution until a CA- issued certificate has been obtained.
-
Page 49: Mail
Network Item Description Country Two-letter country code (where the certificate is to be used) Hostname/IP Host name or IP address of the device to be certified Password (Strong) Password State or province Administrative region in which the organisation is located Locality City/Location where the organisation is based Organization... -
Page 50: Ftp
Network In SMTP Server, type the IP address or host name of the SMTP server (for example, smtp.263xmail.com) In SMTP Port, type the port number of the SMTP port. The default TCP/IP port for SMTP is 25 (not secured). The SSL SMTP port is 465. In the E-mail Encryption list, select SSL, if this is required by the SMTP server. - Page 51 Network If the FTP server supports anonymous access, you can select Anonymous. Authorisation details are not required then. In the Directory Structure list, select the root, parent or child directory. This sets the folder on the FTP server assigned to the FTP client. - root: use this if the client is allowed access to the server root folder.
-
Page 52: Video/Audio
Video/Audio On the Video/Audio page, you can configure the settings for video and audio streaming, picture adjustment, text and picture overlays, privacy masks, the region of interest (ROI) and target cropping. In This Chapter 10.1 Streaming......................52 10.2 Picture Adjustment....................54 10.3 Text Overlay.......................57 10.4 Picture Overlay.................... - Page 53 Video/Audio The main stream is usually for recording and live viewing with good bandwidth, whereas the sub stream and third stream can be used for live viewing when the bandwidth is limited. In the Video Type list, select Video&Audio or Video stream. The audio signal is recorded only if Video&Audio is selected.
-
Page 54: Picture Adjustment
Video/Audio The higher the smoothing value, the better the fluency of the stream will be. The video quality may not be satisfactory, though. The lower the smoothing value, the higher the quality of the stream will be. It may not appear as fluent, though. -
Page 55: Image Adjustment
Video/Audio Day/Night switching To guarantee the image quality in different illuminations, the camera provides two sets of parameters for the user to configure. ● Day/Night Auto-Switch settings ● Day/Night Scheduled Switch settings Day/Night Auto-Switch settings The settings described in the following paragraphs are available if you select Auto-Switch. Image Adjustment Use the Image Adjustment sliders to adjust the image quality. -
Page 56: Image Enhancement
Video/Audio In AUTO mode, the power of the IR LED changes automatically according to the actual luminance. For example, if the current scene is bright enough, the IR LED adjusts itself to lower power. If the scene is not bright enough, the IR LED adjusts itself to higher power. In Manual mode, you can manually set the value of the distance between the IR camera and the object, to adjust the power of the IR LED. -
Page 57: Text Overlay
Video/Audio Other Video output may vary per camera model. Some of the cameras support CVBS, SDI, or HDMI output. Refer to the actual camera model for details. ● Local Output: Select ON to enable analogue video output via the BNC connector on the back panel of the camera. -
Page 58: Picture Overlay
Video/Audio OSD Items The camera name, date and time information and custom text overlays can be superimposed onto the video images. To add the camera name and date/time information Select Display Name, Display Date and Display Week as needed. In Camera Name, type the camera name. In the Time Format, Date Format, Display Mode, OSD Size and Font Color lists, select the required formatting. -
Page 59: Privacy Mask
Video/Audio Locate the picture and select it. Click Upload. Select Enable Picture Overlay. In the Live View window, drag the OSD frame to position it as needed. Click Save. The X Coordinate and Y Coordinate values indicate the location of the picture in the image. -
Page 60: Roi
Video/Audio 10.6 Video/Audio > ROI What this tab is for On the ROI tab, you can draw a Region of Interest (ROI). ROI encoding helps to discriminate the ROI and background information in video compression, which means, the technology assigns more encoding resources to the region of interest. This increases the quality of the ROI, whereas the background information is less focused. -
Page 61: Target Cropping
Video/Audio In Region Name, type a name for the region. Click Save. To remove all regions Click Clear All. Click Save. To configure a dynamic region for ROI (Optional) Select Face Tracking. The captured face picture is set as a region of interest. Note that the face detection function must be supported and turned on, to enable the face tracking function. - Page 62 Video/Audio In the Stream Type list, select Third Stream. In the Cropping Resolution list, select the cropping resolution for the video display of the target area. A red rectangle is displayed on the live video to mark the target area. Drag the rectangle to position the target area as desired.
-
Page 63: Events
Events This chapter explains how to configure the network camera to respond to events, such as motion detection, video tampering, alarm input, alarm output, and exception. These events can trigger the linkage methods, such as Notify IP Server, Send Email, and Trigger Alarm Output. -
Page 64: Motion Detection
Events 11.1 Motion Detection Events > Motion Detection What this tab is for Motion Detection detects moving objects in the configured surveillance area. A series of actions can be taken when an alarm is triggered. On the Motion Detection tab, you can turn on Motion Detection and configure the settings of this function. - Page 65 Events (Optional) Drag the slider to set the sensitivity of the detection. Click Save. To set the arming schedule On the Arming Schedule tab, drag your mouse pointer across the required day(s) to set the arming schedule. A Copy button appears as you move your pointer across the schedule. You can click it to copy the settings of a specific day to another day.
-
Page 66: Video Tampering
Events Set the arming schedule and linkage method as in the normal configuration mode. Click Save. To configure settings with D/N switch set to Auto-Switch Draw the detection area as described for the normal configuration mode. Up to eight areas are supported. In the Switch Day and Night Settings list, select Auto-Switch. - Page 67 Events What this tab is for On the Video Tampering tab, you can configure the camera to raise an alarm when the lens is covered and to link specific response actions to such an event. Steps Video Tampering configuration involves the following steps: On the Area Settings tab, you define the area to be monitored.
-
Page 68: Alarm Input
Events 11.3 Alarm Input Events > Alarm Input What this tab is for The camera has alarm input functionality for alarm application. On the Alarm Input tab, you can enable alarm input handling and configure the related settings. Steps Alarm Input configuration involves the following steps: On the Alarm Input tab, you enable alarm input handling. - Page 69 Events You can click a time section to edit, save or delete it. Click Save. To set the alarm actions On the Linkage Method tab, select the required actions (see descriptions below). Options: Send Email, Notify Surveillance Center, Upload to FTP, Trigger Alarm Output, Trigger Channel.
-
Page 70: Alarm Output
Events 11.4 Alarm Output Events > Alarm Output What this tab is for The camera has alarm output functionality for alarm application. On the Alarm Output tab, you can configure the related settings and activate/deactivate a manual alarm. To configure the Alarm Output settings In the Alarm Output No. -
Page 71: Exception
Events 11.5 Exception Events > Exception What this tab is for On the Exception tab, you can link actions to the occurrence of an Exception Alarm. The exception type can be HDD Full, HDD Error, Network Disconnected, IP address Conflicted and Illegal Login to the camera. -
Page 72: Audio Exception Detection
Events 11.6 Audio Exception Detection Events > Audio Exception Detection What this tab is for The Audio Exception Detection function detects abnormal sounds in the surveillance scene, such as the sudden increase or decrease of the sound intensity. Specific actions can be taken when the alarm is triggered. -
Page 73: Defocus Detection
Events Sound Intensity Threshold Sound Intensity Threshold range: [1-100]. It can filter the sound in the environment. The louder the environmental sound, the higher the value should be. You can adapt the threshold to the actual environment. To set the arming schedule On the Arming Schedule tab, drag your mouse pointer across the required day(s) to set the arming schedule. -
Page 74: Scene Change Detection
Events What this tab is for The image blur caused by the defocusing of the lens can be detected. On the Defocus Detection tab, you can turn on the detection and define actions to be taken when the the event occurs. To set up defocus detection Select Enable. - Page 75 Events What this tab is for Scene Change Detection detects changes of the surveillance environment caused by external factors, such as the intentional rotation of the camera. On the Scene Change Detection tab, you can turn on the detection and define actions to be taken when the event occurs. Note that Scene Change Detection varies per camera model.
-
Page 76: Face Detection
Events Trigger Channel Video is recorded when an event occurs. Before recording can start, the recording schedule on the Record Schedule tab of the Storage page must be set. 11.9 Face Detection Events > Face Detection What this tab is for The Face Detection function detects a face appearing in the surveillance scene. - Page 77 Events The sensitivity value ranges from 1 to 5. The higher the value, the more easily the face can be detected. To set the arming schedule On the Arming Schedule tab, drag your mouse pointer across the required day(s) to set the arming schedule.
-
Page 78: Intrusion Detection
Events 11.10 Intrusion Detection Events > Intrusion Detection What this tab is for The Intrusion detection function detects people, vehicles or other objects which enter and loiter in a predefined virtual region. On the Intrusion Detection tab, you can enable and set up the function, and define the actions to be taken when the alarm is triggered. - Page 79 Events Range: [0 s ~ 10 s]. This is the threshold for the duration of the object loitering in the region. If you set the value to 0, the alarm is triggered immediately after the object has entered the region. Drag the Sensitivity slider to set the sensitivity of the detection.
-
Page 80: Line Crossing Detection
Events 11.11 Line Crossing Detection Events > Line Crossing Detection What this tab is for The Line Crossing Detection function detects people, vehicles or other objects which cross a predefined virtual line. On the Line Crossing Detection tab, you can enable and set up the function, and define the actions to be taken when the alarm is triggered. - Page 81 Events Range: [1-100]. The higher the value, the more easily the line crossing action can be detected. Repeat the steps above to configure other lines. Up to 4 lines can be set. You can click Clear to delete all existing lines. Click Save.
-
Page 82: Region Entrance Detection
Events 11.12 Region Entrance Detection Events > Region Entrance Detection What this tab is for The Region Entrance Detection function detects people, vehicles or other objects that enter a predefined virtual region from outside this region. On the Region Entrance Detection tab, you can enable and set up the function, and define the actions to be taken when the alarm is triggered. - Page 83 Events Repeat the steps above to configure other regions. Up to 4 regions can be set. You can click Clear to delete all existing regions. Click Save. To set the arming schedule On the Arming Schedule tab, drag your mouse pointer across the required day(s) to set the arming schedule.
-
Page 84: Region Exiting Detection
Events 11.13 Region Exiting Detection Events > Region Exiting Detection What this tab is for The Region Exiting Detection function detects people, vehicles or other objects that exit a predefined virtual region. On the Region Exiting Detection tab, you can enable and set up the function, and define the actions to be taken when the alarm is triggered. - Page 85 Events Repeat the steps above to configure other regions. Up to 4 regions can be set. You can click Clear to delete all existing regions. Click Save. To set the arming schedule On the Arming Schedule tab, drag your mouse pointer across the required day(s) to set the arming schedule.
-
Page 86: Unattended Baggage Detection
Events 11.14 Unattended Baggage Detection Events > Unattended Baggage Detection What this tab is for The Unattended Baggage Detection function detects objects left in the predefined region such as baggage, purses, dangerous materials, etc.. On the Unattended Baggage Detection tab, you can enable and set up the function, and define the actions to be taken when the alarm is triggered. - Page 87 Events Range: [5 s ~ 3600 s]. This is the threshold for the duration that objects are left behind in the region. If you set the value to 10, the alarm is triggered after the object was left and has been in the region for ten seconds. Drag the Sensitivity slider to set the sensitivity of the detection.
-
Page 88: Object Removal Detection
Events 11.15 Object Removal Detection Events > Objects Removal Detection What this tab is for The Object Removal Detection function detects if objects have been removed from a predefined region, such as exhibits on display. On the Object Removal Detection tab, you can enable and set up the function, and define the actions to be taken when the alarm is triggered. - Page 89 Events Range: [5 s ~ 3600 s]. This is the threshold for the duration that objects have been removed from the region. If you set the value to 10, the alarm is triggered ten seconds after the object was removed from the region. Drag the Sensitivity slider to set the sensitivity of the detection.
-
Page 90: Counting
Events 11.16 Counting Events > Counting What this tab is for The Counting function is used to calculate the number of objects entering or exiting a certain configured area and is widely applied to roads, entrances or exits. Counting accuracy For better counting accuracy: ●... - Page 91 Events Draw Line Change Direction Delete Reset Counter To set the detection line Select Enable Counting. (Optional) Select Enable OSD Overlay. The real-time number of objects entering and exiting is displayed as an overlay over the live video. You can adjust the position of the OSD according to your needs. Click Draw Line.
- Page 92 Events Click Counting to calculate the data. Select the export format. Options: Table, Bar Chart, Line Chart. If you select Table, there is an Export button to export the data in an Excel file. Note: To avoid compromising the accuracy of the data, we advise you not to adjust the camera lens after completing the installation.
-
Page 93: Storage
Storage Before you configure recording and storage settings, make sure that a network storage device is available within the network or that an SD card is inserted in your camera. In This Chapter 12.1 HDD Management....................93 12.2 Record Schedule....................94 12.3 Capture...................... -
Page 94: Record Schedule
Storage Available storage Network disks added via the Net HDD tab or an SD card inserted into the camera will be available in the HDD Management table. You can see the capacity, free space, status type and property of each item. Up to eight NAS disks can be connected to the camera. If the status is Uninitialised you need to format the disk or card before you can use it. -
Page 95: Storage Medium
Storage Storage medium By default, the files of recordings and snapshots are stored on the SD card (if supported) or on a network disk. Network disks can be added via the Net HDD tab. On the HDD Management tab, you can initialise connected disks and the SD card. To set up scheduled recording Select Enable. -
Page 96: Capture
Storage Recording triggered by Motion | Alarm Video is recorded when the external alarm is triggered or motion is detected. Besides configuring the recording schedule, you have to configure the settings on the Motion Detection and the Alarm Input settings interfaces. For more information, see the descriptions of the Motion Detection and Alarm Input tabs (Event page). -
Page 97: Net Hdd
Storage A Copy button appears as you move your pointer across the schedule. You can click it to copy the settings of a specific day to another day. You can click a time section to edit, save or delete it. Click Save. - Page 98 Storage In the Server Address column, type the IP address of the server which houses the network disk. In the File Path column, type the path to the server. For information about the file path, contact your system administrator or refer to the user manual of your NAS.
-
Page 99: Index
Record Schedule........94 Region Entrance Detection....... 82 Region Exiting Detection......84 Get access to the camera......14 ROI............60 Get access via Siqura Device Manager..14 RS-485..........31 Get access via UPnP........ 16 Get access via web browser..... 14 Safety and compliance......6 Safety instructions........6... - Page 100 Index Target Cropping........61 TCP/IP..........39 Text Overlay.......... 57 Time Settings.........28 Unattended Baggage Detection....86 Upgrade & Maintenance......29 User Management........35 Video Tampering........66 Video/Audio........... 52...
Need help?
Do you have a question about the FD1103 and is the answer not in the manual?
Questions and answers