Table of Contents
Advertisement
Quick Links
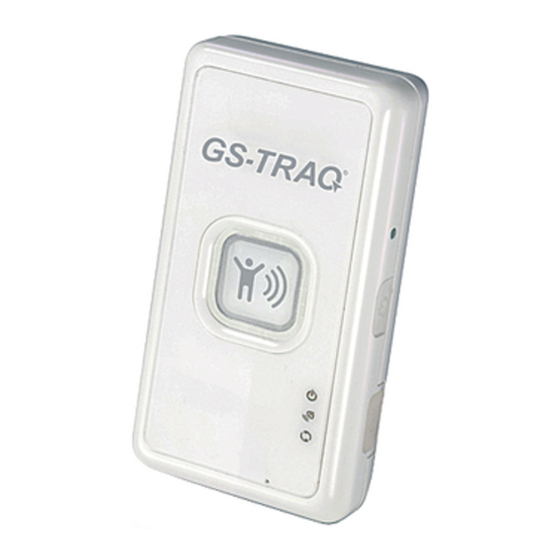
TR-203A Personal Tracker
Globalsat Technology Corporation
16F., No. 186, Jian-Yi Road, Chung-Ho City, Taipei Hsien 235,
Taiwan
Tel: 886.2.8226.3799/ Fax: 886.2.8226.3899
service@globalsat.com.tw
www.globalsat.com.tw
User's Manual
V 1.0
1
USGlobalSat Incorporated
1308 John Reed Court, City of Industry, CA
91745
Tel: 626.968.4145 / Fax: 626.968.4373
sales@usglobalsat.com
www.usglobalsat.com
Advertisement
Table of Contents

Subscribe to Our Youtube Channel
Related Manuals for Globalsat GS-TRAQ TR-203A


Summary of Contents for Globalsat GS-TRAQ TR-203A
- Page 1 TR-203A Personal Tracker User’s Manual V 1.0 Globalsat Technology Corporation USGlobalSat Incorporated 16F., No. 186, Jian-Yi Road, Chung-Ho City, Taipei Hsien 235, 1308 John Reed Court, City of Industry, CA Taiwan 91745 Tel: 886.2.8226.3799/ Fax: 886.2.8226.3899 Tel: 626.968.4145 / Fax: 626.968.4373 service@globalsat.com.tw...
- Page 2 Globalsat Technology Corporation or USGlobalsat, Inc. Globalsat/USGlobalsat hereby grants the right to download one (1) copy of this manual onto a hard drive for personal use. This manual is copyrighted and may contain proprietary information that is subject to change without...
-
Page 3: Table Of Contents
TABLE OF CONTENTS 1. Warning ..............................4 2. Welcome ..............................5 3. Introduction and Features ........................6 3.1 Introduction..........................6 3.2 LED Indicators........................7 4. Device Operation ..........................8 4.1 Device charging ........................8 4.2 SIM card Installation......................9 4.2 Power ..........................10 4.3 Emergency button ......................10 4.4 Use the carry bag .......................12 5. -
Page 4: Warning
USE RESPONSIBLY. READ ALL INSTRUCTIONS AND SAFETY INFORMATION BEFORE USE TO AVOID INJURY. Globalsat Technology Corporation / USGlobalsat, Inc. will not accept any responsibility whatsoever for accidents resulting from failure to observe common sense precautions. Your personal judgment, traffic regulations, and common sense must always take precedence over any directions produced by GPS receiver or the mapping software. -
Page 5: Welcome
2. Welcome Thank you for purchasing the GlobalSat TR-203A Personal Tracker. The GlobalSat TR-203A Personal Tracker is a compact and portable tracking device. In addition to its tracking abilities, the unit incorporates a wide array of custom configurations for users with unique needs. In result, the TR-203A tracker’s versatility... -
Page 6: Introduction And Features
TR-203A is a personal tracking device with fast acquisition time. It is compact, portable and stylish in design with GPS / GSM / GPRS wireless network. User can easily remotely configure TR-203A, and then displays the location on Globalsat Web Service. SIM card holder... -
Page 7: Led Indicators
3. Introduction and Features (Continued) 3.2 LED Indicators Power Status LED Orange State TR-203A is being charged. Battery power is low GPS LED Blink Quickly (Once per second) Blink Slowly (Once every 3 seconds) State TR-203A does not get GPS fix TR-203A gets GPS fix GSM LED Blink Quickly (Once per second) -
Page 8: Device Operation
4. Device Operation 4.1 Device charging First time users, rechargeable battery requires a complete charge before using TR-203A device. Therefore, to maximize your device’s battery life proceed by performing the steps listed below. Using the AC Adapter charge method: 1. Connect TR-203A to its supplied AC power adapter cable. 2. -
Page 9: Sim Card Installation
4. Device Operation (Continued) 4.2 SIM card Installation With the metal contacts facedown and the notch on the SIM card left side, insert the SIM card into the SIM holder. You could take out the SIM card by lightly pressing the SIM card with your nail. Note: Refer to your mobile phone manual to disable the SIM PIN entry function by your mobile phone . -
Page 10: Power
4.2 Power To turn the device “ON”, press and hold the power button until you feel the device vibrating. To turn the device “OFF”, press and hold the power button until you feel the device vibrating. 4. Device Operation (Continued) 4.3 Emergency button Shortly press the emergency button to make TR-203A connect to Free Web Service. - Page 11 Press and hold the emergency button until you feel the device vibrating. TR-203A will send the emergency report to the preset phone number or the free web service website. Note: .Please set the SOS parameters on free web service website before using emergency button.
-
Page 12: Use The Carry Bag
4. Device Operation (Continued) 4.4 Use the carry bag For human use, wear the carry bag on the belt like the picture above. For pet use, wear the carry bag like the picture above. -
Page 13: Free Web Service
After putting TR-203A in the carry bag, you could take out it by pressing on the bottom of the bag and pushing outward TR-203A according to the direction on the picture. Belt clips, holsters and similar accessories, other than the approved accessory for this product, may only be used if the assembly does not have a metallic component. -
Page 14: Account Creation
telecom operator. 5. Free Web Service (Continued) 5.2 Account creation Please turn on your web browser and go to http://traq.gstraq.com/ Next, click the Register hyperlink. Read Agreement, check I Agree, and click Next button. - Page 15 5. Free Web Service (Continued) Check the preparation again and click Next button. Select TR-203A for Device Type, your Time Zone, enter Device IMEI and Serial No., select your Country code, enter Device Phone Number, Device Name, and click Next button.
- Page 16 5. Free Web Service (Continued) Create your login profile by entering User Name, Password, and Email, and click Next button. Please print this page or write down your User Name, Password and click “Click to start Setup” button.
- Page 17 Please select your country and telecom operator. Selecting your telecom operator will bring out the concerning GPRS parameters. If you do not find your telecom operator in the pull-down menu or the information in the pull-down menu is incorrect, please click “User Define”. And then please contact your telecom operator about the GPRS parameter.
- Page 18 If TR-203A has received the setup SMS from the system, it will vibrate indicating that it has accepted the command. We suggest you to hold TR-203A, so that you could feel the vibration when it receives the command. If TR-203A does not receive Setup SMS after 5 minutes, you can resend again.
-
Page 19: Add Device In Your Account
5. Free Web Service (Continued) 5.3 Add device in your account Perform the following: Setup Add New Device Then please refer to 5.2 Create Account to enter the concerning information of the device After adding the required information and sending out the SMS, you could switch to use separate device by selecting in the Device pull-down menu on the upper of the webpage. -
Page 20: Set Up Sos Parameters
Please select the device you would like to delete. And then please click Delete Device button. 5.5 Set up SOS parameters SOS Phone Number 1. Perform the following: Setup Setup SOS Number 2. Enter destination phone number to receive emergency SMS. 3. - Page 21 SOS Time Zone 1. Select SOS Time Zone and SOS Report Type 2. Click Send button. 3. Then please call TR-203A. TR-203A will not answer the phone call but connect to this website. Note: .The content of SOS report includes GPS fix date and time. The GPS date and time will be according to the setting of SOS Time Zone.
-
Page 22: Tr-203A Ping
5. Free Web Service (Continued) 5.6 TR-203A Ping Log into your account 1. Select Setup Report mode on the menu bar. 2. Select Ping Report in the pull-down menu of Report Command 3. Enter value for GPS Fix Time. (Range 10~65535 seconds. GPS fix time is the period for tracker to get GPS fix. -
Page 23: Tr-203A Periodic Report
5 Free Web Service (Continued) Free Web Service (Continued) 5.7 TR-203A Periodic Report Periodic Reporting 1. Select Setup Report Mode on the menu bar. 2. Select Period Report in the pull-down menu of Report Command 3. Enter value for Report Interval. (Range 30~65535 seconds) 4. -
Page 24: Tr-203A Motion Report
5. Free Web Service (Continued) 5.8 TR-203A Motion Report Select Setup Report Mode on the menu bar. Select Motion Report in the pull-down menu of Report Command Enter value for Report Interval (Static) (Range 30~65535 seconds) and Report Interval (Moving). (Range 10~65535 seconds) Click Send button. -
Page 25: Stop Tr-203A Periodic Or Motion Report
5. Free Web Service (Continued) 5.9 Stop TR-203A Periodic or Motion Report Disable Periodic or Motion Reporting Select Setup Report Mode on the menu bar. Select Stop Report in the pull-down menu of Report Command Click Send button. TR-203A will stop periodic and motion report. -
Page 26: Tr-203A Geo-Fence Function
5. Free Web Service (Continued) 5.10 TR-203A Geo-fence Function Setup Geo-fence area 1. Select Setup on the menu bar. 2. Select Setup Geo-fencing Parameter. 3. Click on Map Define... - Page 27 Then you could enter a specific address or city or landmark in the field of Address Search and then click Go button. Map will move to the entered location. For example, the map will show as below after entering Washington D.C. Please move the cursor and click on the two points of the map to form a geo-fence area like the screenshot below.
- Page 28 After clicking Save button, please select you want to receive the geo-fence alarm report when tracker gets in the geo-fence area or gets out of the geo-fence area. And then click Send button to send out the setting. Please call TR-203A for connecting to the website for getting the setting. The steps above are for setting geo-fence area.
- Page 29 And then click Send button to send out the setting. Please call TR-203A for connecting to the website for getting the setting.
-
Page 30: Editing Login Profile And E-Mail
5. Free Web Service (Continued) 5.11 Editing login profile and e-mail 1. Select Setup User Information 2. Click Edit. Edit the content and click OK button. -
Page 31: Tr-203A Sim Card Replacement
5. Free Web Service (Continued) 5.12 TR-203A SIM card replacement When replacing telecom operator’s SIM card from the original, be certain, to change phone number on the website. Select Setup Device Information Next, enter new phone number and click the OK button. - Page 32 5. Free Web Service (Continued) In the case, a different telecom operator’s SIM card is desired to replace the original SIM card, then, perform the following steps to alter the phone number and GPRS parameters on the website. Select Setup Device Information Next, enter new phone number and click the OK button.
- Page 33 Click the OK button. If you have not send SMS by Free Web Service over 3 times, proceed to Setup Send Setup SMS Auto Mode. Click Send button Free web service provides 3 pieces of free SMS for configuring TR-203A. If you want to change the configuration after sending 3 pieces of free SMS, please go to Setup Send Setup SMS...
-
Page 34: History Data Information Look Up
5. Free Web Service (Continued) 5.13 History data information look up Free Web Service could store up to 10000 reports from your TR-203A. Otherwise, the 10001 report will replace 1 report and so on. That is to say, if TR-203A periodically reports its location to website every 1 minute, website can store the reports of 7 days. - Page 35 Note: If the value of GPS fix is No Fix, the point will not be displayed on the map. Only 2D and 3D Fix data will be displayed. After clicking View Map Mode button, please click any piece of report to show it on the map.
- Page 36 Please click Save and then select the location you want to save the file. Save as KML format: Please select you want to save all the history reports (All Data) or only save the reports with Fix data (Fix Data). Then please click Download (kml format) button. You will see the window below.
- Page 37 Users have the ability to click on any point to view detailed information.
-
Page 38: Contact Information
6. Contact Information Globalsat Technology Corporation (Taiwan) USGlobalsat, Inc. (North America) www.globalsat.com.tw www.usglobalsat.com service@globalsat.com.tw sales@usglobalsat.com (pre-sales GPS product questions only) (pre-sales GPS product questions only) Technical Support (North America) See our DOWNLOADS and FAQ section on our web-site for GPS driver updates. -
Page 39: Limited Warranty
END OF THIS DOCUMENT ACCORDING TO THE COUNTRY OR REGION IN WHICH THE PRODUCT PURCHASE TOOK PLACE. Globalsat/ USGlobalsat’s warranty obligations for this hardware product are limited to the terms set forth below: Globalsat/ USGlobalsat, as defined below, warrants this hardware product against defects in materials... - Page 40 Globalsat/ USGlobalsat and becomes Globalsat/ USGlobalsat’s property. If a defect arises and a valid claim is received by Globalsat/ USGlobalsat after the first one hundred and eighty (180) days of Warranty period, a shipping and handling charge may apply to any repair or exchange of the product undertaken by Globalsat/ USGlobalsat.
-
Page 41: Limited Warranty (Continued)
IMPORTANT: Do not open the hardware product. Opening the hardware product may cause damage that is not covered by this warranty. Only Globalsat/ USGlobalsat or an authorized service provider should perform service on this hardware product. TO THE EXTENT PERMITTED BY LAW, THIS WARRANTY AND THE REMEDIES SET FORTH ABOVE ARE EXCLUSIVE AND IN LIEU OF ALL OTHER WARRANTIES, REMEDIES AND CONDITIONS, WHETHER ORAL OR WRITTEN, STATUTORY, EXPRESS OR IMPLIED. - Page 42 Globalsat/ USGlobalsat and you agree to follow instructions, including, if requires, arranging the return of the product or part to Globalsat/ USGlobalsat in a timely manner. When providing RMA service requiring the return of the original product or part, Globalsat/ USGlobalsat may require credit card authorization as security for the retail price of the replacement product or part and applicable shipping costs.
- Page 43 Globalsat/ USGlobalsat may repair or exchange defective products and parts with comparable products and parts that comply with local standards. In accordance with applicable law, Globalsat/ USGlobalsat may require that you furnish proof of purchase details and/ or comply with the registration requirements before receiving warranty service.
-
Page 44: Fcc Notices
9. FCC Notices This equipment has been tested and found to comply with the limits for a Class B digital device, pursuant to Part 15 of the FCC Rules. These limits are designed to provide reasonable protection against harmful interference in a residential installation. This equipment utilizes, exhibits and can radiate radio frequency energy and, if not installed and used in accordance with the instructions, may cause harmful interference to radio communications. - Page 45 The availability of some specific channels and/or operational frequency bands are country dependent and are firmware programmed at the factory to match the intended destination. The firmware setting is not accessible by the end user. Your tracking device is a radio transmitter and receiver. It is designed and manufactured not to exceed limits for exposure to radio frequency (RF) energy set by the Federal Communications Commission (FCC) of the U.S.
-
Page 46: European Union Notice
* R&TTE Directive 1999/5/EC Compliance with these directives implies conformity to harmonized European standards (European Norms) that are listed in the EU Declaration of Conformity issued by Globalsat for this product or product family. This compliance is indicated by one of the following conformity markings placed on the product.
Need help?
Do you have a question about the GS-TRAQ TR-203A and is the answer not in the manual?
Questions and answers