Table of Contents
Advertisement
Quick Links
Advertisement
Table of Contents

Subscribe to Our Youtube Channel
Related Manuals for Globalsat TR-151A


Summary of Contents for Globalsat TR-151A
-
Page 1: User Manual
TR-151A / TR-151E Vehicle/Asset Tracker User Manual Version... -
Page 2: Table Of Contents
Table of Content 1. Introduction and Features....................4 1.1 Introduction ......................4 1.2 Features .........................4 1.3 Hardware........................5 2. Start-up.......................... 6 2.1 Accessories ......................6 2.2 Install SIM card and Battery ..................7 2.3 Charging the battery ....................10 2.4 TR-151 with magnetic holder ................... 11 2.5 Turn on/off the device..................... - Page 3 4.5.1 Asking TR-151 to enter Geo-fence mode ............76 4.5.2 Set the SMS default return phone number............83 4.5.3 Set the Maximum GPS Fixing Time ..............84 4.5.4 Set default report mode................. 85 4.5.5 Set SOS phone number ................. 87 4.5.6 Set the Motion Mode’s parameters..............
-
Page 4: Introduction And Features
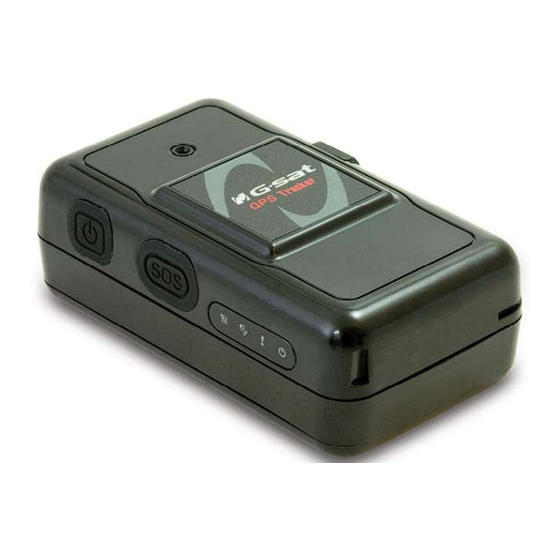
1. Introduction and Features 1.1 Introduction TR-151 is a durable and water resistant GPS/GSM/GPRS tracker. You can install TR-151 on vehicles or assets for tracking. It can send out SMS with its location (longitude and latitude) to user’s cell phone by GSM network or to personal computer by internet network. Then you can track the location of their vehicles or assets. -
Page 5: Hardware
1.3 Hardware TR-151A: Siemens GSM 850/1800/1900 GSM module: TR-151E: Siemens GSM 900/1800/1900 -20° to 55° C Operating temperature: GPS patch antenna Antenna Type: 86.7*48.9*32.5 mm Dimension: 2100mA rechargeable Li-ion battery Battery: For Charging, GPS, GSM and Status. LED indicator: Mini USB port for connecting to PC... -
Page 6: Start-Up
2. Start-up 2.1 Accessories AC charger TR-151 USB Cable Battery Mounting bracket with magnet (optional) TR-151 page 6... -
Page 7: Install Sim Card And Battery
2.2 Install SIM card and Battery Use a coin or screwdriver to loosen the screw on back cover. Lift up the back cover and remove it as the direction shown. TR-151 page 7... - Page 8 Push forward the cover of SIM card slot to the position marked with “OPEN”. Then lift up the cover. Insert the SIM card with its metal contacts facing down and the cut corner at the top left. Plug the battery connector into socket. Be aware that the red wire must be plugged on the top side.
- Page 9 Please put the connector wire under the battery, and then put the battery into battery compartment. NOTE: After installing the battery, the status LED will emit red light. After the LED go out, please wait for 5 seconds before turning on the power. NOTE: Please take out the battery if you do not use TR-151 for a long time.
-
Page 10: Charging The Battery
2.3 Charging the battery Before using TR-151 for the first time, please fully charge it by connecting to AC power adapter under the power-off condition. (The attached battery is specially designed for TR-151. Please do not use other type of battery; otherwise it will damage the device. If you need to change the battery of TR-151, please contact your local dealer.) You can also charge the TR-151 by connect it to PC or Notebook via USB cable. -
Page 11: With Magnetic Holder
2.4 TR-151 with magnetic holder Insert the TR-151 with the Power button side facing out. Push TR-151 into the holder until it clicks in position. TR-151 page 11... - Page 12 There are 4 circular magnets on back of the magnetic holder for attaching TR-151 onto the metal material of vehicle or machine. To remove TR-151, slightly push outward the two sides of holder, and slide out the TR-151. TR-151 page 12...
-
Page 13: Turn On/Off The Device
2.5 Turn on/off the device ● Turn on: After installing the battery, the status LED will emit red light. After the LED go out, please wait for 5 seconds before turning on the power. Press the power button for 3~4 seconds. - Page 14 Power button 1. Power On: Press and hold the power button for 3-4 seconds. The status LED will flash 2 times 2. Power Off: Press and hold the power button for 3-4 seconds. The status LED will flash 1 time. SOS button Press the SOS Button, the status LED will flash 3 times to indicate the button is activated.
-
Page 15: Dip Switch
2.7 DIP switch Enable TR-151 to automatically power You have to press the power button to Switch 1 on when it is connected to external power on TR-151 whether external power. power is connected or not. All LED works as user mode. Make all LED except status LED go off Switch 2 for secret tracking. -
Page 16: Management Setting
3. TR-151 Management Setting 3.1 Install the USB driver Insert the Driver CD into your CD-ROM driver. AutoRun installation window will appear. Click “Install USB Driver” button to install the USB driver. You will see two folders. If your Windows is Vista version, please double click to open “PL2303_USB_Driver_for_Windows_Vista”... -
Page 17: Install, Update, Uninstall The Tr Management Center Program
3.2 Install, Update, Uninstall the TR Management Center program 3.2.1 Install TR Management Center Step 1: Click “English PC Software” button to install the TR Management Center program. TR-151 page 17... - Page 18 Step 2: Click “Next” Step 3: Click "Install" TR-151 page 18...
- Page 19 Step 4: Wait for the program to install Step 5: Click "Finish" when installation is finished TR-151 page 19...
- Page 20 3.2.2 Update TR Management Center If you download a new version of the TR Management Center software from the Globalsat website, you could install the downloaded software to upgrade the TR Management center without un-installing the previous version of TR Management center.
- Page 21 Step 2: Click “Next” Step 3: Select “Modify” and click “Next” TR-151 page 21...
- Page 22 Step 4: Click “Next” Step 5: Click "Install" TR-151 page 22...
- Page 23 Step 6: Wait for upgrading the TR Management Center 2 Step 7: Click “Finish” TR-151 page 23...
- Page 24 3.2.3 Uninstall TR Management Center Step 1: Run "Start" -> "Globalsat" -> "TR Management Center" -> "Uninstall TR Management Center" Press “Yes” Step 2: Uninstall in progress. Close window when finished TR-151 page 24...
-
Page 25: Tr Management Center Screen Introduction
3.3 TR Management Center Screen Introduction Menu Google Map Query Tool Data Output Area Main Tool TR Management Center Main Screen TR-151 page 25... - Page 26 There are five parts of TR Management Center Screen as below. Menu: The basic menu options Shows the trackers' connection status, Network service status and the Main Tools: tracker's latest location Query Tool: Used for searching history data and finding coordinates Data Output Area: Shows the tracker login status, received network data and query results Google Map: Shows the Google Map...
-
Page 27: Tracker And Main Tool Bar
3.3.1 Tracker and Main Tool Bar Main tool is for managing trackers and showing the server status Trackers List Show tracker trace on Google Map display SMS Command Status Network Service Status Latest Tracker’s Location Data TR-151 page 27... -
Page 28: Query Tool
3.3.2 Query Tool Query tool is for looking up for the history data and coordinate. Find history data Data Tool buttons Find Result Tool Coordinate Location Tool TR-151 page 28... -
Page 29: Data Output Area
3.3.3 Data Output Area Data output area is for displaying the Tracker data, log, and query result. The Output area is divided into GPRS Data, GPRS Log and Query Result Tracker Data: Shows the data sent from connected trackers. Only the last 100 entries from each tracker are shown. -
Page 30: Skype Setup
3.4 Skype Setup In stead of sending SMS to trackers by mobile phones, TR Management Center sends SMS to trackers by Skype. You can not only send SMS to trackers for asking report by Skype, but send SMS to set the parameters of TR-151’s function. In order to send SMS by Skype, please complete the following steps to activate the SMS function of Skype. - Page 31 Step 4: Test the Skype SMS function After completing the above process, please check if Skype's SMS functions can work by sending a test message to mobile phone. Follow the SMS messaging procedure below to send a SMS message and check that your Skype is working normally. Sending a test SMS From the Skype menu, select "Tools"...
- Page 32 At the Send SMS interface, add the recipient's mobile phone number Write the content of SMS and click Send SMS button TR-151 page 32...
- Page 33 Step 5: When you launch the TR Management Center program, the following security verification pop-up window will appear in the lower right corner of the screen asking you to allow the TR Management Center to use Skype functions. Click the blue text to request Skype access. Select "Allow this program to use Skype"...
- Page 34 If you accidentally select "Do not allow this program to use Skype", please change this from within the Skype program at "Options -> "Advanced" Note: The exact procedure may vary from the version of Skype. Please refer to the Skype manual for more information.
- Page 35 If the TR Management Center is not allowed to use Skype, please click on the "Change" button and select "Allow this program to use Skype". TR-151 page 35...
-
Page 36: Firewall Setting
3.5 Firewall Setting The TR Management Center sends data via network, so the firewall must be configured to allow external access. When you launch the network service, a Windows Security Alert window will appear. Click on the "Unblock" button to let the TR Management Center to use the network. -
Page 37: Tr Management Center System Requirement
3.6 TR Management Center System Requirement The computer system requirements of the TR Management Center program: 1. The computer must be equipped with at least an Intel Pentium 4 or equivalent AMD CPU, 256MB of RAM and a network card. 2. -
Page 38: Management Operation
4. TR-151 Management Operation 4.1 TR Management Center Basic Setup Before operating the TR Management Center, please set the operation parameters of the TR Management Center in the Basic Setup. It will make the afterward operation work properly. Basic Setup Basic Setup Interface TR-151 page 38... -
Page 39: Tracker Management
Item Function Description TCP Port Set the communication The default is 5000. You can set port for connecting form1024~5000. network Auto start Choose to automatically Network service start network service or not Time Zone Set the time zone SMS Return Set the phone number for phone number receiving the SMS report... -
Page 40: Adding And Setting A Tr-151 Tracker
4.2.1 Adding and setting a TR-151 tracker You can add a new tracker by making TR-151 Setup, please follow the steps below. Step 1: Connect the TR-151 to the computer's USB port by the USB cable. Step 2: Open the battery cover and adjust DIP Switch 3 to "On". Step 3: Turn on the TR-151. - Page 41 Click on Scan COM Port to find the port the TR-151 is connected to Note: If the scan fails to locate TR-151, please try again with the other USB port. Note: If your SIM card asks for SIM PIN entry, a window will appear prompting you for the PIN password.
- Page 42 4.2.1.1 TR-151 Basic setup TR-151 Basic setup Tracker Information: TR-151's Basic Information: Item Description Version of TR-151 firmware. Firmware Version International Mobile Equipment Identity IMEI Code On: SMS sent from TR-151 will be converted to local time. Off: SMS Set Time Zone sent from TR-151 will include the Coordinated Universal Time (UTC).
- Page 43 If “Return Phone Number” and “SMS Default Return Phone Number” are both blank, TR-151 will send report back to caller ID. Maximum GPS fixing time: Item Description The maximum time allowed for a GPS fix. If TR-151 cannot get fixed Maximum GPS fixing of the location within the specified time, TR-151 will turn off GPS and time...
- Page 44 4.2.1.2 Default report mode Default report mode setting: Item Description TR-151 will automatically go into the "Default report mode" when it Default report mode is powered on. There are 7 report modes: SMS Immediate Report, SMS Period Report, Stop Report (Standby), GPRS Immediate Report, GPRS disconnect and period Motion report...
- Page 45 0 – TEXT Format TR-151 2008/3/6 18:50:6 N24.5981,E121.2924 GPS fixed" 1 – NMEA Format ?0,352023006488395,0,3,130308,061740,E12129.3241,N2459.8051,134.0,0.04,0.00,4,4. Set the number of reports to transmit in "Period Report" mode. Number of reports The method of the position report be sent by SMS or GPRS or Report Method SMS+GPRS The phone number for receiving the SMS of "Default report mode"...
- Page 46 4.2.1.3 Sleep mode setup Item Description Default Remarks Regular report The interval of sending position report 30 minutes Unit is minute interval under sleeping mode. During the interval, TR-151 will temporarily exit from sleeping mode Alarm report The interval of sending position report 30 seconds Can be set from interval when TR-151 senses vibration under...
- Page 47 4.2.1.4 TR-151 GPRS setting Item Description Remarks Server IP address or server host IP The fixed IP or Domain Name for the Domain name computer running the TR Management Center Port The communication port for Default is 5000 connecting to GPRS network Can be set from 1024~5000 The name of your network The APN depends on the SIM card...
- Page 48 APN Settings in Taiwan’s provided Service Provider Far East one fetnet01 Trans Asia Telecommunications hank Chunghwa Telecom emome or internet MOBITAI Communications gprs1 Taiwan Mobile Internet KG Telecom internet Once you have entered all of the settings, click on "OK" to set up the TR-151 or click on "Cancel" to cancel the setup.
-
Page 49: Tracker Management
4.2.2 Tracker Management Tracker Management is used to manage registered or previously configured trackers. In Tracker Management, you can edit or delete trackers. You can find Tracker Management from the Menu "Management" -> "Tracker Management". The Tracker Management option under Management in Menu Tracker Management interface TR-151 page 49... -
Page 50: Deleting A Tr-151 Tracker
4.2.3 Deleting a TR-151 tracker There are two ways for deleting TR-151 trackers in the TR Management Center 1. Select "Management" "Tracker Management" from menu bar. Choose the TR-151 you want to delete, and then click on the "Delete" button. 2. -
Page 51: Editing A Tr-151 Tracker
A confirmation window will appear when deleting a tracker Note: Deleting a tracker does not actually delete its history data from the database. To delete all history data, please use the editing features in Microsoft Access. 4.2.4 Editing a TR-151 tracker If you want to change the information of TR-151 tracker, you can edit the information by “Edit tracker”... - Page 52 The other way of bringing “Edit tracker” is selecting a tracker from the Trackers List and right clicking the mouse button to bring the tracker menu. Click on Edit Tracker Edit Tracker window After editing the information, click OK to save the setting. TR-151 page 52...
-
Page 53: Selecting Country/ Area Code
4.2.5 Selecting Country/ Area code It requires adding country code/Area code prior to the phone number while sending SMS by Skype to TR151 or sending SMS to TR-151 by mobile phone when you and TR-151 are in the different country or area. Please click the button beside the phone number in the window of “Edit tracker”... -
Page 54: Instruction Of Using Tr Management Center
4.3 Instruction of using TR Management Center 4.3.1 Instruction for Beginners If it is the first time for you to use TR-151, please refer 4.2.1 Adding and setting TR-151 trackers to set TR-151. It will ensure TR-151 can send the report to TR Management center via network and display the location on the map. -
Page 55: Asking Tr-151 To Make Immediate Report
4.3.2 Asking TR-151 to make immediate report You can send command via SMS or via network to make TR-151 make immediate report. You could send command via network only when TR-151 is under GPRS period and disconnect mode, motion mode, park mode, Geo-fence mode and the report method must be GPRS or GPRS + SMS. - Page 56 Step3: Select “SMS” or “GPRS” or “SMS+GPRS” in the field of Report method, and then click “Send”. Select “SMS” as Report method: TR-151 will send position report to the phone number you set in Basic setup. (Refer to 4.1 TR Management Center Basic Setup.) Select “GPRS”...
- Page 57 You can also click Satellite to see the location on satellite map. TR-151 page 57...
-
Page 58: Asking Tr-151 To Make Periodic Report
4.3.3 Asking TR-151 to make periodic report You can send command via SMS or send command via network to make TR-151 make periodic report. You could send command via network only when TR-151 is under GPRS period and disconnect mode, motion mode, park mode, Geo-fence mode and the report method must be GPRS or GPRS + SMS. - Page 59 Step 3: Select how many periodic reports TR-151 will send in the field of “Times”, select the report interval in the field of “Return interval” and then click Send Under period report, you could only select SMS as the Report method. If you would like TR-151 to send periodic report to TR management center, please select “Period and disconnect”...
-
Page 60: Asking Tr-151 To Make Gprs Periodic Report And Then Disconnect From Tr Management Center
4.3.4 Asking TR-151 to make GPRS periodic report and then disconnect from TR Management Center You can send command via SMS or via network to make TR-151 make GPRS periodic report and then disconnect from server. You could send command via network only when TR-151 is under GPRS period and disconnect mode, motion mode, park mode, Geo-fence mode and the report method must be GPRS or GPRS + SMS. - Page 61 Step3: Select the “Return interval” and then click “Send” TR-151 will send position report to TR Management center shown as the picture below. TR-151 page 61...
-
Page 62: Asking Tr-151 To Do Voice Monitor
4.3.5 Asking TR-151 to Do Voice Monitor You can send command via SMS or via network to make TR-151 start Voice Monitor. Step1: Send command via SMS: Select the TR-151, right click the mouse to bring up the option menu, and select “Send SMS Command”... - Page 63 Step 3: Click Send. TR-151 will call the phone number you set in Basic setup. (Refer to 4.1 TR Management Center Basic Setup.) TR-151 page 63...
-
Page 64: Asking Tr-151 To Enter Motion Mode
4.3.6 Asking TR-151 to enter motion mode Motion mode is for user to get the continual location report when the vehicle installed with TR-151 is moving. In addition to the continual location report, TR-151 will also send regular location report when the vehicle installed with TR-151 is not moving. You could send a SMS or network command to ask TR-151 to enter motion mode. - Page 65 Step3: Select “SMS” or “GPRS” or “SMS+GPRS” in the field of Report method, and then click “Send”. Select “SMS” as Report method: TR-151 will send position report to the phone number you set in Basic setup. (Refer to 4.1 TR Management Center Basic Setup.) Select “GPRS”...
- Page 66 You can also click Satellite to see the location on satellite map. Step 4: Set “Regular Report Interval”, “Motion Report Interval”, “Sensitivity” and Phone Number”. Item Description Default Remarks Regular Report The interval for TR-151 to send 30 minutes Interval position report when it does not sense vibration Motion Report...
-
Page 67: Asking Tr-151 To Enter Park Mode
4.3.7 Asking TR-151 to enter park mode Park mode is for user to make TR-151 send alarm location report when the vehicle installed with TR-151 is moved. In addition to the alarm location report, TR-151 will also send regular location report when the vehicle installed with TR-151 is parked. - Page 68 Step3: Select “SMS” or “GPRS” or “SMS+GPRS” in the field of Report method, and then click “Send”. Select “SMS” as Report method: TR-151 will send position report to the phone number you set in Basic setup. (Refer to 4.1 TR Management Center Basic Setup.) Select “GPRS”...
- Page 69 You can also click Satellite to see the location on satellite map. Step 4: Set “Regular Report Interval”, “Motion Report Interval”, “Sensitivity” and Phone Number”. Item Description Default Remarks Regular Report The interval for TR-151 to send 30 minutes Interval position report when it does not sense vibration Motion Report...
-
Page 70: Comparison Between Parking Mode, Motion Mode, Sleeping Mode, And Normal Mode
4.3.8 Comparison between parking mode, motion mode, sleeping mode, and normal mode Comparison between parking mode, motion mode, sleeping mode, and normal mode Normal mode Motion mode Parking mode Sleeping mode Function/Mode Motion sensor TR-151 page 70... -
Page 71: Tr Management Center Data Query
4.4 TR Management Center Data Query All the data sent from TR-151 will be stored in the database of TR Management center. You can make this data show on Google map or export them into KML format. 4.4.1 Look up for history data You can look up for the history data that TR-151 sent to TR Management center by Query Tool. - Page 72 Find Start to look up for the data Export Export the data into KML format Delete Delete query results Total records Display the quantity of the history data between the Start time and End time Page number Display the page of the history data (Each page has 200 records) Prev Page Go to the previous page...
- Page 73 Query results displayed on the Google Map TR-151 page 73...
-
Page 74: Export The Data Into Kml Format
If you select a piece of result under the Data Output Area, its location and corresponding details will be shown on the Google Map. If you click on one of the tracker icon on the Google map, the selected tracker’s data under Data Output Area will be highlighted. -
Page 75: Delete The History Data In The Database
Enter a name for the exported KML file 4.4.3 Delete the history data in the database You can delete the history data in the database. Step 1: Select the name of the tracker and time interval whose data you’d like to delete. Step 2: Click the Delete button. -
Page 76: Send Sms To Set Tr-151
4.5 Send SMS to set TR-151 4.2.1 Adding and setting a TR-151, you can connect TR-151 with TR Management center by the USB cable to set its parameters. You can also set its parameters by SMS via the Skype software in the TR Management center. For the requirement of sending SMS by Skype, please refer to 3.4 Skype setup. - Page 77 Step1: Select the TR-151 and right click to select Setup by SMS Geo-fence Setup. Step 2: Enter and select the parameters. TR-151 page 77...
- Page 78 You can refer to the table below for the meaning of the Geo-fence parameters. Item Description Geofence Type Choose to set a rectangular (Rectangle) or a circular (Circle) area Alarm Type Choose to send location report when TR-151 gets in (In Geofence) or get out (Out Geofence) the area Report interval The interval of sending location report when TR-151 disobey...
- Page 79 Radius Geo-fence radius (Circle) TR-151 and Google map/ earth use different units to express longitudes and latitudes. The unit used in TR-151’s longitude and latitude is degree and minute with a 4-digit decimal fraction while the unit in Google Map/Earth is degree, minute, and second. So please convert the unit to degree and minute with a 4-digit decimal fraction before setting Geo-fence.
- Page 80 Step 4: Click OK to send out the setting of Geo-fence to the TR-151 by Skype’s SMS. A dialog window for informing that Skype has sent out the SMS will appear. You can operate the other functions during the process of sending SMS. NOTE: In addition to enter the coordinates to set the Geo-fence, you can also draw a rectangular or circular area on the Google map to set the Geo-fence.
- Page 81 Loads the coordinates into the coordinate fields Draw a circular area on the Google map to set Geo-fence: Step 1: Select Circle in the field of Geo-fence type. Step 2: Click the Add from Google Map button Step 3: Left click on one point of the Google map as the central point of the circle. A balloon icon will appear.
- Page 82 Clicking on the center and moving the cursor will make a line appear The system loads the center coordinates and radius into the coordinate fields TR-151 page 82...
-
Page 83: Set The Sms Default Return Phone Number
4.5.2 Set the SMS default return phone number You can enable or disable the SMS default return phone number and assign the phone number as the default for receiving return SMS. Step 1: Select the TR-151 and right click to select Setup by SMS SMS Return Number Setting. -
Page 84: Set The Maximum Gps Fixing Time
4.5.3 Set the Maximum GPS Fixing Time You can set a period of time for TR-151 to get fixed of the location. When TR-151 cannot get fixed of the location within the period, TR-151 will send out the last location report. Step 1: Select the TR-151 and right click to select Setup by SMS Maximum GPS fixing time Step 2: Enter the value for Maximum GPS fixing time. -
Page 85: Set Default Report Mode
4.5.4 Set default report mode You can set the default report mode for TR-151. When TR-151 is powered on, it will enter the default report mode. Step 1: Select the TR-151 and right click to select Setup by SMS Default Report Mode Setting Default report mode menu Step 2: Select the default report mode, report format, and enter the concerning parameters. - Page 86 Number of reports Enter how many reports will be sent out in the default report mode Step 3: Click OK button to send out the setting by Skype’s SMS. TR-151 page 86...
-
Page 87: Set Sos Phone Number
4.5.5 Set SOS phone number You can set the phone number for receiving emergency report after SOS button is pressed. Note: If the report method of SOS you set in 4.2.1.2 Default report mode is GPRS, the SOS alarm report will be sent to TR Management center, not the phone number Step 1: the TR-151 and right click to select Setup by SMS SOS Number Setting Step 2: Enter the phone number for receiving emergency report after SOS button is pressed. -
Page 88: Set The Motion Mode's Parameters
4.5.6 Set the Motion Mode’s parameters You can set the parameters of Motion mode by Skype’s SMS. Step 1: the TR-151 and right click to select Setup by SMS Motion Mode Setting Step 2: Enter the parameters on the window of motion mode setting. You can refer to 4.5.6 Set the Motion Mode’s parameters to enter the parameters... -
Page 89: Set The Sleeping Mode's Parameters
4.5.7 Set the Sleeping Mode’s parameters When TR-151 is under sleeping mode, its GSM module and GPS module will be turned off, the motion sensor will be turned on. Just like being under parking mode, it will send out SMS while it senses vibration. -
Page 90: Set The Gprs Parameters
the position report. 4.5.8 Set the GPRS parameters You can set the GPRS parameters by Skype’s SMS. Step 1: Step 1: Select the TR-151 and right click to select Setup by SMS GPRS Setting Step 2: Enter the parameters on the window of GPRS setting. You can refer to 4.2.1.4 TR-151 GPRS setting to enter the parameters... -
Page 91: Set The Normal Setting
4.5.9 Set the Normal Setting You can set the Normal setting parameters by Skype’s SMS. Step 1: Step 1: Select the TR-151 and right click to select Setup by SMS GPRS Setting Step 2: Enter the parameters on the window of Normal setting. Item Description Name... - Page 92 number or server to confirm it has received the command Step 3: Click OK button to send out the setting by Skype’s SMS TR-151 page 92...
-
Page 93: Send Command Via Network To Set Tr-151
4.6 Send command via network to set TR-151 4.2.1 Adding and setting a TR-151, you can connect TR-151 with TR Management center by the USB cable to set its parameters. In 4.5 Send SMS to set TR-151 you can also set its parameters by SMS via the Skype software in the TR Management center. - Page 94 Step1: Select the TR-151 and right click to select Setup by Network Geo-fence Setup. Step 2: Enter and select the parameters. TR-151 page 94...
- Page 95 You can refer to the table below for the meaning of the Geo-fence parameters. Item Description Geofence Type Choose to set a rectangular (Rectangle) or a circular (Circle) area Alarm Type Choose to send location report when TR-151 gets in (In Geofence) or get out (Out Geofence) the area Report interval The interval of sending location report when TR-151 disobey...
- Page 96 You can convert E121°29’15.72” & N24°59’47.40” into the unit of TR-151’s longitudes and latitude as the method below. 15.72 (second) ÷60=0.262 (minute) 47.40 (second) ÷60=0.79 (minute) The expression of TR-151’s longitude and latitude is E12129. 2620 & N2459.7900 Example 2: The longitude and latitude from Google earth is W1°12’55.05”...
- Page 97 Drawing the rectangular area with the mouse Loads the coordinates into the coordinate fields TR-151 page 97...
- Page 98 Draw a circular area on the Google map to set Geo-fence: Step 1: Select Circle in the field of Geo-fence type. Step 2: Click the Add from Google Map button Step 3: Left click on one point of the Google map as the central point of the circle. A balloon icon will appear.
- Page 99 The system loads the center coordinates and radius into the coordinate fields TR-151 page 99...
-
Page 100: Set The Sms Default Return Phone Number
4.6.2 Set the SMS default return phone number You can enable or disable the SMS default return phone number and assign the phone number as the default for receiving return SMS. Step 1: Select the TR-151 and right click to select Setup by Network SMS Return Number Setting. -
Page 101: Set The Maximum Gps Fixing Time
4.6.3 Set the Maximum GPS Fixing Time You can set a period of time for TR-151 to get fixed of the location. When TR-151 cannot get fixed of the location within the period, TR-151 will send out the last location report. Step 1: Select the TR-151 and right click to select Setup by Network Maximum GPS fixing time... -
Page 102: Set Default Report Mode
4.6.4 Set default report mode You can set the default report mode for TR-151. When TR-151 is powered on, it will enter the default report mode. Step 1: Select the TR-151 and right click to select Setup by Network Default Report Mode Setting Default report mode menu Step 2: Select the default report mode, report format, and enter the concerning parameters. - Page 103 Number of reports Enter how many reports will be sent out in the default report mode Step 3: Click OK button to send out the setting by Skype’s SMS. TR-151 page 103...
-
Page 104: Set Sos Phone Number
4.6.5 Set SOS phone number You can set the phone number for receiving emergency report after SOS button is pressed. Note: If the report method of SOS you set in 4.2.1.2 Default report mode is GPRS, the SOS alarm report will be sent to TR Management center, not the phone number Step 1: the TR-151 and right click to select Setup by Network SOS Number Setting Step 2: Enter the phone number for receiving emergency report after SOS button is pressed. -
Page 105: Set The Motion Mode's Parameters
4.6.6 Set the Motion Mode’s parameters You can set the parameters of Motion mode by network command. Step 1: the TR-151 and right click to select Setup by Network Motion Mode Setting Step 2: Enter the parameters on the window of motion mode setting. You can refer to 4.5.6 Set the Motion Mode’s parameters to enter the parameters... -
Page 106: Set The Sleeping Mode's Parameters
4.6.7 Set the Sleeping Mode’s parameters When TR-151 is under sleeping mode, its GSM module and GPS module will be turned off, the motion sensor will be turned on. Just like being under parking mode, it will send out SMS while it senses vibration. -
Page 107: Set The Gprs Parameters
NOTE: If you enter 0 in the field of Number of reports, TR-151 will not stop sending the report until TR-151 does not sense the vibration. The Sensitivity is that while TR-151 senses the vibration over the sensitivity, it will send out the position report. -
Page 108: Set The Normal Setting
4.6.9 Set the Normal Setting You can set the Normal setting parameters by network command. Step 1: Step 1: Select the TR-151 and right click to select Setup by Network GPRS Setting Step 2: Enter the parameters on the window of Normal setting. Item Description Name... - Page 109 number or server to confirm it has received the command Off: Disable TR-151 to send return SMS or command to the phone number or server to confirm it has received the command Step 3: Click OK button to send out the setting by network command TR-151 page 109...
-
Page 110: Update Tr-151'S Firmware
4.7 Update TR-151’s Firmware You can update TR-151’s firmware by the TR Management Center. Step 1: Please make TR-151 enter setting mode by adjusting DIP switch 3 to ON position under power-off status. Step 2: Please connect TR-151 and PC by the USB cable. Step 3: Please turn on the power of TR-151. - Page 111 Step 8: Please click Update to update TR-151’s firmware. TR-151 page 111...
-
Page 112: Using Google Map
4.8 Using Google Map Google Map is an online map developed by Google Inc. It offers access to major maps of the world and is constantly updated. As Google Map is integrated into TR Management center, TR Management center can work under Internet connected status. -
Page 113: Google Map Data
4.8.1 Google map data Google Map includes the basic map, satellite map, hybrid map and other map data. You can switch the map by the buttons on the upper right corner of Google map. Basic Map TR-151 page 113... - Page 114 Satellite Map Hybrid Map TR-151 page 114...
-
Page 115: Google Map Operation
4.8.2 Google map operation Move the map: You can move the map by right clicking and dragging the map. Or you can move the map by the tool on the Google map. Zoom the map: You can zoom in or zoom out the map by scrolling forward or backward the mouse. -
Page 116: Appendix 1: Gprs Setting
5. Appendix 1: GPRS Setting Country Network User Name Password Albania Vodafone guest guest Argentina internet.ctimovil.com.ar guest guest Argentina Movistar internet.gprs.unifon.com.ar internet.unifon Argentina Personal gprs.personal.com [mobile number] adgj Australia Optus internet guest guest Australia Telstra telstra.internet guest guest Australia Telstra telstra.datapack [blank] Telstra... - Page 117 Belgium Mobistar internet.be mobistar mobistar (personal) Belgium Mobistar web.pro.be mobistar mobistar (business) Belgium Orange orangeinternet guest guest Belgium Proximus internet.proximus.be guest guest (Internet) Belgium Proximus intraprox.be guest guest (intranet) Botswana Mascom Wireless internet.mascom guest guest Brazil Claro claro.com.br claro claro Brazil gprs.oi.com.br guest...
- Page 118 Croatia VIPNET START gprs0.vipnet.hr 38591 38591 Croatia VIPNET PRO gprs5.vipnet.hr 38591 38591 Croatia VIPNET 3G 3g.vip.hr 38591 38591 Colombia Movistar internet.movistar.com.co movistar movistar Congo Vodacom vodanet vodalive [blank] Costa Rica IceCelular icecelular guest guest Czech Cesky Mobil internet guest guest Republic (contract) Czech...
- Page 119 Estonia internet guest guest Finland internet guest guest Finland Elisa internet rlnet internet (Radiolinja) Finland Saunalahti internet.saunalahti guest guest Finland Sonera internet [blank] [blank] Finland Song internet.song.fi song@internet songnet France Bouygues ebouygtel.com guest guest France Bouygues b2bouygtel.com guest guest (B2Bouygtel) France Orange orange.fr...
- Page 120 Greece Vodafone internet.vodafone.gr guest guest Guatemala Comcel Wap.tigo.gt Guatemala PCS Digital ideasalo guest guest Guyana GT&T Cellink Plus wap.cellinkgy.com test test Hong Kong hkcsl or guest guest internet Hong Kong New World internet guest guest Hong Kong Orange web.orangehk.com guest guest Hong Kong People...
- Page 121 Hungary Vodafone vitamax.internet.vodafone.net guest guest (pre-pay) (comp.) Hungary Vodafone vitamax.snet.vodafone.net guest guest (pre-pay) (un-comp.) India AirTel airtelgprs.com guest guest India bplgprs.com bplmobile [blank] India BSNL celloneportal guest guest India Hutch guest guest (normal) India Hutch guest guest (Gujarat) India Idea Cellular internet guest guest...
- Page 122 Ireland Vodafone live.vodafone.com vodafone vodafone (pre-pay) Israel Cellcom internetg guest guest Israel MTC-Vodafone apn01 guest guest Israel Orange orangeinternet guest guest Italy INTERNET guest guest Italy tre.it guest guest Italy ibox.tim.it guest guest Italy Vodafone web.omnitel.it guest guest (Omnitel) Italy Wind internet.wind Wind...
- Page 123 (no contract) Luxembourg LUXGSM web.pt.lu guest guest Luxembourg Tango internet tango tango Luxembourg VOXmobile vox.lu guest guest Macau ctm-mobile guest guest Macau Macau Hutchison web.hutchisonmacau.com hutchison 1234 Telecom (Internet) Macau Macau Hutchison mms.hutchisonmacau.com hutchison 1234 Telecom (MMS) Malaysia DIGI diginet guest guest Malaysia...
- Page 124 Netherlands internet guest guest Netherlands T-Mobile (Ben) internet guest guest active Netherlands Telfort internet telfortnl password Netherlands Vodafone web.vodafone.nl vodafone vodafone (normal) Netherlands Vodafone office.vodafone.nl vodafone vodafone (business) New Zealand Vodafone internet guest guest (unrestricted) New Zealand Vodafone www.vodafone.net.nz guest guest (restricted) Nicaragua...
- Page 125 Philippines Globe Telecoms www.globe.com.ph globe globe (WAP) Philippines Smart internet witsductoor banonoy Philippines Sun Cellular minternet guest guest Poland erainternet erainternet erainternet Poland Heyah heyah.pl heyah heyah Poland Orange internet internet internet Poland Polkomtel www.plusgsm.pl guest guest Portugal Optimus internet guest guest Portugal...
- Page 126 Russia Megafon internet.ugsm guest guest (UGSM) Russia Megafon internet.usi.ru guest guest (usi) Russia Megafon internet.volga guest guest (Volga) Russia Motiv internet.beeline.ru beeline beeline (uses BeeLine) Russia internet.mts.ru internet.kuban Russia internet [supplied] Russia internet.ntc guest guest Russia PrimTel internet.primtel.ru guest guest Saint Lucia Cable &...
- Page 127 Slovakia Globtel internet guest guest Slovakia Orange internet jusernejm pasvord Slovenia Mobitel internet mobitel internet (Internet) Slovenia Mobitel internetpro mobitel internet (Internet Pro) Slovenia Simobil [none] guest guest South Africa Cell-C internet guest guest South Africa internet guest guest South Africa Vodacom internet guest...
- Page 128 Switzerland Orange internet guest guest Switzerland Sunrise internet internet internet Switzerland Swisscom gprs.swisscom.ch guest guest Taiwan Chunghwa emome or guest guest Telecom internet Taiwan Far EasTone fetnet01 guest guest Taiwan KG Telecom internet guest guest Taiwan Taiwan Cellular internet guest guest Thailand internet...
- Page 129 Virgin Mobile goto.virginmobile.com user [space] Vodafone internet webs (contract) Vodafone pp.vodafone.co.uk (pre-pay) Ukraine Djuice www.djuice.com.ua igprs igprs Ukraine Jeans www.jeans.ua guest guest Ukraine Kyivstar www.kyivstar.net igprs internet Ukraine Mobi-GSM internet.urs guest guest Ukraine www.umc.ua guest guest Uruguay ANCEL gprs.ancel guest guest Uruguay internet.ctimovil.com.uy...
-
Page 130: Appendix 2: Setting Free Web Service
6. Appendix 2: Setting Free Web Service Free web service is provided on by Globalsat Corporation http://traq.gstraq.com/login.php Before using the service, please adjust TR-151 by the tool in the product CD Please insert the product CD in the CD ROM of PC. - Page 131 Please contact your telecom operator for checking the APN, User Name, Password, DNS1, and DNS2. Please click “Set config to device” button. Please wait till you see the message below. TR-151 page 131...
- Page 132 7. IEEE 1725 -Do not disassemble or open crush, bend or deform, puncture or shred -Do not modify or remanufacture, attempt to insert foreign objects into the battery, immerse or expose to water or other liquids, expose to fire, explosion or other hazard. -Only use the battery for the system for which it is specified -Only use the battery with a charging system that has been qualified with the system per this standard.
Need help?
Do you have a question about the TR-151A and is the answer not in the manual?
Questions and answers