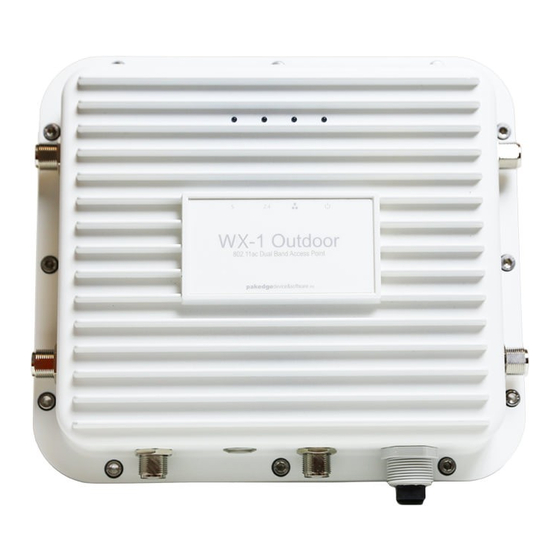
Pakedge WX-1-O User Manual
Dual band access point
Hide thumbs
Also See for WX-1-O:
- Quick start manual (12 pages) ,
- User manual (64 pages) ,
- Quick start manual (10 pages)

Subscribe to Our Youtube Channel
Related Manuals for Pakedge WX-1-O


Summary of Contents for Pakedge WX-1-O
- Page 1 WX-1-O 802.11ac Dual Band Access Point User Guide Version 1.0...
-
Page 2: Table Of Contents
WX-1-O User Guide Version 1.0 Content Introduction ......................................4 System Requirements ..................................5 Hardware Installation ..................................5 WX-1-O Installation ..................................21 Antennas ...................................... 21 Weather Proof RJ-45 ................................21 Wall Mounting ................................... 22 Pipe Mounting ................................... 22 Power Method for the WX-1x ..............................8 Power via PoE+ ................................... - Page 3 WX-1-O User Guide Version 1.0 LEDs ........................................46 Maintenance ......................................47 Username/Password ................................... 47 Time Zone......................................48 Firmware ......................................49 Configuration ....................................50 Reboot ......................................51 Appendix A – Specs ..................................52 HARDWARE SPECIFICATIONS ..............................52 RF INFORMATION ..................................52 OPERATIONS ....................................
-
Page 4: Introduction
WX-1 1-O User Guide Version 1.0 Introduction Thank you for purchasing the Pakedge Thank you for purchasing the Pakedge WX-1x 802.11ac Dual Band Access Point. As the central component of your wireless As the central component of your wireless network, the WX-1x provides you with high provides you with high-speed, high-range wireless AC networking. - Page 5 WX-1 1-O User Guide Version 1.0 • WDS Repeater – The repeater also receives wireless signal fro The repeater also receives wireless signal from another access point. However, m another access point. However, unlike a brige access point, a repeater access point sends out Wi unlike a brige access point, a repeater access point sends out Wi-Fi so that client devices can Fi so that client devices can connect to it wirelessly.
-
Page 6: System Requirements
1. Place the unit in an appropriate place using the mounting kit. 2. Run an Ethernet cable to the device and plug one end into the WX-1-O access point. 3. Plug the other end of the Ethernet cable into a PoE+ injector or PoE+ Switch. -
Page 7: Antennas
WX-1-O User Guide Version 1.0 Antennas Weather Proof RJ-45 Be sure to run the Ethernet cable through the plastic element, and seal it tightly to insure weather- proofing. -
Page 8: Wall Mounting
WX-1 1-O User Guide Version 1.0 Wall Mounting Wall Mounting Pipe Mounting Pipe Mounting... -
Page 9: Power Method For The Wx-1X
WX-1 1-O User Guide Version 1.0 Power Method for the WX Power Method for the WX-1x The diagrams below show using a PoE using a PoE+ injector or a PoE+ switch to power the WX WX-1x. Note: the product must be powered by must be powered by 802.3at - compliant Power over Ethernet compliant Power over Ethernet (PoE+) injector or switch... -
Page 10: Power Via Poe
WX-1 1-O User Guide Version 1.0 Power via PoE+ Switch Power using the included power adapter Power using the included power adapter... - Page 11 WDS Bridge. When shipped from the factory, the WX-1x is set to Access Point mode. The default IP address of the WX-1x is 192.168.1.250 and username/password of pakedge/pakedgea. In order to log into the WX-1x, you must first configure the TCP/IP settings of your PC/Notebook. Follow these steps: 1.
-
Page 12: Wx-1X Start Up
WX-1-O User Guide Version 1.0 3. Select Use the following IP Address and type the IP address and subnet mask, as in the example below. (Be sure the IP address and subnet mask are on the same subnet as the WX-1x.) WX-1x IP address: 192.168.1.250... - Page 13 The WX-1x login dialog appears. login dialog appears. In the username box, type pakedge pakedge. In the password box, type pakedgea and click and click Login. The WX-1x main menu appears (see figure below). The main menu displays the current status main menu appears (see figure below).
-
Page 14: Menu Options
WX-1 1-O User Guide Version 1.0 Menu Options Menu Options The navigation bar on the top of the window comes with of the window comes with 4 options: • Status: Shows the dashboard and logs of the the dashboard and logs of the WX-1x access point. The dashboard is the default The dashboard is the default page that comes up when you log into the page that comes up when you log into the WX-1x GUI. -
Page 15: Dashboard
WX-1 1-O User Guide Version 1.0 Dashboard The Dashboard is the default landing page of the access point. You can also access this page by hovering The Dashboard is the default landing page of the access point. You can also access this page by hovering The Dashboard is the default landing page of the access point. -
Page 16: System Log
1-O User Guide Version 1.0 System Log The System Log page has an activity log that can be used by Pakedge Technical Support for has an activity log that can be used by Pakedge Technical Support for has an activity log that can be used by Pakedge Technical Support for troubleshooting purposes. -
Page 17: Network
WX-1 1-O User Guide Version 1.0 Network Ping Hover over Management and click on and click on Diagnostics. You will be directed to the ping test under the ping test under the Ping tab: • Ping – Target IP / Domain Name Target IP / Domain Name: Enter the IP Address of a location to ping. -
Page 18: Traceroute
WX-1 1-O User Guide Version 1.0 Traceroute Click on the Traceroute tab. A Traceroute test can help you identify obstacles you may have in the network. The Traceroute text maps A Traceroute test can help you identify obstacles you may have in the network. The Traceroute text maps A Traceroute test can help you identify obstacles you may have in the network. -
Page 19: Snmp
: Enter the contact information of the installer or network administrator for the SNMP manager. • Description: Enter in a description of the device. : Enter in a description of the device. The default description is Pakedge efault description is Pakedge WX-1x WAP. -
Page 20: Leds
WX-1 1-O User Guide Version 1.0 LEDs Hover over Management and click on LEDs. and click on LEDs. • Turn off all LEDs: Check to turn LED : Check to turn LEDs off. Maintenance... -
Page 21: Username/Password
WX-1 1-O User Guide Version 1.0 Username/Password Username/Password Hover over Maintenance and click on and click on Username/Password. You can change the . You can change the username and password for the device here. -
Page 22: Time Zone
WX-1 1-O User Guide Version 1.0 Time Zone Hover over Maintenance and click on and click on Time Zone. This page allows you to set up up the timezone. -
Page 23: Firmware
WX-1 1-O User Guide Version 1.0 Firmware Allows you to update the firmware for the unit. you to update the firmware for the unit. • Keep Settings: Selecting Selecting this will preserve your current configurations after the firmware update. s after the firmware update. •... -
Page 24: Configuration
WX-1 1-O User Guide Version 1.0 Configuration Configuration Hover over Maintenance and click on and click on Configuration: • Download backup: Click : Click Download Configuration to save and export the current settings of the to save and export the current settings of the WX-1x. -
Page 25: Reboot
WX-1 1-O User Guide Version 1.0 Reboot Hover over Maintenance and click on Reboot and click on Reboot. Clicking the Reboot Button allows you to reboot licking the Reboot Button allows you to reboot the device. -
Page 26: Appendix A - Specs
WX-1-O User Guide Version 1.0 Appendix A – Specs HARDWARE SPECIFICATIONS • 1 x 10/100/1000 Gigabit Ethernet RJ-45 port with IEEE 802.3at Power over Ethernet (PoE+) support • Configurable LED Indicators for Power, Ethernet, 2.4GHz Wireless and 5GHz Wireless •... -
Page 27: Management And Security
WX-1-O User Guide Version 1.0 2.4 GHZ – B-ONLY, G-ONLY, B/G-MIXED, N-ONLY, G/N-MIXED, B/G/N-MIXED 5 GHZ – A-ONLY, N-ONLY, A/N MIXED, AC-ONLY, N/AC-MIXED, A/N/AC-MIXED MANAGEMENT AND SECURITY • User can adjust power by dBm • Web-based configuration (HTTP) • Upgrade firmware via web browser/internet •... -
Page 28: Appendix B - Accessory List
WX-1-O User Guide Version 1.0 Appendix B – Accessory List WX-1 • Quick Start Guide • AC100-240V, 50-60Hz DC12V 2A power adapter • CAT5e cable • Mounting bracket • T-bar mount • Screws WX-1-O • Quick Start Guide • CAT5e cable •... -
Page 29: Appendix D - Limited Warranty
God. The foregoing limited warranty is Pakedge’ s sole warranty and is applicable only to Products sold as new by Authorized Dealers. The remedies provided herein are in lieu of a) any and all other remedies and... - Page 30 PERFORMANCE YOUR PAKEDGE PRODUCT IS CAPABLE OF PROVIDING. Rights, Limits, and Exclusions Pakedge limits its obligation under any implied warranties under state laws to a period not to exceed the warranty period. There are no express warranties. Pakedge also excludes any obligation on its part for incidental or consequential damages related to the failure of this product to function properly.
-
Page 31: Federal Communication Commission Interference Statement
WX-1-O User Guide Version 1.0 Federal Communication Commission Interference Statement This equipment has been tested and found to comply with the limits for a Class B digital device, pursuant to Part 15 of the FCC Rules. These limits are designed to provide reasonable protection against harmful interference in a residential installation. -
Page 32: Safety Precautions
WX-1-O User Guide Version 1.0 2. Installation location The product shall be installed at a location where the radiating antenna can be kept 22cm from nearby person in normal operation condition to meet regulatory RF exposure requirement. 3. External antenna Use only the antennas which have been approved by the applicant. - Page 33 For added protection for this product during a lightning storm, or when it is left unattended and unused for long periods of time, unplug the power supply, and disconnect the CAT5e to the WX-1-O at the PoE+. This will prevent damage to the product due to lightning and power surges.
- Page 34 WX-1-O User Guide Version 1.0 pakedgedevice&software 3847 Breakwater Avenue Hayward, CA 94545 17011 Beach Blvd. Suite 600 Huntington Beach, CA 92647 (650) 385-8702 www.pakedge.com sales@pakedge.com...
Need help?
Do you have a question about the WX-1-O and is the answer not in the manual?
Questions and answers