Dynon EFIS-D10A Installation Manual
Hide thumbs
Also See for EFIS-D10A:
- Installation & maintenance manual (21 pages) ,
- Installation and maintenance manual (34 pages)
Table of Contents

Related Manuals for Dynon EFIS-D10A


Summary of Contents for Dynon EFIS-D10A
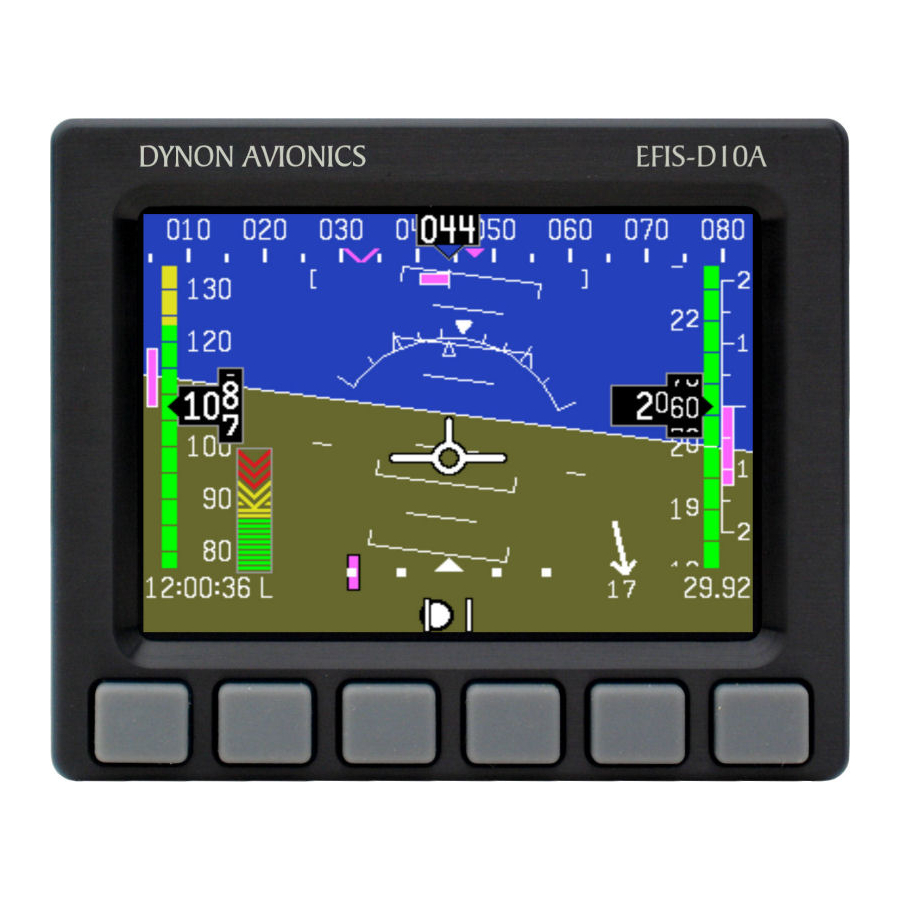
- Page 1 EFIS-D10A Installation Guide This guide intended for use with Experimental/LSA/Ultralight/Microlight installations. P/N 100341-000, Revision L For use with firmware version 5.6 February 2021 Copyright © 2003-2021 by Dynon Avionics, Inc.
- Page 2 Information in this document is subject to change without notice. Dynon Avionics reserves the right to change or improve its products and to make changes in the content without obligation to notify any person or organization of such changes.
- Page 3 ABOVE LIMITATIONS MAY NOT APPLY TO YOU. Dynon Avionics retains the exclusive right to repair or replace the instrument or firmware or offer a full refund of the purchase price at its sole discretion. SUCH REMEDY SHALL BE YOUR SOLE AND EXCLUSIVE REMEDY FOR ANY BREACH OF WARRANTY.
-
Page 4: Table Of Contents
AP74 Configuration ............................6-30 7. Appendix Appendix A: Ongoing Maintenance and Troubleshooting ..................7-1 Appendix B: Dynon OAT Probe Installation and Usage ..................7-7 Appendix C: HS34 Installation and Configuration ....................7-10 Appendix D: Dynon AOA/Pitot Installation and Calibration ................7-24 Appendix E: Encoder Serial-to-Gray Code Converter Installation ............... - Page 5 Table of Contents Appendix G: Weights ............................7-36 Appendix H: EFIS-D10A Specifications ......................7-36 EFIS-D10A Installation Guide...
-
Page 6: Introduction
OEM Installations If your EFIS-D10A is installed by an OEM distributor, you may find that you are unable to access some menus and settings. Some Dynon distributors customize various areas of the EFIS- D10A firmware to maintain a consistent pilot experience and minimize integration issues across a large number of installations. -
Page 7: About This Guide
In the electronic (.PDF) version of this manual, page and section references in the Table of Contents and elsewhere act as hyperlinks taking you to the relevant location in the manual. The latest version of this manual is available on the Dynon Avionics website at docs.dynonavionics.com. -
Page 8: Wiring Overview
Ensure that the power lines include a circuit breaker or an appropriately sized fuse for the wire you select. Power is fed to the EFIS-D10A via pins in the female D-25 connector as shown on the 25-Pin Female EFIS Harness diagram on page 2-2. -
Page 9: 25-Pin Female Efis Harness
Below is the wiring diagram of the EFIS 25-pin female harness. If you purchased your harness from Dynon Avionics, it is color coded according to the chart on the following page. Unless noted otherwise, all wires are 3 feet long on the Dynon-provided harness. - Page 10 The pin assignments for the female 25-pin harness are repeated below. Note that the pin numbers are labeled on the face of both the female and male connector. Each connection on the harness supplied by Dynon is color-coded. These colors are listed in the following chart. Female...
- Page 11 The following block diagram depicts the basic layout of the EFIS DB25 electrical connections and is for reference only. Read the specific instructions for each connection prior to installation. The colors shown refer to the Dynon-supplied EFIS harness. EFIS-D10A Installation Guide...
-
Page 12: Instrument Installation
(away from tabs mounted down magnetic interference) such that its pitch is as close to that of the EFIS-D10A as possible. It does not need to be directly along any axis of the EFIS-D10A. It should be mounted with the long... -
Page 13: Edc-D10A Communication Cable
EDC Ground White The EDC cable in the harness supplied by Dynon consists of 4 conductors, surrounded by a metal shield and white insulation. These 4 wires are terminated with crimped female D-sub pins wrapped in plastic tubing. If you are building your own cable, we recommend that you use shielded cable as well. -
Page 14: Power Inputs
Instrument Installation earpieces of a headset near the front of the EFIS-D10A. If the EDC-D10A is correctly wired, you should see no change in the displayed heading when the headset earpiece and its magnetic speaker is near the EFIS-D10A. If you see a substantial change in heading, there is a communication problem between the EFIS-D10A and the EDC-D10A. -
Page 15: Serial Communication Cable
Dynon employees and customers at wiki.dynonavionics.com. The EFIS-D10A has one RS-232 serial port that can be used for several purposes. This serial port can only be configured for one purpose at a time. The EFIS Serial port (DB25) is used for: •... -
Page 16: Sl30 And/Or Gps Connection
Instrument Installation be accessed whenever you need to update your product’s firmware or checklists. If you did not purchase a harness from Dynon, obtain a 9-pin D-sub connector and make the three connections shown in the table. To verify proper communication between the EFIS-D10A and the PC, use the Dynon Avionics Product Support Program’s “Detect Firmware Version”... - Page 17 EFIS-D10A. When a Dynon product is connected to a GPS, it will synchronize its Zulu clock to the time reported by the GPS. However, some GPSs, such as the Garmin 430 and 530, do not report time in their serial output stream.
- Page 18 HSI page. There is no need to break this connection when doing PC updates. IF YOU OWN AN EMS AND AN EFIS (NOT FLIGHTDEK-D180) First, ensure that your EMS and EFIS are connected as described in Dynon Smart Avionics Bus (DSAB) Wiring on page 3-11.
-
Page 19: Altitude Encoder Wiring
There are four different serial formats used by transponders. The EFIS-D10A can output any of these formats. To select which format the EFIS- D10A sends out its serial encoder output port, you must choose the appropriate format via the menu system. - Page 20 There are four formats used by serial transponders. Choose the correct format for your transponder in the ALTENC menu, using the FRMAT button. Format 1 Used By Dynon Encoder Serial-to-Parallel Converter, Garmin AT (formerly UPS Aviation Technologies) Baud rate 1200...
-
Page 21: Audio Alert Output
Outside terminal To ground To set the volume of the AOA alarm, you will need your EFIS-D10A powered on and the alarm output wired as described above. Enter the EFIS menu by pressing any button (except the leftmost or rightmost) beneath an EFIS page. Press MORE > SETUP > MORE > MORE >... -
Page 22: Dynon Smart Avionics Bus (Dsab) Wiring
Instrument Installation Dynon Smart Avionics Bus (DSAB) Wiring The Dynon Smart Avionics Bus is the only way Dynon EFIS products can communicate with one another, providing features Wire DB25 such as data sharing and alarm notification. DSAB is a multi-... -
Page 23: Panel Location And Mounting
Correct attitude performance depends on mounting the EFIS-D10A square with the direction of flight. You have two options for mounting the EFIS-D10A into your panel: standard or flush. You may use the optional flush-mount bracket, allowing the face of the EFIS-D10A to be flush with your panel. - Page 24 EFIS-D10A into place in the panel, putting the washers in between the EFIS-D10A and the panel. Place one of the 4 supplied mounting nuts on the end of each of the 4 studs protruding from the back of the panel. Secure the nuts tightly against the panel to complete the installation.
-
Page 25: Connecting Static & Pitot Lines
If you purchased Dynon’s AOA pitot tube, note that it has pitot and AOA ports on it, but not static. You will need to provide your own source of static pressure for the EFIS-D10A and any other instrument in your panel which requires it. -
Page 26: Efis Calibration And Configuration
To account for your individual preferences and your aircraft’s particular setup, there are a few simple calibration and configuration steps that you must complete before using your EFIS-D10A. This section takes you through these steps to make sure that you have properly installed and configured your EFIS-D10A. - Page 27 Magnetic Field Values” button at the bottom of the linked page – the values required by your Dynon EFIS will be displayed only after clicking that button. If you are near the equator or in the southern hemisphere, note that the inclination may be negative number.
- Page 28 North such as on a compass rose. You must also have enough room to perform a 540 turn on the ground as described below. Turn the EFIS-D10A on and let it warm up for 10-15 minutes before proceeding. Turn all instruments on that you would normally be operating during a flight, including the engine.
- Page 29 Dynon Avionics EDC-D10A Remote Compass. You will need to repeat this process anytime you move the EFIS-D10A to a new location in your plane or change the magnetic or electrical characteristics of the nearby environment (i.e. adding or removing other electrical instruments).
- Page 30 EFIS-D10A (via the headphone test described in the installation section), and have located a suitable place to perform the calibration, perform the following steps: 1. Turn on the EFIS-D10A and allow it to warm up for at least 15 minutes before performing the calibration.
- Page 31 15 second timer. Let the time run out before proceeding. 11. Press the END button. This will cause the EFIS-D10A to pause as it calculates. This pause should last between 1-20 seconds. However, if the collected data is poor, this can take as long as 5 minutes.
-
Page 32: Configure Airspeed Color Thresholds
EFIS Calibration and Configuration The EFIS-D10A did not see enough data for the 10 second north-bound section of the turn. ERR: HOLD N LONGER BEFORE Repeat the listed maneuver, ensuring that you XXXXXX TURN spend 10 seconds pointed north before beginning the turn. -
Page 33: Dsab Configuration
This section introduces some concepts that are central to understanding and configuring a network of DSAB-capable Dynon products. It then takes you through a series of simple steps to configure your network, enabling data sharing and HS34 functionality. Do not proceed with DSAB configuration until you perform all installation, calibration, and configuration steps for each instrument with a display. -
Page 34: Example Networks
The second diagram depicts a system with an HS34 connected, demonstrating that all NAV and GPS devices must be connected to the HS34. Both diagrams discuss what devices can be assigned various roles and what happens when DSAB fails. EFIS-D10A Installation Guide... - Page 35 DSAB Configuration EFIS-D10A Installation Guide...
-
Page 36: Initial Setup
Dynon Avionics web site at downloads.dynonavionics.com. To begin configuration, enter the EFIS > SETUP > DSAB menu. A full-page menu appears with three options: STATUS, CONFIGURATION, and BRIGHTNESS. -
Page 37: Network Status
The first line indicates how many devices are configured on the network. This number is independent of the number of devices actually currently turned on and communicating. It simply reports how many instruments were present during the most recent execution of DSAB configuration. EFIS-D10A Installation Guide... - Page 38 DSAB IDENT shown. If the instrument you wish to identify is the one which you are currently interacting with, the line changes to read THIS UNIT. Press DOWN▼ or UP▲ to scroll through each of the other instruments configured in your network. EFIS-D10A Installation Guide...
-
Page 39: Autopilot Installation And Configuration
Dynon Avionics, it contains more detailed drawings and diagrams unique to your aircraft. You can find the list of Dynon’s aircraft mounting kits on the current Price List / Order Form on Dynon’s secure web site at store.dynonavionics.com. The drawings and installation instructions of current Dynon Avionics aircraft mounting kits are available on the Dynon web site at docs.dynonavionics.com. -
Page 40: Dsab Firmware Compatibility
It is also expected that aircraft manufacturers will develop their own mounting kits for Dynon servos or offer the Dynon AP as a factory option. If Dynon does not currently offer a mounting kit for your particular aircraft, and you would be inclined to assist in developing a kit and documentation, please send an introductory email message about your interest to: betatest@dynonavionics.com. -
Page 41: Autopilot System Electrical Installation
Autopilot Installation and Configuration Autopilot System Electrical Installation The diagram below provides an overview of the autopilot electrical system. The following sections describe the electrical installation of each subsystem in detail. EFIS-D10A Installation Guide... - Page 42 Autopilot Installation and Configuration SERVO ELECTRICAL INSTALLATION Dynon Avionics’ servos are supplied with 7 un-terminated wires, each about 8” in length. It is the responsibility of the installer to decide on connectors and associated wiring. The 7 wires have the following colors and functions:...
- Page 43 Use the D-sub pins/connector kit included with your AP74 to make the following connections: • Pin 3: Dynon Smart Avionics Bus (DSAB) “A”, connected in parallel with all other DSAB B connections (Green wire on Dynon-supplied wiring harnesses) • Pin 4: Power, 10 - 30 volts DC •...
-
Page 44: Servo Mechanical Installation
Autopilot Installation and Configuration Note: As with the optional Dynon HS34, it is acceptable to connect the tone output of EFIS (DB25 Pin 18) and/or EMS (DB37 Pin 31) in parallel with the tone/voice output of the AP74 (Pin 25) to provide “failover” audio alerts from the EFIS and/or EMS if the AP74 were to fail. - Page 45 Be sure to leave ample room for the arm and attached linkage to move through a complete range of motion without interference. CAUTION: In normal operation, Dynon’s servos can reach temperatures that can be very uncomfortable to, and perhaps cause burns to unprotected skin. Thus, servos should be mounted in an area, or in such a manner to prevent accidental skin contact.
- Page 46 Use the following dimensions (in inches) for reference when planning and implementing your installation. Long-arm variants (not needed in most installations) have linkage mount holes at 1.5”, 1.75”, and 2.0” Weight SV32 2.17” 2 lb SV42 3.10” 3 lb SV52 4.02” 4 lb EFIS-D10A Installation Guide...
- Page 47 EFIS screen), you may move the linkage mount point inward, provided there is still enough travel to accommodate the control system at the servo location. Using either of the two inner-most holes of the servo arm affects the final amount of force that EFIS-D10A Installation Guide...
- Page 48 “manual override”. The shear screw will break at the application of 100 inch-pounds of torque, at which point the servo arm will travel freely. If the brass shear screw is broken during AP installation or usage, do not replace it with a standard screw - contact Dynon for a replacement shear screw.
-
Page 49: Ap74 Mechanical Installation
(in inches) found on the diagram to plan for the space required by the instrument. The front bezels of the vertically oriented AP74 (100756-000) and are the same height as Dynon’s D100- series products and can be mounted close to – or abutted against – one if desired. Plan a panel location that allows for convenient operation of the knobs and buttons. - Page 50 See the following section for details on where to locate the bracket with respect to the hole in the panel. This flange can be trimmed if it is not needed or if it interferes with other instruments. 6-12 EFIS-D10A Installation Guide...
-
Page 51: Firmware Upgrades Required For Ap Functionality
AP74 power must be ON when EFIS firmware is upgraded. To use the Dynon Avionics AP, the EFIS and all other Dynon products in the DSAB network must be running the same firmware version (currently 5.4). This includes EFIS, EMS (including those configured as backup/slave units), HS34, AP74, servos, and the EDC-D10A compass. -
Page 52: Ap Servo Configuration
Dynon Avionics Product Support Program which is available on the Dynon Avionics web site at downloads.dynonavionics.com. If you are using a GPS connected to your Dynon EFIS and will be using GPS as an input for the AP, please upgrade your GPS to the most current firmware available for it. - Page 53 Note: The following steps assume that two servos are installed to provide AP control of Pitch and Roll functions. If only a Pitch or Roll servo has been installed, skip the non-applicable sections. On the EFIS, perform the following: • Enter the SETUP > AP > SERVO CALIB menu. EFIS-D10A Installation Guide 6-15...
- Page 54 (HDG, TRK, ALT hold). • The EFIS now has a record of which servo performs which function and the particular range of motion it will be executing. If servos are swapped or replaced, Servo Calibration must be performed again. 6-16 EFIS-D10A Installation Guide...
- Page 55 This parameter can be tuned in flight; leaving it at the default of 10 is sufficient for initial setup. If the autopilot is not as “decisive” as you’d like, increase this value; if it is too aggressive, decrease it. On the EFIS, perform the following (continuing from TORQUE): EFIS-D10A Installation Guide 6-17...
- Page 56 We recommend that you perform the following on the ground at zero airspeed. Step 4a – Set Pitch Servo Torque: The PITCH SERVO > TORQUE parameter specifies how much torque the pitch servo will exert before slipping. 6-18 EFIS-D10A Installation Guide...
- Page 57 There are several additional advanced parameters that can be used to fine tune the performance of the pitch axis. They should be considered secondary to the primary Pitch Axis Sensitivity adjustment. When used, they should be adjusted in the following order: EFIS-D10A Installation Guide 6-19...
- Page 58 95% of V , which should be set to the specifications of your aircraft in the EFIS > SETUP > IASCLR menu. The AP cannot be engaged at airspeeds 6-20 EFIS-D10A Installation Guide...
- Page 59 Disengage/CWS Button, as shown on page 6-3. If the resistor is installed and this parameter is set to Y, the EFIS continuously monitors the AP Disengage/CWS Button circuit for proper resistance. If a broken line is detected the following message is displayed on the EFIS: EFIS-D10A Installation Guide 6-21...
- Page 60 On the EFIS, perform the following (continuing from Button Configuration Control Wheel Steer Mode): • DOWN▼ > (-CTRL WHEEL STEER- MODE: value is highlighted) • SEL► > Set to HOLD HDG/ALT or LAST HDG/ALT per the explanation above. • > BACK > EXIT 6-22 EFIS-D10A Installation Guide...
- Page 61 EMS- and EFIS-based instruments. If you would like the AP74’s audio out to be your only source for Dynon product audible alerts, disconnect the audio out connections on your other DSAB-connected Dynon products.
- Page 62 Selecting TEST VOICE OUTPUT and then pressing SEL► produces an audible voice test (“DYNON AVIONICS”) on the audio output line. This allows you to verify connections and volume on the ground. Turn the potentiometer to adjust the volume to your preference.
- Page 63 On the EFIS, observe the AP status indicator (lower left corner - AP:HDG-OFF) while the AP flies. If the HDG indicator is frequently highlighted yellow, that is an indication that the Roll Servo is slipping and the torque needs to be increased. Occasional slips due to turbulence are acceptable. EFIS-D10A Installation Guide 6-25...
- Page 64 Roll Servo SENSITIVITY needs to be increased. If, upon reaching the target heading and the stick “twitches” excessively, that is an indication that the Roll Servo SENSITIVITY needs to be decreased. 6-26 EFIS-D10A Installation Guide...
- Page 65 • Push ALT button (activates PITCH servo); ensure that the red ALT indicator lights are on. • Ensure that the HDG indicator lights are off; push the HDG button if they are not. • Push the AP button to engage in ALT mode. EFIS-D10A Installation Guide 6-27...
- Page 66 As soon as the altitude bug is changed, the AP begins changing the aircraft’s altitude to follow. Repeat this step, setting the altitude bug to 500 feet below your current altitude. Step 9g – Verify pitch TORQUE and SENSITIVITY settings during climbs and descents 6-28 EFIS-D10A Installation Guide...
- Page 67 EFIS screen (shown at right). This indicator displays when the AP senses too much nose down trim. Trim the aircraft nose up until the indicator disappears. Disengage the AP to observe the state of the aircraft’s trim. EFIS-D10A Installation Guide 6-29...
-
Page 68: Ap74 Configuration
• Rotating the VALUE knob changes the value of the FIRST ACTION mode (ALT, HDG, or BARO) and displays a pop-up window indicating the current mode and value. Pushing the VALUE knob again within 5 seconds of the last knob rotation closes the pop-up window. 6-30 EFIS-D10A Installation Guide... - Page 69 ARM pre-select configuration above. This forces you to explicitly enable (and thus synchronize) the modes you wish the autopilot to control when you press the AP button. The default value for this setting is NO, leaving all modes pre-armed after turning off the AP. EFIS-D10A Installation Guide 6-31...
-
Page 70: Appendix
7. APPENDIX The appendices contain additional information pertaining to the installation and maintenance of the EFIS-D10A. You will find here a table of weights, specifications, a configuration table, the maintenance manual, the OAT Installation and Operating Guide, the AOA Pitot Installation Guide, and the Blind encoder Serial-to-Parallel Installation Guide. - Page 71 MORE > DIM and increase the brightness until it will not increase anymore. 4. Let the unit remain on for 2 hours. 5. If, after these 2 hours, your EFIS-D10A has not turned off and does not display the INTERNAL BATTERY LOW warning, your battery passes the capacity test.
- Page 72 This is most common in unventilated panels during hot periods. If you continue to see this alert, provide more airflow to the space around the EFIS-D10A. EFIS-D10A Installation Guide...
- Page 73 EDC-D10A. TROUBLESHOOTING GUIDE The following table provides a list of potential issues that the EFIS-D10A may experience. The symptom is given on the left side while the probable solution is listed at the right. You may also post about your issue at forum.dynonavionics.com, where we and other active users may be able to assist you.
- Page 74 Next, on the EFIS-D10A, enter the EFIS main menu, press MORE > SETUP > MORE > MORE > MORE > SPDCAL. When you are confident that there is no pressure on the pitot and static ports, press either button corresponding to SET ZERO PRESSURE.
- Page 75 Dynon representative, the issue cannot be resolved, we will provide you with an RMA number to use when shipping the EFIS-D10A to us. If your unit is still under warranty, the repairs will be performed and the EFIS-D10A will be returned promptly. If your warranty has expired, the Dynon representative will make arrangements with you and make you fully aware of the costs before proceeding with the repair.
-
Page 76: Appendix B: Dynon Oat Probe Installation And Usage
The following instructions provide information on installing and using the EFIS-D10A OAT probe. Keep in mind that this probe is designed specifically to work with the EFIS-D10A. Do not expect it to work properly with another OAT or TAS/Density Altitude system. If you own an Dynon EMS product with an OAT installed, your EFIS-D10A can receive its OAT value from the EMS via the DSAB wires. - Page 77 > SETUP > MORE > OAT. Push the INSTALLED button (either button 1 or 2) to toggle between N, 1 and 2. All OATs sold by Dynon since 2005 are P/N 100433-001, so you most likely need to select sensor type 2.
- Page 78 Ensure that you have selected the number corresponding to your OAT in the OAT INSTALLED menu as described above. It can sometimes take as long as 5 seconds for the EFIS-D10A to lock onto the OAT reading. Ensure that all wiring is correct and that there are no shorted or open connections.
-
Page 79: Appendix C: Hs34 Installation And Configuration
Appendix Appendix C: HS34 Installation and Configuration If you purchased an HS34 from Dynon Avionics, read through this section for details on its physical and electrical installation. It describes the pinout, mounting information, and some common wiring connections. WIRING Follow these instructions explicitly as improper wiring can result in permanent damage to your instrument, other connected equipment, or both. - Page 80 Contact in 1 (same as EMS contacts) Resolver E Marker Outer Input ARINC 429 RX 2 A Marker Middle Input ARINC 429 RX 1 A Marker Inner Input ARINC 429 TX A Voice audio output (8V peak-peak) ARINC 429 TX A EFIS-D10A Installation Guide 7-11...
- Page 81 Once properly configured on your DSAB network, this connection scheme allows you to use your HS34’s VALUE knob with the DSAB Bus Master. Refer to the Dynon Smart Avionics Bus (DSAB) Wiring section on page 3-11 for more information on connecting Dynon products via DSAB.
- Page 82 If your device is one of those listed in the next section, Common Device Connections, you may ignore this section. See page 3-4 for a chart of supported GPSs. EFIS-D10A Installation Guide 7-13...
- Page 83 HS34. Make note of whether the connections are to the male or female connector on the back of the HS34. When constructing your harness, refer to the pinouts on page 7-11. 7-14 EFIS-D10A Installation Guide...
- Page 84 Appendix EFIS-D10A Installation Guide 7-15...
- Page 85 Appendix 7-16 EFIS-D10A Installation Guide...
- Page 86 (in inches) found on the diagram to plan for the space required by the instrument. The front bezel of the vertically oriented HS34 (100755-000) is the same height as Dynon’s D100-series products and can be mounted close to – or abutted against – one if desired. Plan a panel location that allows for convenient operation of the knobs and buttons.
- Page 87 As you screw the mounting screw tighter, the bottom (or left, for the horizontal version) of the bezel moves closer to the panel. Once it touches the panel, do not turn the mounting screw any further. 7-18 EFIS-D10A Installation Guide...
- Page 88 ARINC devices can accept commands, set the OUTPUT DATA to ON and configure OUTPUT SPEED appropriately. Note that the EFIS/EMS SERIAL menu is disabled on all products connected to a DSAB system with an HS34 connected. All GPS and NAV devices must be connected to the HS34. EFIS-D10A Installation Guide 7-19...
- Page 89 NAV input occurs within the NAV portion of cycle. If you do not see all expected NAV radios, verify that all settings are accurate in the ANALOG, SERIAL, and ARINC-429 menus. Press DOWN▼ or UP▲ to select the input that you wish to 7-20 EFIS-D10A Installation Guide...
- Page 90 Voice/Tone Alert Configuration EMS AUDIO ALERTS The HS34 can act as the sole audio alert RPM HIGH source for all DSAB-connected Dynon instruments. The HS34’s audio output MANIFOLD PRESSURE HIGH reports both EFIS and EMS alerts; each OIL PRESSURE HIGH/LOW...
- Page 91 (fail-over). Selecting TEST VOICE OUTPUT and then pressing SEL► produces an audible voice test (“DYNON AVIONICS”) on the audio output line. This allows you to verify connections and volume on the ground. The possible voice alerts for both EFIS and EMS are listed in the table above.
- Page 92 5. To test the fail-over capability, temporarily disconnect the HS34 and observe the NAV and/or GPS data on the EFIS; data should display properly after a pause of a few seconds with the HS34 connected, and disconnected. EFIS-D10A Installation Guide 7-23...
-
Page 93: Appendix D: Dynon Aoa/Pitot Installation And Calibration
We recommend that you read the entire guide before proceeding with the installation. Dynon’s Heated AOA/Pitot Probe is nickel-plated. Do not polish the probe as this will cause the finish to come off. AOA CALCULATION: PRINCIPLES OF OPERATION Dynon Avionics’... - Page 94 Appendix TOOLS AND MATERIALS REQUIRED • Dynon Avionics AOA/Pitot probe. • Two plumbing lines (usually ¼” soft aluminum or plastic tubing) routed from the EFIS- D10A to the probe mounting location. • Tubing interface hardware o Reference our wiki at wiki.dynonavionics.com...
- Page 95 The following block diagram depicts the basic layout of the electrical connections between the probe and heater controller. This diagram should be used in conjunction with detailed instructions on the following pages. Read the specific instructions for each connection prior to installation. 7-26 EFIS-D10A Installation Guide...
- Page 96 The switch allows you to manually turn the more than 1 amp. Current depends on heater controller on and off, depending on light source connected. the situation. Install a 15-amp fuse at any point along the power line to the heater EFIS-D10A Installation Guide 7-27...
- Page 97 LED, and can accommodate the power required for its current and voltage drop. If you own a Dynon EMS-based product, you may also use one of its two contact input to display an onscreen indication. Connect this heater status output directly to the desired EMS contact input, with no additional resistors or lights.
- Page 98 Appendix these lines, you may drill all the way through the outer metal without affecting the probe’s waterproofing. DIMENSIONS Standard mount EFIS-D10A Installation Guide 7-29...
- Page 99 Make gentle bends, and only bend any given section once. After mounting the probe, route the pitot and AOA lines from the probe to your EFIS-D10A. The tube closest to the snout is the pitot line, while the tube in the rear is the AOA line. There is no static source on the probe.
- Page 100 If this is not the case, please repeat the AOA user calibration, including flight configurations that resulted in stalls with incorrect indications. If the user calibration continues to be unsuccessful, please contact Dynon Avionics technical support.
-
Page 101: Appendix E: Encoder Serial-To-Gray Code Converter Installation
EFIS-D10A and outputs standard Mode-C parallel Gray code into your Mode-C transponder. This Encoder Converter requires data from the EFIS-D10A and is not to be confused with other standalone encoders available on the market. While the installation is not complex, it is important that you install the unit correctly. - Page 102 Ground, which are green (or red) and black respectively, and 2 feet in length. Connect these wires to the EFIS-D10A 25-pin female harness. Ensure that your EFIS-D10A is powered off. Then connect the black EFIS Ground wire to pin 21. Then, connect the green wire to pin 13 (Serial Encoder Transmit) on the EFIS harness.
- Page 103 Black Serial Encoder Ground STEP 3: EFIS-D10A ENCODER FORMAT For proper communication the EFIS Altitude Encoder format must be set to format number one. To change this setting, from the main menu, select: MORE > SETUP > MORE > ALTENC.
-
Page 104: Appendix F: Replacing The Efis-D10A Battery Pack
Appendix Appendix F: Replacing the EFIS-D10A battery pack 1. Remove the three 7/64” hex screws from the battery door of the EFIS-D10A. Do not remove the Phillips or D-sub screws. Screw 3 Screw 1 Screw 2 2. If you previously had a battery, disconnect it from the EFIS-D10A by unplugging the battery connector and gently pulling out old battery. - Page 105 The following are the weights of the EFIS-D10A and associated Dynon-supplied sensors. EFIS-D10A ....................1 lb 7.4 oz (0.663 kg) EFIS-D10A + battery ................1 lb 13.8 oz (0.844 kg) EFIS 25-pin wiring harness ................11.2 oz (0.32 kg) EDC-D10A ......................3.6 oz (0.102 kg) EFIS OAT ......................
Need help?
Do you have a question about the EFIS-D10A and is the answer not in the manual?
Questions and answers