Table of Contents
Advertisement
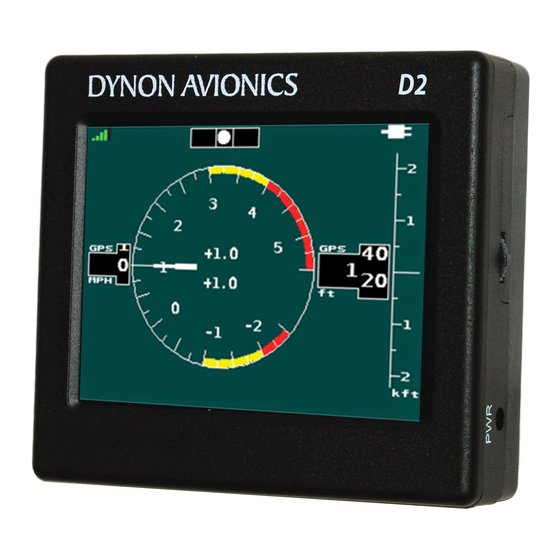
Quick Links
Advertisement
Table of Contents

Related Manuals for Dynon D2 Pocket Panel


Summary of Contents for Dynon D2 Pocket Panel
-
Page 3: Copyright
Copyright D2 Pilot’s User Guide, Rev C, 102083-000, January 2017 2014-2017 Dynon Avionics, Inc. All rights reserved. No part of this manual may be reproduced, copied, transmitted, disseminated or stored in any storage medium, for any purpose without the express written permission of Dynon Avionics. -
Page 4: Registering Your D2
Dynon-related content. Registering Your D2 Please take a moment to register your D2 Pocket Panel at register.dynonavionics.com. Registering your product with Dynon ensures that your contact information is up-to-date. This helps verify product ownership, can expedite warranty claims, and allows us to notify you in the event a service bulletin is published for your product. -
Page 5: Limited Warranty
Dynon Avionics warrants this product to be free from defects in materials or workmanship for one (1) year from date of shipment. Dynon Avionics will, at its sole option, repair or replace any components that fail in normal use. Such repairs or replacement will be made at no charge to the customer for parts or labor. The customer is, however, responsible for any transportation cost. -
Page 7: Table Of Contents
Table of Contents ........................OPYRIGHT ....................ONTACT NFORMATION D2....................EGISTERING ....................... IMITED ARRANTY 1. SAFETY AND LICENSING INFORMATION .............. 1-1 ................. 1-1 MPORTANT AFETY NFORMATION 2. INTRODUCTION ....................2-1 ........................2-1 EATURES 3. PRODUCT LIMITATIONS ..................3-1 4. PRODUCT TOUR ....................4-1 .................... - Page 8 ..............6-6 DJUSTING RIGHTNESS FOR IGHT LIGHT 7. PERFORMANCE NOTES ..................7-1 ..................... 7-1 TTITUDE ERFORMANCE 8. WIFI OPERATION ....................8-1 .............. 8-1 SING THE WITH ABLET PPLICATIONS ..................... 8-1 ECHNICAL ETAILS 9. SOFTWARE UPDATES ..................9-1 10. ADDITIONAL MOUNTING OPTIONS ..............10-1 RAM®...
-
Page 9: Safety And Licensing Information
1. SAFETY AND LICENSING INFORMATION Important Safety Information Your Dynon Avionics D2 Pocket Panel contains a Li-Ion battery. Li-Ion batteries are safe when used as directed, but can also be hazardous if they are not used in accordance with their instructions. -
Page 11: Introduction
2. INTRODUCTION Your new D2 Pocket Panel is a portable attitude indicator (artificial horizon) that is designed to be used by pilots of certified, light sport and experimental aircraft. The self-contained design of the D2, not requiring permanent installation in an aircraft, makes it an ideal backup instrument for certified aircraft. -
Page 13: Product Limitations
3. PRODUCT LIMITATIONS The D2 Pocket Panel is a portable device that aids situational awareness. As the D2 does not have TSO authorization from the FAA or other regulatory body, it is not suitable for permanent installation in type certificated aircraft. -
Page 15: Product Tour
4. PRODUCT TOUR On-Screen Elements The D2 is primarily a portable backup attitude indicator but also has a second screen that displays the aircraft load factor (G meter). Switch between the two displays with a press and release of the menu button. Aircraft Attitude is determined by combining information from internal solid state rotation rate... - Page 16 Product Tour Figure 2 - Pitch Roll angle is indicated by the position of the yellow triangular roll pointer with respect to the arc above it. There are tick marks on the roll arc at 10, 20, and 30 and 60 degrees of bank, and triangles at 45 degrees of bank.
- Page 17 Product Tour determine if the aircraft is close to stalling. It should not be used as a reference when landing the aircraft. Figure 4 - GPS Ground Speed GPS Altitude is the aircraft’s altitude in either feet or meters as determined by the D2’s GPS. GPS altitude will not always match your aircraft’s static system-based barometric altimeter, and should not be used as a replacement for one.
- Page 18 Product Tour Figure 6 - GPS Ground Track GPS Vertical Speed depicts the rate of climb or descent of the aircraft in thousands of feet per minute or meters per second as determined by the D2’s GPS. GPS vertical speed will not always match the indication provided by your aircraft’s static-based vertical speed indicator, and should not be used as a replacement for one.
- Page 19 Product Tour The Slip/Skid Ball provides a visual representation of lateral acceleration. When the ball is within the two vertical lines, the aircraft is in coordinated flight. The slip/skid ball operates independently of GPS reception. Figure 8 - Slip / Skid Ball Turn Rate is displayed as a curved magenta bar along the top outside curve of the GPS ground track arc.
- Page 20 Product Tour Figure 11 - Battery Charge Level / External Power Source Icons Load Factor (G Meter) is determined by accelerometers and displayed as an analog-style gauge. Configurable settings are provided for the color coded (red/yellow) ranges for both positive and negative G loads.
-
Page 21: Left Side
Product Tour Left Side SD Card Slot: Used for software updates. GPS: Connection port for optional external GPS antenna. Reset: Recessed reset switch. Mini-USB: Can be used to charge unit from any USB power source (USB cable not provided). Faster battery charging is available via the PWR connector on the right side. Figure 13 - D2 Left Side (left to right): SD Card, GPS, Reset, Mini-USB Menu Button: Press and release to cycle through the D2 screens. -
Page 22: Right Side
Product Tour power down the D2 it must be disconnected from external power sources (both the USB and power cables). Figure 14 - D2 Top Side (left to right): Menu Button, Power Button Right Side PWR: External power via AC Power Adapter or Vehicle Power Adapter. CAUTION: Never use unapproved chargers, never connect more the 5 volts DC and never reverse the polarity of the voltage applied to the power connector or permanent damage may result. -
Page 23: Before First Use
5. BEFORE FIRST USE Before you use your D2 for the first time, please complete the following initial setup and configuration steps: Fully charge the battery (see following section). Check for D2 software updates at www.dynonavionics.com. Choose settings (see following section). D2 Pilot’s Guide... -
Page 25: Using Your D2
6. USING YOUR D2 Power On/Off Turn the D2 on and off by holding the power button on the top of the device. The D2 will also automatically power on any time an external power source is connected. Charging the Battery BATTERY INFORMATION Only use chargers and power adapters specifically designed for the D2! Connecting other chargers WILL CAUSE DAMAGE to the D2 that will not be repaired under warranty. - Page 26 Using Your D2 Connect the Power Adapter to the PWR port on the right side of the D2. Leave connected for 4 hours to completely charge from empty. Less time will be needed if the battery is partially charged. The D2 may optionally be powered off while it is charging. ...
-
Page 27: Mounting Your D2
Using Your D2 Mounting Your D2 Mount in the aircraft using one of the provided removable, portable mounts. When mounting the D2, the following alignment constraints must be met: A very small amount of roll install error (+/- 6 degrees) can be corrected during the software- based alignment process. - Page 28 When using the pinch mount, Dynon highly recommends using the optional external GPS antenna as the D2’s view of the sky is likely to be obscured by aircraft structure.
-
Page 29: Align The D2 For Flight
Using Your D2 Align the D2 for Flight Figure 16 - Pitch Adjust Mode Figure 17 - Roll Adjust Mode With the D2 powered on, press the rocker to enter Pitch Adjust Mode. Move the rocker up or down until the displayed pitch matches the pitch of the aircraft. ... -
Page 30: Adjusting Brightness For Night Flight
Using Your D2 You may find that you need to re-adjust the roll and pitch a bit more in flight. Simply press the Rocker to re-adjust pitch and roll. Adjusting Brightness for Night Flight When not adjusting pitch, roll, or any other settings, moving the Rocker up and down will increase and decrease the backlight of the display. -
Page 31: Performance Notes
7. PERFORMANCE NOTES Attitude Performance Optimal attitude performance depends on a number of environmental factors: GPS REQUIRED The attitude indication provided by the D2 is primarily created by combining information from solid state MEMS-type accelerometers and rotation rate sensors, and supplemented by GPS ground speed. - Page 32 Figure 18 - GPS Lost ROTATION RATE LIMIT The D2 will operate normally with rotational rates of up to 150 degree per second around any axis. If a rate of 150 degrees per second is exceeded, HORIZON RECOVERING will be displayed along the bottom of the display.
- Page 33 Performance Notes Figure 19 - Horizon Recovering After Rate Limit Exceeded AEROBATICS AND NON-STANDARD MANEUVERS The D2’s attitude sensing algorithm is based on fixed wing aircraft flight dynamics. Using the D2 during aerobatics or other maneuvers that are not encountered during normal fixed wing aircraft flight may cause the D2’s attitude indicator to lag the actual horizon or be otherwise incorrect.
-
Page 35: Wifi Operation
D2. Information available in individual apps depends on each app’s features. Consult your app documentation to determine what information it can display from the D2. Levil AHRS-G mini is trademark of Levil Technology Corp, which is not affiliated with Dynon Avionics, Inc. D2 Pilot’s Guide... -
Page 37: Software Updates
D2 software version. If the version number on the Dynon website is higher than the one your D2 currently has, download the current version from the Dynon website. Copy the downloaded .d2s file to an SD card (not included). Put the file on a blank SD card. -
Page 39: Additional Mounting Options
10. ADDITIONAL MOUNTING OPTIONS Other RAM® Mounts The RAM® suction cup mounting system that is included with your D2 can be adapted and customized with the use of other components. These can be purchased directly from www.rammount.com or from any of RAM’s authorized dealers. The RAM® components that come with the D2 use the B size (1"... -
Page 41: Troubleshooting
RESET button hole on the left side of the unit The D2 does not power on, D2 may be damaged Contact Dynon Avionics technical even when power is support staff applied to the charging port on the right side of the unit D2 Pilot’s Guide... - Page 42 Confirm that you are fully charging being fully charged, the D2 before use. If this does not or is worn out solve the issue, contact Dynon Avionics technical support staff Battery display does not No power at wall Check that power source is...
- Page 43 Troubleshooting Problem Description Possible Cause Solution The ball is not centered, Roll adjust is not With no menu displayed, depress but the D2/aircraft is correct for the the Rocker switch twice to enter the definitely level current mounting Roll Adjust mode. Adjust to center position the ball The horizon zero pitch line...
-
Page 45: Specifications
12. SPECIFICATIONS All specifications are subject to change without notice or obligation. PHYSICAL Dimensions (exclusive of projections/buttons/switches) 3.63 inches (92mm) W 3.26 inches (83mm) H 1.16 inches (29mm) D Weight 7.1 oz (201g) Temperature Range Operating/Charging (allowable): -15˚C (5˚F) to 60˚C (140˚F) Operating/Charging (for best battery lifespan): -15˚C (5˚F) to 45˚C (113˚F) Short Term Storage (<3 months): -20˚C (-4˚F) to 45˚C (113˚F) Long Term Storage (>3 months): -10˚C (14˚F) to 20˚C (68˚F) - Page 46 Specifications DC PWR Port Charging 5V DC (D2-specific chargers ONLY) Vehicle Power Adapter 10-30V Input 5V DC Output Max Current: approx 0.4A @ 14V DC input voltage Mini-USB Port Charging: Standard 5V, 500mA USB power 12-2 D2 Pilot’s Guide...
-
Page 47: Screen Care
13. SCREEN CARE The D2 features a display which with normal care will provide years of problem free use. The D2 screen should only be cleaned with a soft cloth. Never use water or solvents when attempting to clean the display. Avoid excessive pressure to the display to prevent damage to the LCD (Liquid Crystal Display). -
Page 48: Requesting Support / Repair
Push until you feel the reset button “click”. The D2 should now power on. When contacting Dynon Technical Support, have your D2 at hand. If possible, have the AC Adapter (charger) also at hand to provide power if there is a battery issue. -
Page 49: Notes
15. NOTES D2 Pilot’s Guide 15-1...
Need help?
Do you have a question about the D2 Pocket Panel and is the answer not in the manual?
Questions and answers