
Related Manuals for Cecilware ARCTIC COMPACT AGITATION 8/1


Summary of Contents for Cecilware ARCTIC COMPACT AGITATION 8/1
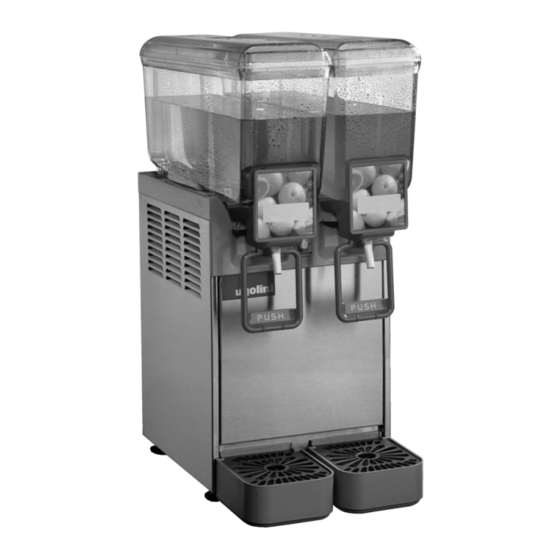
- Page 1 ARCTIC COMPACT AGITATION SERIES MODELS: 8/1 - 8/4 OPERATOR’S MANUAL CARNET D’I NSTRUCTIONS MANUAL DE INSTRUCCIONES...
-
Page 2: Technical Characteristics
1 TECHNICAL CHARACTERISTICS Transparent removable bowls Capacity each bowl, gallons approx. Dimensions: width inches inches depth height inches Net weight, approx. Gross weight, approx. Adjustable thermostats Hermetic compressor Air-cooled condenser Overload protector Noise level lower than 70 dB (A) IMPORTANT Read electrical ratings written on the data plate of the individual units;... - Page 3 PROCEDURES). IMPORTANT Install the dispenser so that the plug is easily accessible. 4 TO OPERATE SAFELY Do not operate the dispenser without reading this operator’s manual. Do not operate the dispenser unless it is properly grounded. Do not use extension cords to connect the dispenser.
-
Page 4: Cleaning And Sanitizing Procedures
heating source is close to the unit and air flow through the slotted panels is not obstructed by wall or boxes. Allow at least 15 cm (6”) of free clearance all around the dispenser. In any case if the product in the bowls is cold the unit is running properly. - Page 5 Prepare at least two gallons of a mild cleaning solution of warm (45-60 °C 120-140 °F) potable water and dishwashing detergent. Do not use abrasive detergent. Important: if present, follow label directions, as too strong a solution can cause parts damage, while too mild a solution will not provide adequate cleaning.
-
Page 6: Routine Maintenance
the drip plate (see figure 6). figure 6 Place bowl on the unit. Wet the gasket for ease of insertion. Please take care that the hook on the backside of the bowl be inserted properly in its seat on the upper drip plate. -
Page 8: Caracteristicas Tecnicas
1 CARACTERISTICAS TECNICAS Contenedores transparentes desmontables Capacidad de cada contenedor, gallons aproximada Dimensiones: ancho inches largo inches alto inches Peso neto, aproximado Peso bruto, aproximado Termostatos regulables Motocompresor hermético Condensador a ventilación forzada Guardamotor Nivel de ruido inferior a 70dB (A) IMPORTANTE Características eléctricas: leer los datos detallados en la placa del distribuidor;... -
Page 9: Para Un Funcionamiento Seguro
desarmado, lavado e higienizado siguiendo cuanto dicho en las presentes instrucciones del capítulo 5.3 LIMPIEZA. 4 PARA UN FUNCIONAMIENTO SEGURO No utilizar el distribuidor antes de haber leído el presente manual de instrucciones. No utilizar el distribuidor si no está correctamente conectado a tierra. - Page 10 Para disminuir ulteriormente los tiempos de restablecimiento y, por lo tanto, aumentar la autonomía del distribuidor, volver a llenar cuando el nivel del producto desciende a mitad evaporador. Todos los distribuidores de este tipo deben despedir calor. Si el calor producido fuera excesivo, controlar que ninguna fuente de calor se encuentre cerca del distribuidor y, en modo particular, cerca de las rejillas de los paneles.
- Page 11 figura 3). figura 3 Sacar el cajón recoge-gotas y vaciarlo. 5. 3. 2 LAVADO IMPORTANTE No lavar ningún componente de la maquina en lavavajillas. ATTENCION Antes de efectuar cualquier tipo de lim- pieza, desenchufar de la toma de corriente eléctrica el enchufe del aparato o bien apa- gar el interruptor externo de pared.
-
Page 12: Higienizacion Del Distribuidor Montado
hasta ajustarlo completamente (ver figura 4). figura 4 Grifo en acero inox por gravedad: montar la palanca mando grifo y enfilar el pisón unido a la su junta (ver figura 5). figura 5 Poner la junta al evaporador, de modo que el borde de mayor ancho se quede en contacto con el plano recoge-gotas (ver figura 6). -
Page 13: Manutencion (Solamente Por El Servicio Postventa)
pero no debe sustituir jamás a la efectuada con el aparato desmontado. Poner en una palangana una solución de agua o producto para higienizar aprobado por las autoridades de vuestro país, respetando las especificaciones del fabricante. Si se carece de un producto para higienizar específico, preparar una solución de agua e hipoclorito de sodio (lejía u s o a l i m e n t i c i o ) e n l a p r o p o r c i ó... - Page 14 Arctic Compact models 8/1, 8/2, 8/3, 8/4 SPARE PARTS LIST DESCRIPCION PIEZAS DE REPUESTO...
- Page 15 code English Faucet piston 00077 Faucet gasket 00028 8 It bowl 00680 Pinch tube 00002 9 22900-01910 5 It bowl Picture 00659 Push handle 00660 13 22900-00800 Faucet cover 14 22900-00501 Push handle Faucet spring 00030 8 It bowl cover 00681 5 It bowl cover 00681...
- Page 16 Arctic Compact models 8/1, 8/2, 8/3, 8/4 WIRING DIAGRAM ESQUEMA ELECTRICO 1/5-8 - 2/5-8 - 3/5-8 Switch Thermostat Pump/mixer Compressor 4/5-8 Switch Thermostat Pump/mixer Compressor Interruptor Termostato Bomba/agitador Motocompresor Interruptor Termostato Bomba/agitador Motocompresor...
- Page 17 NOTES- NOTAS:...
- Page 18 NOTES- NOTAS:...
- Page 19 NOTES- NOTAS:...
- Page 20 CECILWARE CORPORATION 43-05 20th Avenue Long Island City, N.Y. 11105 Tel. (800) 935 2211 Fax (718) 932 7860 Email cecilware@aol.com www.cecilware.com 2404_49 V0.1 07L17...
Need help?
Do you have a question about the ARCTIC COMPACT AGITATION 8/1 and is the answer not in the manual?
Questions and answers