Advertisement
Quick Links
Advertisement

Related Manuals for Fleck 9000


Summary of Contents for Fleck 9000
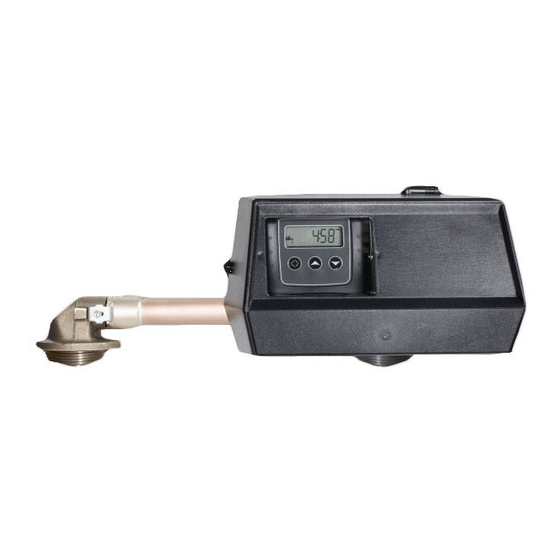
- Page 1 Fleck 9000 T WIN TANk WATer SoF TeNer › I n s ta l l at I o n G u I d e V1.0...
- Page 2 › P r e fac e Thank you for your purchase of a new water softener with Fleck 9000 Meter Control Valve from QualityWaterForLess.com! We have put together these instructions as reference and to be used as gen- It is always recommended that a licensed plumber perform all installa- eral installation guidelines.
- Page 3 Placing and Filling the Tank Page 9 Installing the Fleck 9000 Valve onto the Tank Page 10 Plumbing the Fleck 9000 Valve into your Home and the Brine Tank Connection Page 12 Making the Drain Connection and Meter Connection Page 14...
-
Page 4: Master Programming Mode
I c P r o G r a M s e t t I n G I n P u t Va l u e If you have a Fleck 9000 SXT electronic meter DF - Display Format... - Page 5 › M e c H a n I c a l P r o G r a M s e t t I n G I n P u t Va l u e If you have a mechanical meter valve, here are your Gc - GAl cAPAcITY If you have an SXT valve, 00 Gallons...
- Page 6 1 › calcul atInG Hardness, caPacIt y, and brIne fIll Water Test: Before start-up, it is crucial that you know your water’s HArDNeSS and IroN levels in order to set up your unit properly. If your unit is not programmed with your particular hardness level, it will either regenerate too early or too late.
- Page 7 c - UNIT cAPAcITY: section In the first column, identify the containing your softener tank size and then within this H - compensated Hardness c - capacity section, find the pertaining to your level. Then look under the column c - Unit capacity in the table on page 4 or 5.
- Page 8 › P r e - I n s ta l l at I o n Before assembly of your new system, be sure that the following conditions have been met for the place- ment of your system: • Level, firm surface, such as concrete, on which • Access to the water main coming into your to place the softener tanks and salt tank (also home.
- Page 9 2 › P l ac I n G a n d f I l l I n G t H e ta n K If your tanks are not filled 1) Choose the final location for your water softener , place the riser Figure 9-B and place the tanks upright and level on the surface.
- Page 10 9000 Meter Valve and the second tank adapter, of the Fleck 9000 Meter Valve and the second make a mark through both of the screen screw tank adapter as shown in Figures 10-A and 10-B holes on both screens, drill two 3/32”...
- Page 11 10) Then attach the plastic tube assembly onto the the tube assembly to the second tank adapter as Fleck 9000 Meter Valve as shown in Figure 11-E shown in Figure 11-E (you will need to swing open the program panel to...
- Page 12 2) Next, connect this prepared end of the tubing insert, and brine line screen to one end of the to the Fleck 9000 Meter Valve as shown in included brine tubing as shown in Figure 12-A. Figure 12-B. Tighten the nut to the valve using i Be sure to face the tapered side of the a wrench until snugly in place.
- Page 13 4) Next, fix the 474 Brine Float Assembly to the 3) Locate the brine well and remove the cap. may also take this moment to prepare and brine well through the pre-drilled hole and insert the brine support grid determined hand-tighten as shown in Figure 13-B from pages 6 and 7 474 Brine...
- Page 14 6 › d r a I n c o n n e c t I o n 1) Locate the drain barb fitting and use Teflon tape 2) Install the drain barb fitting to the Fleck 9000 to wrap the threading as shown in Figure 14-A.
- Page 15 8 › P r o G r a M M I n G t H e f l e c K 9 0 0 0 s X t Va lV e 1) To begin programming, first plug in your 9000 2) Set the time on the system to 12:01 PM by Valve to a nearby wall outlet.
- Page 16 NT / 2 TS / U1 or U2 7) The display should now show . As shown 8) The display should now show in Figure 16-A. This indicates Number of Tanks shown in Figure 16-B. This indicates which tank is Dual. Do not change this value and press the is currently in service.
- Page 17 Do / 14 rT / 2:00 13) The display should now show as shown 14) The display should now show in Figure 17-A. This indicates the Day Override is shown in Figure 17-B. This indicates the system 14 days; the system will regenerate in 14 days if will regenerate at 2:00 AM following the day the meter has not measured water consumption override period.
- Page 18 FM / t0.7 19) The display may now show as shown 20) The system will now exit Master Programming mode and the display should now show the time in Figure 18-A. This indicates Flow Meter type of day followed by the number of gallons remain- 3/4”...
-
Page 19: Initial Start-Up
› c o n G r at u l at I o n s Your new softener with Fleck 9000 Meter Valve is now properly installed and programmed! Please maintain your system by keeping the softener plugged-in and always keep your brine tank filled with salt to at least above the water level.
Need help?
Do you have a question about the 9000 and is the answer not in the manual?
Questions and answers