
Related Manuals for Fleck 9100SXT Meter


Summary of Contents for Fleck 9100SXT Meter
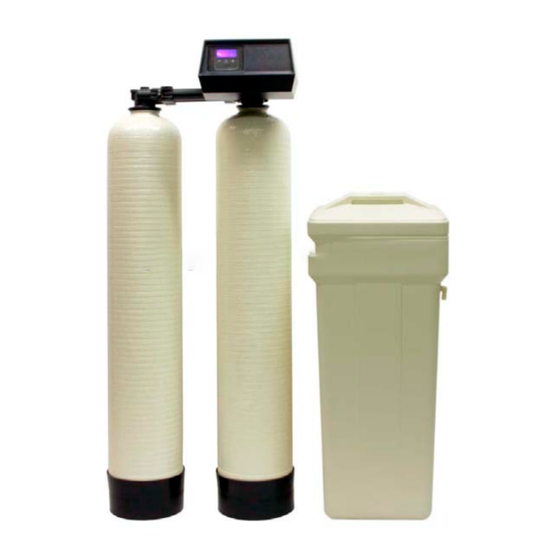
- Page 1 INSTALLATION & START-UP INSTRUCTIONS FLECK 9100SXT METER TWIN ALTERNATING WATER SOFTENER SYSTEMS - 1 - © 1999-2007 QualityWaterForLess.com info@qualitywaterforless.com...
- Page 2 Preface: Thank you for your purchase of a new Water Softener with Fleck 9100SXT Meter from QualityWaterForLess.com! We have put together these instructions as reference, and to be used as general installation guidelines. It is always recommended that a licensed plumber perform all installation work according to all local codes.
- Page 3 • If your tank is not filled, please follow the additional instructions below. • First, place the riser tube into the tank as shown in Figure 2. NOTE: Please be sure that the riser tube seats into the bottom of the tank, and that the top of the riser tube is FLUSH with the top of the tank lip.
- Page 4 • Using the included silicone lubricant packet, lubricate the inner and outer o- rings on the bottom of the Fleck 9100SXT Meter Valve as shown in Figures 5 & 6 below. Please repeat this for the main valve, and the secondary portion, as shown below.
- Page 5 • Using the included silicone lubricant packet, lubricate the o-rings on the 9100SXT Valve meter assembly as shown in figure 10 below. • Finally, push the yoke or bypass valve snugly to the back of the 9100SXT valve. Use the clips & screws to secure each side of the yoke or bypass valve as shown in Figure 11 below.
- Page 6 Plumbing your Fleck 9100SXT Meter: • Before beginning your installation, please first familiarize yourself with the “IN” and “OUT” on the Fleck 9100SXT Meter Valve. In order to prevent damage to your home and to the softener system, install the softener according to the “IN”...
- Page 7 • Depressurize and drain your home of water by turning on all faucets and fixtures in your home, including those outside. • Pick your installation point, and cut a section of pipe out to run to and from your softener. NOTE: In many cases, it is preferred to keep outside lines UNSOFTENED.
- Page 8 • Tighten the nut to the Brine Fitting Assembly using until snugly tightened in place. Be careful not to over tighten, as you may sever the brine line tubing. See figure 19 below. FIGURE 19 • Locate the included brine tank, and remove the brine tank cover shown on the following page in Figure 20.
- Page 9 FIGURE 22 FIGURE 23 • Take the other end of your brine line tube and insert the tube through the small hole drilled through the brine tank, and brine well. Loosely unscrew the hex nut on the 2310 brine float assembly. Insert the tubing end firmly into the hex nut on the 2310 brine float assembly.
- Page 10 • Install the drain barb assembly included with your shipment to the Fleck 9100SXT Meter Valve by screwing the fitting using a wrench snugly into the threads as shown in Figure 28 below. Please use caution not to over tighten this fitting.
- Page 11 Programming the Fleck 9100SXT Meter Valve: • Before start-up a few simple steps must be followed to program the Fleck 9100SXT Meter Valve. • It will be important to know what your water Hardness and Iron is before doing this programming procedure.
- Page 12 FIGURE 30 FIGURE 31 FIGURE 32 FIGURE 33 • To enter master programming mode, press the “UP” and “DOWN” buttons TOGETHER and HOLD for 5 seconds, and then release the buttons, as shown in figure 34 below. • The display should now show “DF / GAL” as shown in figure 35 below. (This indicates U.S.
- Page 13 • The display should now show “CT / Fl” as shown in figure 37. (This indicates Control Type METER IMMEDIATE Format) Do not change this value, and press the “Extra Cycle Button” once to continue. FIGURE 36 FIGURE 37 • The display should now show “NT / - - - 2” as shown in figure 38 below. (This indicates Number of Tanks is Dual) Do not change this value, and press the “Extra Cycle Button”...
- Page 14 FIGURE 40 FIGURE 41 • The display should now show “RS / SF” as shown in figure 42 below. (This indicates Reserve Selection is Safety Factor percentage) Do not change this value, and press the “Extra Cycle Button” once to continue.
- Page 15 • The display should now show “BW / 10” as shown in figure 45 below. (This indicates Backwash Time is 10 minutes in length) Do not change this value, and press the “Extra Cycle Button” once to continue. • The display should now show “BD / 60” as shown in figure 46 below. (This indicates Brine Draw Time is 60 minutes) Do not change this value, and press the “Extra Cycle Button”...
- Page 16 System Size Salt Time Setting 24,000 Grains 32,000 Grains 40,000 Grains 48,000 Grains 64,000 Grains 80,000 Grains 96,000 Grains 120,000 Grains • The display may now show “FM / t0.7” as shown in figure 49 below. (This indicates Flow Meter type 3/4" Turbine) Do not change this value, and press the “Extra Cycle Button”...
- Page 17 Enjoy Your Softener! Congratulations, you have successfully installed your new water softener with Fleck 9100SXT Meter Valve! Please maintain your system by keeping the softener plugged-in and always keep your brine tank filled with salt to at least above the water level.
Need help?
Do you have a question about the 9100SXT Meter and is the answer not in the manual?
Questions and answers