Table of Contents
Advertisement
Quick Links
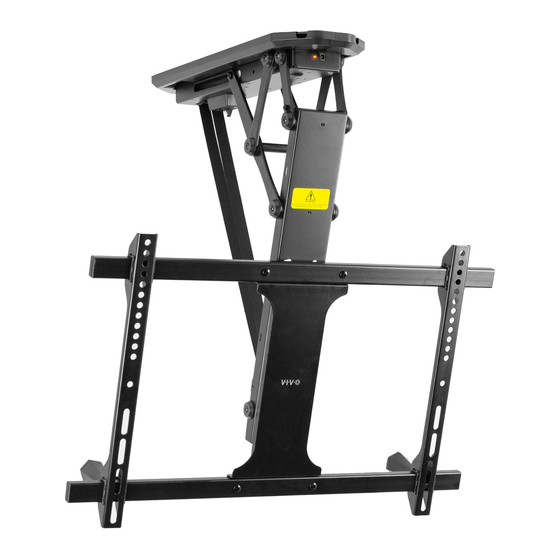
Black Electric Flip Down Ceiling TV Mount
SKU: MOUNT-E-FD70
Instruction Manual
ASSEMBLY VIDEO AVAILABLE:
Follow along step-by-step with our video walk through by scanning
the QR code with your mobile device or by following the product
link: vivo-us.com/products/mount-e-fd70
help@vivo-us.com
www.vivo-us.com
309-278-5303
Advertisement
Table of Contents

Related Manuals for Vivo MOUNT-E-FD70


Summary of Contents for Vivo MOUNT-E-FD70
- Page 1 Black Electric Flip Down Ceiling TV Mount SKU: MOUNT-E-FD70 Instruction Manual ASSEMBLY VIDEO AVAILABLE: Follow along step-by-step with our video walk through by scanning the QR code with your mobile device or by following the product link: vivo-us.com/products/mount-e-fd70 www.vivo-us.com help@vivo-us.com...
- Page 2 7AM - 7PM Monday-Friday Give us a Call: Chat Us: Email Us: 309-278-5303 www.vivo-us.com help@vivo-us.com We’re Here for You! Our customer-minded support team is here for YOU, Monday-Friday 7am-7pm CST. We offer immediate assistance with rapid response times from customer service agents and product techncians to...
-
Page 3: Weight Capacity
DO NOT INSTALL INTO DRYWALL ALONE. VERIFY YOUR WALL CONSTRUCTION. USE WOOD STUDS TO MOUNT. We include mounting for brick and concrete walls. If unsure, please contact us at vivo-us.com, email at help@vivo-us.com, or call us at 309-278-5303. WEIGHT CAPACITY DO NOT EXCEED WEIGHT CAPACITY. -
Page 4: Tools Needed
TOOLS NEEDED: DIFFICULTY LEVEL Phillips Screwdriver Drill Pencil PACKAGE CONTENTS Please consult the parts list below and ensure you have everything you need to assemble your product. If parts are missing or damaged, please contact us. A (x1) B (x1) C (x1) D (x2) E (x2) -
Page 5: Assembly Steps
NOT use included Concrete Anchors (W-B) for wood or drywall. A (x1) C (x1) W-A (x6) W-B (x6) W-C (x4) Mount Template ST6.3x55mm Screw Concrete Anchor Washer Have a question? Give us a quick call / chat! 309-278-5303 or vivo-us.com... - Page 6 STEP 2: Assembling VESA Components Assemble Bracket Rails (F) to Center Plate (C) using M6x25mm Screws (S-B), M6 Washers (S-C) and M6 Nuts (S-D). While holding M6 Nuts (S-D) with a wrench, use a Phillips screwdriver to tighten M6x25mm Screws (S-B). Slide VESA Brackets (E) onto Bracket Rails (F) and secure using M4x8m Screws (S-E) and 3mm Allen Wrench (T-A).
- Page 7 M-B (x4) M-C (x4) M-E (x4) M5x14mm Screw M8x30mm Screw M6x30mm Screw M8x50mm Screw M6x14mm Screw M-G (x8) M-F (x4) M-H (x8) Small Spacer Square Washer Large Spacer Have a question? Give us a quick call / chat! 309-278-5303 or vivo-us.com...
- Page 8 STEP 4: Attach Leveling Knobs (Optional) Attach Leveling Knobs (J) to the lower two Set Screws (S-A) as shown. This will ensure the TV is perfectly level with the ceiling when raised. S-A (x4) J (x2) Set Screw Leveling Knob STEP 5: Place TV on Mount Place the TV with VESA bracket assembly on Mount (A) by inserting the center screw on Center Plate (B) into the keyhole on Mount (A) at the desired height.
-
Page 9: Step 6: Manage Cables
NOTE: Plugging power supply into AC outlet prior to the mount may cause a large spark when connecting to the mount. Do not open the electrical cover. Never operate the unit without a TV installed G (x1) H (x1) AC Adapter Remote Have a question? Give us a quick call / chat! 309-278-5303 or vivo-us.com... - Page 10 WHO WE ARE VIVO is more than a brand of ergonomic office furniture. We are a team of creative and innovative indivuduals working together to offer high quality, affordable ergonomic solutions. We think and work outside of the box to serve...
-
Page 11: Need Assistance
Call Us: 309-278-5303 Average Resolution Time: 5m 4s Chat Us: www.vivo-us.com Average Resolution Time: < 15m Email Us: help@vivo-us.com Average Resolution Time: 1HR 8M 23% within < 15m 38% within <... - Page 12 LOVE YOUR NEW VIVO SETUP? Ready to share that new amazing setup? Want to brag about that amazing new ergonomic solution? Tag us in your photo! VIVO-us @vivo_us FOR MORE GREAT VIVO PRODUCTS, CHECK OUT OUR WEBSITE AT: WWW.VIVO-US.COM LAST UPDATED: 06/28/2022 REV1...
Need help?
Do you have a question about the MOUNT-E-FD70 and is the answer not in the manual?
Questions and answers