
Related Manuals for Vivo MOUNT-E-MM090


Summary of Contents for Vivo MOUNT-E-MM090
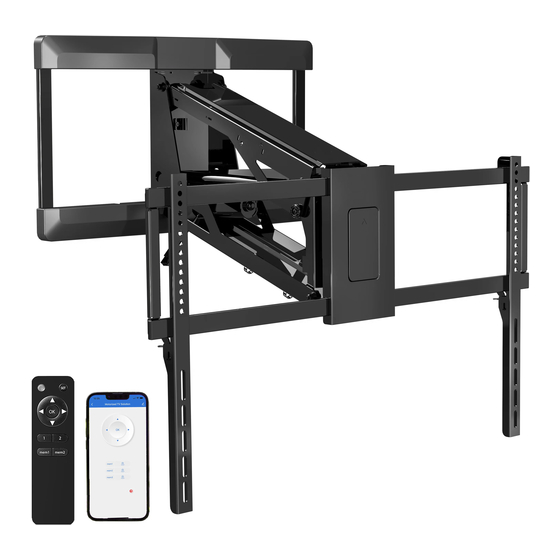
- Page 1 Electric Large TV Wall Mount TUYA® SMART SKU: MOUNT-E-MM090 Mobile App Instruction Manual Assembly Video & Product Info www.vivo-us.com/products/mount-e-mm090...
-
Page 2: Electrical Safety Instructions
If you do not understand these directions, or if you have any doubts about the safety of the installation, please contact our product support team at 309-278-5303 or help@vivo-us.com for further assistance. Check carefully to make sure there are no missing or defective parts. Improper installation may cause damage or serious injury. Do not use this product for any purpose that is not explicitly specified in this manual. -
Page 3: Package Contents
Package Contents A (x1) B (x2) Mount Cover C (x2) D (x2) E (x2) VESA Rail VESA Bracket Connecting Bracket F (x1) G (x1) H (x1) Template Remote AC Adapter I (x2) Cable Clips... -
Page 4: Included Hardware & Tools
Included Hardware & Tools S-A (x4) S-B (x4) M-A (x4) M-B (x4) M4x20mm M4x8mm Screw M6x14mm Screw M8x16mm Screw Threaded Rod M-C (x4) M-D (x4) M-E (x4) M-F (x4) M6x30mm Screw M8x35mm Screw M8 Washer Small Spacer W-A (x6) W-B (x6) W-C (x6) M-G (x4) ST6.3x55mm Screw... -
Page 5: Pre-Assembly
Preassembly Measure your Mantel Width (1) and locate the nearest range on the chart below. Use the Mounting Height (2) in the right column that matches up with your Mantel Width. Locate the Mounting Height that best matches your Mantel Width. Mantel Width (1) Mounting Height (2) <... -
Page 6: Assembly Steps
ASSEMBLY STEPS STEP 1a Wood Stud Installation Using the Mounting Height (2) in the Preassembly, hold the Mounting Template (F) up to the wall and mark the four inner holes using a pencil and a level. Use of a stud finder is also highly recommended. - Page 7 Partially install two ST6.3x55mm Screws (W-A) into the top holes using a 10mm Socket Wrench, leaving a 5mm gap between the wall and the screw head. 10mm Hang the Mount (A) onto the partially installed screws through the keyhole sections and slide into place.
- Page 8 STEP 1b Brick/Concrete Installation Using the Mounting Height (2) in the Preassembly, hold the Mounting Template () up to the wall and mark the four inner holes and the top 2 outermost holes using a marker and a level. Note: The inner 4 holes have a 16”...
- Page 9 Press Concrete Anchors (W-B) into the previously drilled holes. Partially install ST6.3x55mm Screws (W-A) into the top inner holes using a 10mm Socket Wrench, leaving a 5mm gap between the wall and the screw head. 10mm Hang Mount (A) onto the partially installed screws through the keyhole sections. Secure Mount to the remaining Concrete Anchors (W-B) using ST6.3x55mm Screws (W-A) and M6 Washers (W-C).
- Page 10 STEP 2 Plug AC Adapter (H) into Mount (A). STEP 3 Plug AC Adapter (H) into an outlet. Review the Remote Instructions on page 15 and lower the mount to its lowest position using Remote (G). Press Covers (B) onto front of Mount (A). PLEASE REFER TO REMOTE INSTRUCTIONS ON PAGE 15...
- Page 11 Press Covers (B) onto front of Mount (A). STEP 4 Slide the VESA Rails (C) into the side slots of Mount Bracket (A1) until the threaded holes on the Rails are fully inside of the Bracket. Secure M4x20mm Threaded Rods (S-A) into the holes VESA Rail, tightening with 2mm Allen Wrench (T-A).
- Page 12 STEP 5 Install the Connecting Brackets (E) on the ends of VESA Rails (C) using M4x8mm Screws (S-B). Tighten with a Phillips screwdriver. STEP 6 Install VESA Brackets (D) to your display making sure the hook sections are oriented towards the top. Secure using Screws (M-A thru M-D), Washers (M-E), Spacers (M-F, M-G), and a Phillips screwdriver.
- Page 13 STEP 7 Remove the preinstalled Wing Nuts (D2) on VESA Brackets (D) and flip down the Locking Bracket (D1). With the help from a second person, hang TV onto Mount (A). Reinstall the wing nuts with Locking Brackets flipped back up. Remove the protective film off Cable Clips (I) and attach where desired.
- Page 14 [ THIS PAGE HAS INTENTIONALLY LEFT BLANK ]...
-
Page 15: Setup & Troubleshooting
REMOTE & MOBILE APP Setup & Troubleshooting TUYA SMART DOWNLOAD TUYA SMART APP... -
Page 16: Remote Control Instructions
REMOTE CONTROL - INSTRUCTIONS UPWARD MOVEMENT STOP DOWNWARD MOVEMENT MEMORY MEMORY SET 1 SET 2 MEMORY MEMORY RECALL 1 RECALL 2 REQUIRES TWO AAA BATTERIES [not included] General Use Install Batteries Before first use, install two AAA batteries (NOT INCLUDED) in the remote. Adjusting Height Press and hold the to raise or lower the mount. -
Page 17: Reset Mode
Perfrom a Reset. If problem still persists, please contact our Product Support Team at 309-278-5303 or help@vivo-us.com. If the Mount still does not respond to Mount, please reach out to our Product Support Team 309-278-5303 or help@vivo-us.com for further assistance. - Page 18 Mount is Making Abnormal Sound Please check all power connections and perform a Reset. If sound does not go away, please contact our Product Support Team at 309-278-5303 or help@vivo-us.com. Mount Doesn’t Respond to Remote: Please review possible causes and steps below.
-
Page 19: Mobile App
TUYA SMART - MOBILE APP INSTRUCTIONS TUYA® SMART Mobile App DOWNLOAD TUYA SMART APP IN YOUR APP STORE... -
Page 20: Button Functions
Button Functions UPWARD MOVEMENT STOP DOWNWARD MOVEMENT MEMORY MEMORY SET 1 RECALL 1 MEMORY MEMORY SET 2 RECALL 2 MEMORY MEMORY SET 3 RECALL 3 USING ARROW KEYS Press and hold either arrow key (up or down ) to begin movement, then release to STOP movement. -
Page 21: Add Device
Setting Up & Creating Account TURN ON WIFI CREATE ACCOUNT Before you begin, ensure that Wifi is Open Tuya Smart App and select Sign-Up switched on your phone. from start screen. Follow on screen prompts. Only one Tuya Smart account can be synced to mount at one time. -
Page 22: Connection Screen
Add Device Done 1 device(s) being added Motorized Tv Solution Tap to add this device MOTORIZED TV SOLUTION CONNECT TO WIFI Your TV Mount will show under Add Select your Wifi from available list Device as Motorized TV Solutiuon. and enter password to enable mount Select this device and tap + to access. - Page 23 New Home... All Devices Motorized TV Solution MOUNT ADDED Mount has been added successfully. Click on mount name to activate controls. Unpairing Mount from App From the Home screen, locate your TV mount, then long press to open device options. Select Remove Device at the bottom of the screen to unpair the mount from your app.
- Page 24 Syncing Other Mobile Devices To allow other mobile devices to control the TV mount, you will need to first create Home in the app and then invite other users to your Home. HOME MANGEMENT CREATE A HOME Select the icon to navigate to the Tap Create A Home to proceed.
- Page 25 INVITE OTHER MEMBERS JOINING A HOME Tap Add Member and choose an Once app is installed and registered, invitation method. New users will new user will tap the ME ( ) icon on receive link to download Tuya Smart the bottom left. From that screen, tap Home Management and then Join a app with an invitation code to join your Home.
- Page 26 My Home... My Home... New Home Name Home Management No devices No devices Add Device Add Device Add Device CHANGING HOME SCREEN SELECT NEW HOME Select the icon to navigate to the From dropdown, select the name of the Home screen. Tap the next to My new home you were invited to.
- Page 27 Reset Mode If the mount operates abnormally, it may be necessary to perform a reset of the mount. To reset, unplug the mount from power for 10 seconds and plug back in. Press and hold button for 6 seconds; the mount will go up to it’s height position and the control box will emit 2 short beeps.
- Page 28 LAST UPDATED: 01/16/2024 REV1 v1.0 Need Help? Get In Touch Monday-Friday from 7:00am-7:00pm CST help@vivo-us.com www.vivo-us.com 309-278-5303 Chat live with an agent! FOR MORE GREAT VIVO PRODUCTS, CHECK OUT OUR WEBSITE AT: WWW.VIVO-US.COM VIVO-us @vivo_us...
Need help?
Do you have a question about the MOUNT-E-MM090 and is the answer not in the manual?
Questions and answers