Avigilon NVR5 Premium Installation Manual
Hide thumbs
Also See for NVR5 Premium:
- Installation manual (32 pages) ,
- User manual (15 pages) ,
- Manual (12 pages)

Subscribe to Our Youtube Channel
Related Manuals for Avigilon NVR5 Premium


Summary of Contents for Avigilon NVR5 Premium
- Page 1 Installation Guide Avigilon NVR5 Premium NVR5-PRM-96TB-S19, NVR5-PRM-128TB-S19, NVR5-PRM-160TB-S19...
- Page 2 The contents of this document and the specifications of the products discussed herein are subject to change without notice. Avigilon Corporation reserves the right to make any such changes without notice. Neither Avigilon Corporation nor any of its affiliated companies: (1) guarantees the completeness or accuracy of the information contained in this document;...
-
Page 3: Table Of Contents
Install the Sliding Rack Rails and Cable Management Arm Install the Bezel Log into Windows Server for the First Time Activate the ACC Software and Connect to Avigilon Cloud Services Activate ACC Software and Feature Licenses Connect to Avigilon Cloud Services Reactivating a License... - Page 4 Hard Drive RAID Status Indicators System Health and Identification Modes Resetting the iDRAC System For More Information Product User Guides...
-
Page 5: Introduction
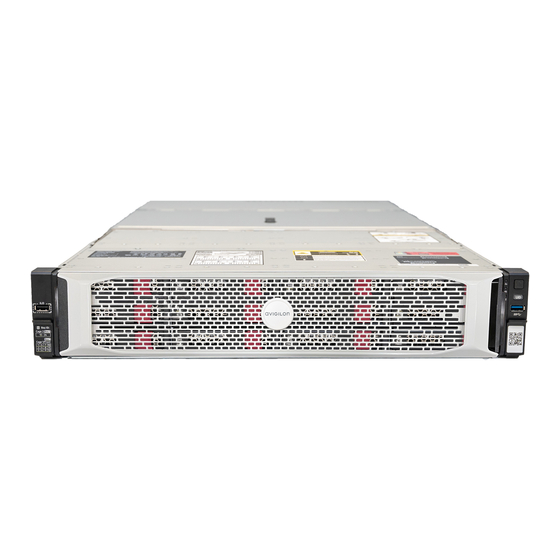
Introduction The Avigilon Network Video Recorder (NVR5 Premium FIPS Series) is preloaded with Avigilon Control Center (ACC) software and is configured for exceptional performance and reliability. The Network Video Recorder offered in higher data storage capacities can be easily integrated into any existing Avigilon surveillance system or act as the base of a new site. - Page 6 1. Bezel Protects against unauthorized physical access to the hard drives. For more information, see Install the Bezel on page 10. 2. Power button Controls the power supply to the recorder. 3. Video connector Accepts a VGA monitor connection. 4. USB 2.0 port Accepts USB connectors to external devices.
-
Page 7: Back View (96Tb, 128Tb, 160Tb)
Back View (96TB, 128TB, 160TB) Figure 1: Back view of NVR5 Premium 96TB, 128TB and 160TB recorder 1. Two (2) 1 Gbps Ethernet ports Accepts Ethernet connections to multiple networks and includes LED indicators of the connections. 2. Out-of-Band Management (OOBM) port Accepts an OOBM RJ-45 connection and includes an LED indicator of the connection. -
Page 8: Package Contents
Package Contents Ensure the package contains the following: Avigilon NVR5 Premium Recorder Rack sliding rail assembly kit Cable management arm assembly kit Bezel and key Power cables 2 x C13 / C14 2 x region specific... -
Page 9: Installation
Installation Connect Cables Refer to the diagrams in the Overview section for the location of the different connectors. Make the following connections as required: 1. Connect a KVM switch or separate keyboard, mouse and monitor to the recorder. The keyboard and mouse can be connected to any USB port on the recorder. ... -
Page 10: Install The Bezel
Install the Bezel The bezel can be installed on the front of the recorder to help protect the hard drives against unauthorized access. 1. Align and insert the right end of the bezel until it clicks into place. 2. Push the left end of the bezel into the front of the unit until it clicks into place. Install the Bezel... -
Page 11: Log Into Windows Server For The First Time
9. Once the setup procedure is complete, the system will restart. Proceed to activate the license for the Avigilon Control Center software on your Network Video Recorder. Log into Windows Server for the First Time... -
Page 12: Activate The Acc Software And Connect To Avigilon Cloud Services
Activate the ACC Software and Connect to Avigilon Cloud Services After you have deployed your NVR5 Premium recorder, activate your ACC software and feature licenses and connect to Avigilon Cloud Services. Activate ACC Software and Feature Licenses You can activate, deactivate, and reactivate product or feature licenses. Licenses are called Product Keys in the ACC system, and Activation IDs in the licensing portal. -
Page 13: Troubleshooting
Network Configuration By default, the NVR5 Premium acquires an IP address on the network through DHCP. If you need to set up the workstation to use a static IP address or any specific network configuration, see the Windows Help and Support files for more information. - Page 14 Note: After operating system recovery, you need to reinstall the previously installed ACC software. Depending on when your NVR5 Premium was shipped, it is recommended that you connect to the network when possible to install updates for Windows and ACC Client software after system recovery is completed.
-
Page 15: Operating System Recovery By External Usb
ACC software. The ACC software installation is covered in the following step. 6. Navigate to C:\Avigilon\Control Center Installation Files, and run the ACC installer for the version of ACC software in use at your site. If needed, connect to the internet and download the required ACC installers. -
Page 16: Maintenance
Maintenance Checking System Health You can check your system health through the ACC Client Site Health or with the Server Administrator software. ACC Client Site Health You can check on the health of the system components in the Site Health in the ACC Client software. See Site Health in the ACC Client User Guide for more information. -
Page 17: Replacing Hard Drives
Guide for Avigilon Systems (link). The operating system and the Avigilon Control Center software are mirrored on two hard drives at the back of the recorder. If one of the hard drives fail, you can replace the failed drive while the recorder continues to run from the other. -
Page 18: Replacing A Hard Drive Blank
WARNING — Opening or removing the system cover while the system is powered on may expose you to a risk of electric shock. CAUTION — Do not operate the system without the cover for a duration exceeding five minutes. ... - Page 19 2. Press the release button and slide the blank out of the hard drive slot. 3. Insert the hard drive all the way into the recorder then push the handle against the hard drive to lock it into place. 4. Open the Server Administrator application and expand the System Tree. The new hard drive should be automatically added to the Physical Disks list.
-
Page 20: Replacing Front Or Back Hard Drives
Replacing Front or Back Hard Drives 1. Locate the failed hard drive at the front or back of the recorder. 2. Press the release button on the front left of the hard drive. 3. When the handle is released, pull the hard drive out of the recorder. 4. - Page 21 1. At the top of the recorder, unlock the latch release then lift and rotate the latch towards the back of the recorder. The cover slides back and is released from the recorder body. 2. Hold the cover from both sides and lift it off the recorder. 3.
- Page 22 10. Place the new hard drive into the tray and push the handle down until the hard drive clicks into place. 11. Fold down the handles on the hard drive tray. Close and lock the recorder cover. After the operating system starts up, the recorder immediately starts rebuilding the hard drive. The progress is displayed in the Server Administrator.
-
Page 23: Led Indicators
Blinking blue — System identification mode is active. Steady amber — The system is in fail-safe mode. Note: If the system health indicates a degraded or critical state, contact Avigilon Technical Support for assistance. System health and System ID ... -
Page 24: Idrac Direct Led Indicators
LED Indicator Description Steady amber — An electrical error has occurred. Possible errors include: Electrical Voltage out of range Failed power supply Voltage regulator Check the power status indicator to confirm if it is an issue with the power supply, and reseat the power supply unit, if the error persists. -
Page 25: Network Link Status Indicators
Figure 4: (1) The power status indicator for 96TB, 128TB and 160TB recorders LED Indicator Description Power is not connected. Green Power is supplied. Blinking amber There is a problem with the power supply. Blinking green A firmware update is being applied to the power supply unit. CAUTION —... - Page 26 Figure 5: (1) Link LED. (2) Connection activity LED. LED Indicator Description The recorder is not connected to a network. Link LED — green The recorder is connected to a network at the Connection Activity LED — blinking green maximum port speed. Link LED —...
- Page 27 LED Indicator Description The hard drive is ready for removal from the recorder. Note: The indicator remains off until all drives are initialized after the system is turned on. Drives are not ready for removal during this time. Two short green flashes every second The system is identifying a new hard drive, or preparing a hard drive for removal.
- Page 28 Limited Warranty Avigilon warranty terms for this product are provided at avigilon.com/warranty. Resetting the iDRAC System...
- Page 29 For More Information For additional product documentation and software and firmware upgrades, visit support.avigilon.com. Technical Support Contact Avigilon Technical Support at support.avigilon.com/s/contactsupport. Product User Guides Windows Upgrade and Recovery Guide for Avigilon Systems (link) Enabling iDRAC Enterprise Features Setup Guide (link) ...
Need help?
Do you have a question about the NVR5 Premium and is the answer not in the manual?
Questions and answers