Avigilon Premium NVR5 Series Installation Manual
Hide thumbs
Also See for Premium NVR5 Series:
- Installation manual (30 pages) ,
- User manual (15 pages) ,
- Manual (12 pages)

Related Manuals for Avigilon Premium NVR5 Series


Summary of Contents for Avigilon Premium NVR5 Series
- Page 1 Installation Guide Avigilon NVR5 Premium NVR5-PRM-252TB-S19, NVR5-PRM-288TB-S19, NVR5-PRM-360TB-S19, NVR5-PRM-432TB-S19...
- Page 2 (2) is responsible for your use of, or reliance on, the information. Avigilon Corporation shall not be responsible for any losses or damages (including consequential damages) caused by reliance on the information presented herein.
-
Page 3: Table Of Contents
Install the Sliding Rack Rails and Cable Management Arm Install the Bezel Log into Windows Server for the First Time Activate the ACC Software and Connect to Avigilon Cloud Services Activate ACC Software and Feature Licenses Connect to Avigilon Cloud Services Reactivating a License... - Page 4 LED Indicators Front View Power Status Indicators UID Status Indicator Health Status Indicators Network Status Indicators Health and Thermal Status Indicators for Hard Drives Hard Drive RAID Status Indicators Rear View Network Status Indicators UID Status Indicator Power Status Indicators For More Information Product User Guides...
-
Page 5: Introduction
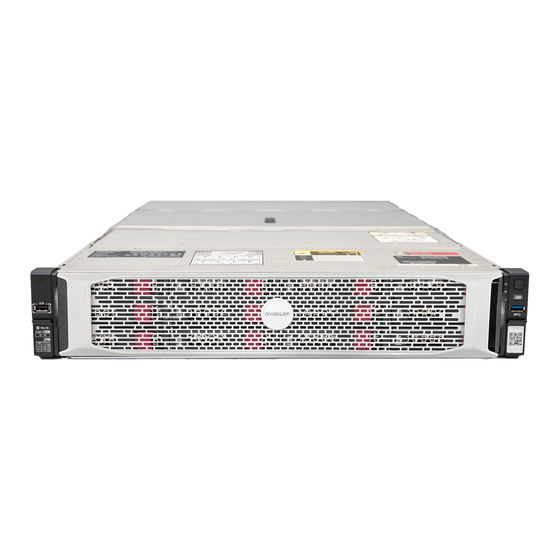
The Avigilon Network Video Recorder (NVR5 Premium) is preloaded with Avigilon Control Center (ACC) software and is configured for exceptional performance and reliability. The Network Video Recorder offered in higher data storage capacities can be easily integrated into any existing Avigilon surveillance system or act as the base of a new site. -
Page 6: Back View
1. Bezel Protects against unauthorized physical access to the hard drives. For more information, see Install the Bezel on page 9. 2. HPE iLO label (top view is not shown) Provides the Hewlett Packard Enterprise iLO (Integrated Lights-Out) serial number and Out-of-Band Management (OOBM) account credentials for initial login to the iLO web interface. -
Page 7: Package Contents
Bezel with a Kensington slot Kensington lock included in a separate kit Power cables 2 x C13-to-C14 cables 2 x NEMA cables (NA, EU, UK, AU) The 3-year support shown in HPE iLO materials has been extended by Avigilon. Package Contents... -
Page 8: Installation
OOBM account from the HPE iLO label, which is displayed on the top panel of the front cage. Important: Avigilon recommends changing the default iLO password (eight characters) after initial login to protect your recorder from unauthorized remote access. If you reset iLO to the factory default settings, use the default iLO account credentials to log in after reset. -
Page 9: Install The Sliding Rack Rails And Cable Management Arm
Boot Settings > Secure Boot Enforcement and press Enter. 3. Select Enabled and press Enter. To configure the iLO web interface, do the following: 1. Select Security > Access Settings. 2. Click the pencil icon for each section and edit the settings: Account Service >... -
Page 10: Log Into Windows Server For The First Time
1. Align and insert the right end of the bezel until it clicks into place. 2. Push the left end of the bezel into the front of the unit until it clicks into place. 3. Adjust the Kensington cable and insert the T-bar into the security slot on the bezel. 4. - Page 11 1. On the first screen, scroll through the list and select your preferred language. Figure 3: The language selection screen during initial Windows software set up. (Used with permission from Microsoft.) 2. Select the country/region, preferred app language and keyboard layout, and then click Next. NOTE: If a language other than English is selected, the server will restart.
-
Page 12: Activate The Acc Software And Connect To Avigilon Cloud Services
You can start to back up the system settings for your new site in the ACC Client software after it is configured. These settings include the ACC password, and the settings for the camera connections. For more information on backing up the site and server configurations, see the Avigilon ACC Client User Guide. Reactivating a License... -
Page 13: Troubleshooting
You can monitor the health of the system components in the Site Health in the ACC Client software. See the Help files provided with the ACC Client software, or the Avigilon ACC Client User Guide available from the Avigilon website for more information. -
Page 14: Operating System Recovery By External Usb
2. On the Choose an option screen, select Use another operating system. 3. Select the OS Recovery partition. 4. On the Avigilon Recovery window, select Recover. Allow up to half an hour for the recovery to complete. 5. After system reboot, complete the Windows setup process. - Page 15 The general steps are: 1. Load the Avigilon Recovery Image onto a USB recovery device. 2. Plug the USB recovery device into the recorder. 3. Repeatedly press the F12 key while booting the recorder. 4. On the UEFI Boot menu, select the USB recovery device.
-
Page 16: Maintenance
Maintenance Checking System Health You can check your system health through the ACC Client Site Health and iLO web interface. For more information, see the Hewlett Packard Enterprise HPE iLO 5 User Guide (link) ACC Client Site Health You can check on the health of the system components in the Site Health in the ACC Client software. See Site Health in the ACC Client User Guide for more information. -
Page 17: Downloading The Active Health System Log
Downloading the Active Health System Log Note: Before you start, ensure the iLO Service Port and USB flash drives options are enabled in the iLO web interface. The Active Health System Log collects server information, processor model, storage capacity, memory capacity, speed, firmware and driver details for troubleshooting. -
Page 18: Powering Down The Recorder
Note: Before powering down the recorder for any upgrade, recovery or maintenance, back up critical recorder data and programs. For more information, see the Windows™ Upgrade and Recovery Guide for Avigilon Systems (link). Important: When the recorder is in standby mode, auxiliary power is still being provided to the system. -
Page 19: Powering Up The Recorder
Press and release the power and standby button. This method initiates a controlled shutdown of applications and the OS before the recorder enters standby mode. Press and hold the power and standby button for more than four seconds to force the recorder to enter standby mode. -
Page 20: Replacing Front Hard Drives
To replace a hard drive stored in the front of the recorder, complete the following steps: 1. Back up all recorder data. For more information, see the Windows™ Upgrade and Recovery Guide for Avigilon Systems (link). 2. Power down the recorder. -
Page 21: Replacing Center Hard Drives
To replace a hard drive stored in the middle of the recorder, complete the following steps: 1. Back up all recorder data. For more information, see the Windows™ Upgrade and Recovery Guide for Avigilon Systems (link). 2. Power down the recorder. - Page 22 d. When done, slide the server back into the rack, and then press the server firmly into the rack to secure it in place. 4. Open drive cage 2: Replacing Center Hard Drives...
-
Page 23: Replacing Rear Hard Drives
To replace a hard drive stored in the rear of the recorder, complete the following steps: 1. Back up all recorder data. For more information, see the Windows™ Upgrade and Recovery Guide for Avigilon Systems (link). 2. Power down the recorder. - Page 24 WARNING — To reduce the risk of personal injury from hot surfaces, allow the drives, power supplies, and internal system components to cool before touching them. WARNING — To reduce the risk of personal injury or damage to the equipment, be sure that: The rack is bolted to the floor using the concrete anchor kit.
- Page 25 a. Extend the server from the rack, as described in the previous step 2. b. Remove the access panel: c. If necessary, unlock the access panel latch. d. Pull up the latch to disengage the access panel from the chassis. e.
- Page 26 9. Pull the release lever to disengage the drive from the backplane, and then slide the drive out of the bay. 10. To replace the hard drive, reverse the above steps. Replacing Rear Hard Drives...
-
Page 27: Led Indicators
LED Indicators The following tables describe what the LEDs on the recorder indicate. For more information on the location of the LED indicators, see Overview on page 5. Front View Note: When the power status, UID status, system health and network status LED indicators are flashing simultaneously, a power fault has occurred. -
Page 28: Health Status Indicators
The system is in a degraded state. For more information, see Checking System Health on page 16. Note: If the health LED indicates a degraded or critical state, contact Avigilon Technical Support for assistance. Flashing green One flash per second: The remote server management tool (iLO web interface) is rebooting. Steady green The system is working. -
Page 29: Hard Drive Raid Status Indicators
LED Indicator Description The power supply is not connected, the recorder is off, or the facility power is off. Steady amber One or more hard drives in the front, center or rear cage have failed or is predicted to fail. WARNING —... -
Page 30: Rear View
LED Indicator Description Flashing green Four flashes per second: The hard drive is working and has activity. One flash per second: The hard drive is doing any of the following: Rebuilding RAID migration Strip size migration Capacity expansion Logical drive extension Erasing Spare part activation Rear View... -
Page 31: Uid Status Indicator
The power supply is not connected, power supply failure, the power supply is in standby mode, or the facility power is off. Steady green The power supply unit is working. Limited Warranty Avigilon warranty terms for this product are provided at avigilon.com/warranty. UID Status Indicator... -
Page 32: For More Information
For More Information For additional product documentation and software and firmware upgrades, visit support.avigilon.com. Technical Support Contact Avigilon Technical Support at support.avigilon.com/s/contactsupport. Product User Guides Windows™ Upgrade and Recovery Guide for Avigilon Systems (link) Hewlett Packard Enterprise HPE iLO 5 User Guide (link)
Need help?
Do you have a question about the Premium NVR5 Series and is the answer not in the manual?
Questions and answers