
Related Manuals for ARDESTO CH-1500MOW


Summary of Contents for ARDESTO CH-1500MOW
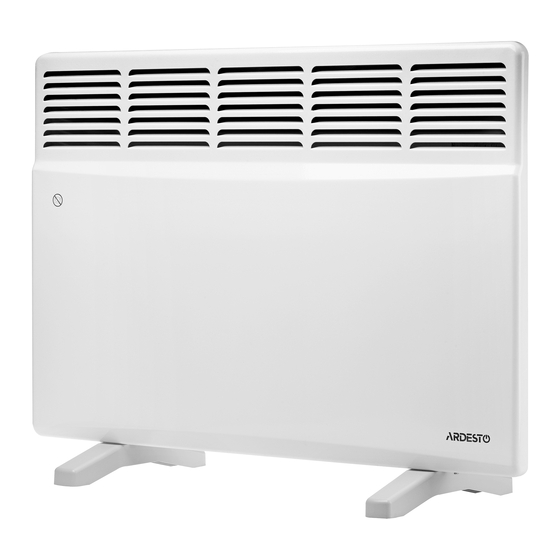
- Page 1 КОНВЕКТОР ЕЛЕКТРИЧНИЙ Інструкція з експлуатації ELECTRIC CONVECTOR User manual CH-1500MOW CH-1500MCW CH-2000MOW CH-2000MCW...
- Page 2 1. ВИМОГИ БЕЗПЕКИ Перед підключенням конвектора до електромережі обов’язково візуально перевірте шнур живлення та сам конвектор на наявність механічних ушкоджень. При наявності ушкоджень зверніться в сервісний центр для їхнього усунення. До усунення ушкоджень підключати конвектор до електромережі заборонено. Відключайте конвектор від електромережі під час його...
- Page 3 або розумовими можливостями або з недостатністю досвіду й знань, якщо вони перебувають під постій- ним наглядом або їх проінструктовано щодо безпеч- ного використання приладу та вони зрозуміють мож- ливі небезпеки. Діти не повинні бавитися з приладом. Очищення та обслуговування споживачем не повинні здійстювати...
-
Page 4: Загальні Вказівки
УВАГА! Перед встановленням і початком експлуа- тації виробу уважно ознайомтесь з цією «Інструк- цією з експлуатації» (далі - інструкція). У зв’язку з постійною роботою з удосконалювання ви- робу в конструкцію можуть бути внесені зміни, що не відображені в цій інструкції, без зниження споживчих властивостей... -
Page 5: Технічні Дані
Після заповнення гарантійного талона забороняється вносити в нього будь які виправлення, доповнення, видаляти і переписувати дані, що внесені продавцем. Зберігайте касовий чек, цю інструкцію, гарантійний талон і паковання протягом гарантійного строку експлуатації конвектора. Загублена документація, що додається до конвектора при продажі, не відновлю- ється. - Page 6 ЗАБОРОНЯЄТЬСЯ! • Розміщувати обігрівач безпосередньо під ште- псельною розеткою. • Закривати частково або повністю, засмічувати отво- ри повітрязабірної і повітрявипускної решіток. • Розташовувати поруч із конвектором легкозайми- сті речовини й предмети. • Використовувати конвектори у безпосередній близь- кості від ванни, душу або плавального басейну. •...
-
Page 7: Підготовка До Роботи
5. ПІДГОТОВКА ДО РОБОТИ 5.1 Розпакуйте конвектор. Збережіть паковання для його подальшого використання в разі демонтажу конвектора для тривалого зберігання. Після зберігання конвектора або його транспортуван- ня при низькій температурі (в разі випадіння роси) перед включенням конвектора його необхідно витри- мати... - Page 8 Таблиця 2 Номінальна споживана потужність, L, мм кВт Мал. 1 5.5 Конвектори допускається встановлювати в при- міщеннях з підвищеною вологістю – ванних кімнатах, душових, басейнах (малюнок 3). При цьому установка конвектора забороняється: - в зоні 1 ванних кімнат, душових; - в зоні 2, якщо особа, знаходячись у ванні або під душем, зможе...
- Page 9 Розетки для підключення конвекторів повинні бути встановлені на відстані не менше 25 см від підлоги поза зоною 2. Мал. 2 Мал. 3 5.6 Для експлуатації конвектора на підлозі, встановіть опори, як показано на малюнках 4.1 – 4.3. Для установки опор покладіть конвектор на горизон- тальну...
- Page 10 Розміщення конвектора на опорах в приміщенні анало- гічне (див. мал. 3), при цьому відстань від задньої стінки конвектора до предметів (меблі, штори і т.п.) повинна бути не менше 15 см. 5.7 Переведіть клавішу вимикача у відключене поло- ження «0», ручку термостата встановіть в положення «»...
-
Page 11: Технічне Обслуговування
Для перемикання конвектора в режим половинної потужності (для конвекторів зі ступінчастим регулятором потужності) досить перевести в положення «0» одну із клавіш регулятора. 6.2 Ініціалізація функції захисту від замерзання. Встановіть ручку термостата в положення «» і включіть конвектор. 6.3 Відключення конвектора від електромережі. Встановіть... - Page 12 8. УМОВИ ТРАНСПОРТУВАННЯ ТА ЗБЕРІГАННЯ 8.1 Конвектори в упаковці виробника можуть тран- спортуватися всіма видами критих транспортних засобів, які забезпечують їх захист від атмосферних опадів та механічних пошкоджень, у відповідності з правилами перевезення вантажу, діючими на тран- спорті даного виду. Транспортування допускається при...
-
Page 13: Safety Requirements
1. SAFETY REQUIREMENTS Before connecting the convector to the power supply network, be sure to visually check the power cord and the convector for mechanical damage. If there are damages, contact an authorized service center for repair. Before rapairing damage, it is not allowed to connect the convector to the power supply network. - Page 14 or instructed in the safe use of the device and they understand the possible dangers. Children should be supervised to ensure they do not play with the product. Cleaning and customer servise should not be performed by children without supervision. Children under 3 years old should not be close to the appliance, except when they are under constant supervision.
-
Page 15: General Instructions
WARNING! Before installing and operating this product, please read this “User Manual” (hereinafter referred to as “the manual”) carefully. Due to the continuous improvement of the product, there can be made changes in the design of the product that are not reflected in this manual without reducing its consumer properties. -
Page 16: Technical Data
After filling out the warranty card, it is not allowed to make any amendments, additions, delete and rewrite the data added by the seller. Keep the cashier’s check, this manual, warranty card and packaging during the warranty period of the convector. Lost documentation attached to the convector upon sale is not restored. - Page 17 IT IS NOT ALLOWED TO: • Place the heater directly under the outlet. • Partially or complety cover, clog holes in the intake and exhaust grids. • Place flammable substances and objects near the convector. • Use convectors in the immediate vicinity of the bathtub, shower or swimming pool.
-
Page 18: Preparation For Work
5. PREPARATION FOR WORK 5.1 Unpack the convector. Keep the packaging for future use if you need to remove the convector for long-term storage. After storing or transporting the convector at a low temperature (in case of dew), it should be kept at room temperature for at least 2 hours before turning on. - Page 19 Table 2 Rated power consumption, kW L, mm...
- Page 20 Windowsill Upper hook Lower hook Floor Fig. 1 5.5 The convector may be installed in rooms with high humidity - bathrooms, showers, pools (Fig. 3). It is prohibited to install the convector: - in the area 1 of bathrooms, showers; - in the area 2, if a person, being in a bath or under a shower, can reach the controls of the convector.
-
Page 21: Operation
5.6 To operate the convector on the floor, install the supports according to figures 4.1 - 4.3. To install the supports, put the convector on a horizontal surface with the base up. Fig. 4.1 Fig. 4.2 Fig. 4.3 Install the hooks of the support (Fig. 4.1) in the corresponding holes of the air intake grid so that the holes for screw fixing in the support and along the edges of the convector base coincide, fix the support with a screw (Fig. -
Page 22: Maintenance
When the room temperature reaches the desired value (you can check the temperature with a thermometer), slowly turn the thermostat knob towards decreasing the numerical values (relative to the mark) indicated on the knob until the thermostat switches off the heating mode, which is accompanied by a characteristic “click”... -
Page 23: Transportation And Storage
8. TRANSPORTATION AND STORAGE 8.1 Convectors in the manufacturer’s packaging can be transported by all types of covered vehicles, which ensure their protection against atmospheric precipitation and mechanical damage, in accordance with the rules for the carriage of goods in force on this type of transport. - Page 24 Умови гарантії: Warranty conditions: Завод гарантує нормальну роботу виробу протя- The plant guarantees normal operation of the гом 12 місяців з моменту його продажу за умови product within 12 months from the date of the sale, дотримання споживачем правил експлуатації і provided that the consumer complies with the rules догляду, передбачених...
-
Page 25: Гарантійний Талон
ГАРАНТІЙНИЙ ТАЛОН Шановний Покупець! Вітаємо Вас з придбанням приладу торго- вельної марки ARDESTO, який був розроблений та виготовлений у відповідності до найвищих стандартів якості, та дякуємо Вам за те, що Ви обрали саме цей прилад. Просимо Вас зберігати талон протягом гарантійного періоду. При... -
Page 26: Warranty Card
WARRANTY CARD Dear Buyer! Congratulations on your purchase of the ARDESTO brand appliance, which was designed and manufactured in accordance with the highest quality standards, and we thank you for choosing this particular instrument. We ask you to keep the coupon during the warranty period. When purchasing a product, require a full warranty card. - Page 27 Warranty card/Гарантійний талон Product information/Інформація про виріб Product/Виріб Model/Модель Serial number/Серійний номер Seller Information/Інформація про продавця Trade organization name/Назва торгової організації The address/Адреса Date of sale/Дата продажу Seller stamp/Штамп продавця Coupon/Талон № 3 Seller stamp/ Штамп продавця/ Date of the application/Дата звернення Cause of damage/Причина...
Need help?
Do you have a question about the CH-1500MOW and is the answer not in the manual?
Questions and answers