
Related Manuals for Techni Mobili RTA-3930SU


Summary of Contents for Techni Mobili RTA-3930SU
- Page 1 MODELS RTA-3930SU RTA-3940SU ASSEMBLY INSTRUCTIONS Thank you for purchasing our product. Please note that this product comes packaged Scan QR code to view assembly video in 2 separate boxes. REV.LTK-6666-0422-2...
- Page 2 RTA-3930SU, RTA-3940SU • The product comes packaged in 2 separate boxes. • The unit requires AC power supply 100V-240V. 110V-240V • The unit plugs into an electrical outlet type A or B. • Please read carefully the assembly instructions before the installation.
-
Page 3: Main Parts List
RTA-3930SU, RTA-3940SU MAIN PARTS LIST Metal foot Leg without motor Leg with motor Adjustable support beam Transmission rod Support plate Power adapter Metal covers Power cable (for the beam) Cable tie Metal holder Tabletop (for adapter) Handset Switch cord Control box... - Page 4 RTA-3930SU, RTA-3940SU MAIN PARTS LAYOUT (FOR REFERENCE): LIST OF HARDWARE, SCREWS AND FITTINGS PART ITEM PART ITEM...
- Page 5 RTA-3930SU, RTA-3940SU BEFORE YOU START THE ASSEMBLY, PLEASE READ THE FOLLOWING TIPS AND WARNINGS. ❼ ❶ To avoid Do a quick inventory misalignments, always to make sure the package leave the screws loose contains all the parts and and tighten them until...
-
Page 6: Assembly Steps
RTA-3930SU, RTA-3940SU ASSEMBLY STEPS STEP 1 se the e C5 to asse ble the etal feet 1 to the le s 2 and 3 with s rews A Hardware: otto to iew this step otto STEP 2 se the e C4 to loosen p all the s rews on the... - Page 7 RTA-3930SU, RTA-3940SU STEP 3 • Place the adjustable support beam 4 over the brackets of the legs 2 Hardware: and 3 with the beam tabs facing UP. • Use the key C5 to assemble the adjustable support beam 4 to the legs 2 and 3 with screws B.
- Page 8 RTA-3930SU, RTA-3940SU STEP 4 • Use the hex wrench (spanner) G to loosen up the nut on the Hardware: transmission rod 5 to allow it to expand, and insert the inner rod into the hole of the leg 2, but DO NOT TIGHTEN the nut, this is done until step 8.
- Page 9 RTA-3930SU, RTA-3940SU STEP 5 Use the key C5 to assemble the support plates 6 to the legs 2 and 3 with screws A. Hardware: NOTE: The metal plates might have small rubber grommets, if that is the case, DO NOT REMOVE THEM.
- Page 10 RTA-3930SU, RTA-3940SU STEP 7 • With the help of another person, expand or retract the beam 4 to make the holes on the support plates 6 align with the pre-drilled holes on the Hardware: tabletop 12. • Use a Phillips screwdriver (not included) and screws F to assemble: M4.2x19...
- Page 11 P.10 RTA-3930SU, RTA-3940SU P.10 STEP 8 • Use the key C4 to re-tighten all the holes on the middle of the beam 4. • If the transmission rod 5 detached from the leg 2 in the previous Hardware: steps, go ahead and re-insert it, then use the hex wrench (spanner) G to tighten the nut.
- Page 12 P.11 RTA-3930SU, RTA-3940SU P.11 STEP 9 Without attaching them to the unit, make the following connections: • The cable from the handset 13 to the control box 15 in its respective receiving port. Switch Handset Cord Port Wire Port Scan QR Code...
- Page 13 RTA-3930SU, RTA-3940SU P.12 P.12 STEP 10 It is important to do a lift test before proceeding. • Stay clear of the legs as they will move up and down during the test. • Press the UP and DOWN arrows on the handset 13 to make sure the legs rise/lower simultaneously.
-
Page 14: Cables Management
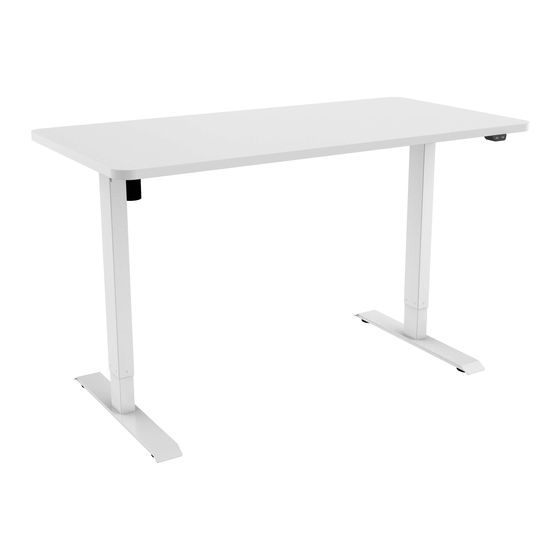
RTA-3930SU, RTA-3940SU P.13 P.13 STEP 12 • Use a Phillips screwdriver (not included) to attach the control box 15 to the tabletop 12 with screws F. Please note that there are no pre- Hardware: drilled holes for it, you can attach anywhere on the panel. - Page 15 RTA-3930SU, RTA-3940SU P.14 P.14 ALL DONE! Give yourself a nice pat on the back. You did a great job! Weight Limit 154 Lbs Lift range (70 Kg) DOWN from floor: 48.5” Max Press the UP or DOWN buttons 29” Min...
- Page 16 RTA-3930SU, RTA-3940SU P.15 P.15 TECHNICAL DATA Input voltage 100V-240V, 50/60Hz Duty cycle (power cycle) 10%: 2 min on at most, 18 min. off. Tolerable ambient temperature 32-104°F (0-40°C) Max. lift speed 59 in/min (25mm/s) CARE, MAINTENANCE AND SAFETY WARNINGS: • Do not exceed the indicated weight limits.
- Page 17 P.16 RTA-3930SU, RTA-3940SU P.16 TECHNI MOBILI DESK WARRANTY DESKS/LAPTOP CARTS/FILE CABINETS: LIMITED 5-YEAR WARRANTY RTA Products, LLC warrants to the Original Purchaser who acquired a new product from RTA Products or its authorized resellers that this product will be free from defects in its workmanship and materials, under normal use and service conditions, as described herein.
- Page 18 FOR SEVERAL HELP OPTIONS INCLUDING REPLACEMENT PARTS ORDERS _________________________________________________________________ WWW.TECHNIMOBILI.COM VISIT: CLICK ON SUPPORT TAB Scan QR Code to order replacement parts SUPPORT@RTAPRODUCTS.COM OR EMAIL US:...
Need help?
Do you have a question about the RTA-3930SU and is the answer not in the manual?
Questions and answers