Table of Contents
Advertisement
Quick Links
Advertisement
Table of Contents

Subscribe to Our Youtube Channel
Related Manuals for Durafly GLOSTER GLADIATOR MK1


Summary of Contents for Durafly GLOSTER GLADIATOR MK1
- Page 1 GLOSTER GLADIATOR MK1 DURAFLY 1100MM PLUG AND FLY...
-
Page 2: Safety Precautions
& WARNING: Read this instruction manual fully so as to become completely familiar with the features of the product before operating. Failure to operate this product correctly could result in damage to the product, personal property and cause serious injury. This is a sophisticated hobby product and is NOT a toy. - Page 3 CONTENTS 12-17...
-
Page 4: Specification
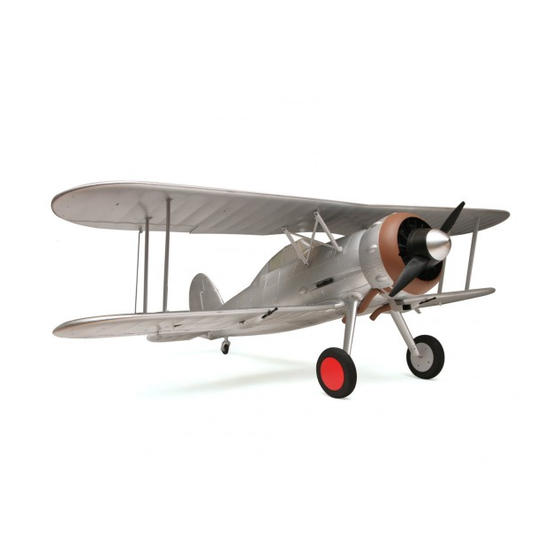
The Durafly Gloster Gladiator is manufactured in strong EPO foam, to the usual high standards you have come to expect from this range of RC airplanes. As all other Durafly models, it comes "Plug N Fly", this means it is supplied with an easy to assemble airframe, installed motor and ESC, and pre-installed servos. -
Page 5: Required To Complete Model
CONTENTS: 1. Fuselage 6. Scale Spinner w/Prop Adapter 2. Main Wings 7. Scale Landing Gear. 3. Decal Sheet 8. Large Diameter Scale Wheels. 4. Horizontal Stabilizer 9. Complete Accessory Pack Including 11x7 Prop, 5. Scale Detailing Parts Linkages, Y Lead, and Tool Kit REQUIRED TO COMPLETE MODEL:... - Page 6 GLOSTER GLADIATOR MK1 DURAFLY 1100MM PLUG AND FLY ASSEMBLY of the Gloster Gladiator (PNF): Note: If using the supplied stick on decals, we suggest you add these before building the model, you may find it a bit easier. For advice on applying the decals, please go to pages 10-12 of this manual.
- Page 7 2. Remove one of the wheel collars from an 3. Tighten the grub screw using the hex-key axle. Remove the inner wheel hub from one of supplied, ensure the grub screw tightens the wheels and slide it onto one of the axles onto the flat of the axle.
- Page 8 GLOSTER GLADIATOR MK1 DURAFLY 1100MM PLUG AND FLY 8. Use the supplied 2.3mm x 10mm hex 9. Also use 2.3mm x 10mm hex self-tapping screws with the molded on washer to secure screws to retain the landing gear fairings to the the landing gear retaining straps in place.
- Page 9 14. Connect the elevator halves using the 15. Secure the horizontal stabilizer halves to supplied 2.3mm x 6mm self-tapping screw. the fuselage using the supplied 2 off 2.3mm x 6mm self-tapping screws. 16. Connect the pushrod ball-link to the 17. Center the elevator servo with either your elevator control horn.
- Page 10 GLOSTER GLADIATOR MK1 DURAFLY 1100MM PLUG AND FLY 20. Secure the bottom wing to the fuselage 21. The next step is to attach one of the using the 4 supplied M3 x 20mm machine cabane struts to the fuselage. screws.
- Page 11 26. Next step is to attach the top wing. It is best 27. With the interplane struts firmly located, line to start with one set of interplane struts and up the cabane struts to the top wing fixings. firmly locate them, then locate the other side. Secure once again with the 2.3mm x 8mm hex screws with the molded on washers.
- Page 12 GLOSTER GLADIATOR MK1 DURAFLY 1100MM PLUG AND FLY 32. Do a final check that everything is square, 33. Double check that when your aileron stick and that both wings line up with each other. and the trim is at neutral that all the ailerons are at neutral.
-
Page 13: Control Throws
The Gladiator Mk1 handles very well in flight, and that’s not down to good design alone, but a good pre-flight set-up too. Before you fly your Gladiator please follow the recommended settings below for optimum handling and performance. CONTROL THROWS: - mm - mm Elevator... - Page 14 GLOSTER GLADIATOR MK1 DURAFLY 1100MM PLUG AND FLY G5/1824 G5/1824 G5/1804 G5/1804 G5/1701 GRIP GRIP FIRST FIRST LIFT HERE LIFT HERE LIFT HERE G5/1815 G5/1815 Port side decals. Starboard side decals DATUM DATUM DATUM DATUM G5/1701 G5/1701 No STEP No STEP...
- Page 15 Note: Study the scheme reference sheet carefully and understand fully where each decal should be applied. Position the decals carefully on the model according to the hen gently rub (using a dry cloth) the decal in place rub from the center out to avoid wrinkles and air bubbles If air bubbles are present, use the tip of a sharp blade to make a small hole in the bubble then rub over it again to push the air out...
-
Page 16: Flying Wire Installation
GLOSTER GLADIATOR MK1 DURAFLY 1100MM PLUG AND FLY FLYING WIRE INSTALLATION GUIDE FOR DURAFLY 1100mm GLOSTER GLADIATOR CREATED BY TOM HUNT #2 FUSELAGE STRUT FWD HOLE #1 START #3 LOWER FWD OUTBD FITTING LOWER INDB FITTING FWD-INBD HOLE... - Page 17 UPPER AFT OUTBD FITTING LOWER INDB FITTING AFT-OUTBD HOLE...
- Page 18 GLOSTER GLADIATOR MK1 DURAFLY 1100MM PLUG AND FLY #7 FUSELAGE STRUT AFT HOLE #6 START LOWER INDB FITTING AFT-INBD HOLE LOWER AFT OUTBD FITTING UPPER FWD OUTBD FITTING...
- Page 19 LOWER FWD INBD FITTING TUBE SITS BELOW THIS WIRE TUBE SITS ON TOP OF THESE 3 WIRES TRUE FRONT VIEW Ø2.5 mm X 108 mm LONG FLYING WIRE STABILIZING TUBE SUPPORT TACK GLUE TO WIRES USING FOAM TAC, UHU PHOR OR SIMILAR. NOTE: THIS TUBE IS OPTIONAL AND IS NOT SUPPLIED.
- Page 20 #13 TERMINATE AFT FITTING TO VERTICAL FIN HERE #12 OUTBD HORIZTAIL #11 START FWD FITTING FITTING VERTICAL #15 TERMINATE LOWER HORIZTAIL FITTING #14 START LOWER FUSELAGE FITTING...
- Page 21 DATUM DATUM With assembly and set-up now complete, your Durafly Mk1 Gloster Gladiator should now be ready for flight. However we recommend you read and follow the advice given in the following pages of this manual before flying.
-
Page 22: Model Flying Precautions
MODEL FLYING PRECAUTIONS Do not fly this model in poor weather. High winds, low visibility, inclement temperatures, rain and storms are to be avoided. Never attempt to catch this model whilst in flight. Even a slow moving model can cause harm to yourself and other and risks damage to the model. - Page 23 GLOSTER GLADIATOR MK1 DURAFLY 1100MM PLUG AND FLY FLYING YOUR MK1. Before flying make sure you have followed closely the set-up guidelines on page 10, and pages 17-18. Start by taxying on the ground a little to get used to the handling. Be sure to always taxy with full up elevator, use high rates and gentle use of the throttle.
- Page 24 Thank you again for purchasing the Durafly We hope you’ll have many happy days of flying and look forward to bringing you more Durafly models in the future. Don’t forget, spare parts are available for this model, please see the next page for details.
-
Page 25: Spare Parts
GLOSTER GLADIATOR MK1 DURAFLY 1100MM PLUG AND FLY SPARE PARTS... -
Page 26: Troubleshooting
TROUBLE SHOOTING: Problem Cause Solution 1. Charge the batteries. 1. Battery is not fully charged. 2. Install a full charged battery. 2. Transmitter battery low. 3. Check for connection 3. Motors not connected. between the ESC and motor. 4. Replace motor. Motor does 4. - Page 27 GLOSTER GLADIATOR MK1 DURAFLY 1100MM PLUG AND FLY If you wish to contact us directly please email: durafly@hobbyking.com...
- Page 28 APEX CE SPECIALISTS LIMITED UK REP M1 4HT, UK APEX CE SPECIALISTS LIMITED...
Need help?
Do you have a question about the GLOSTER GLADIATOR MK1 and is the answer not in the manual?
Questions and answers