Table of Contents
Advertisement
Quick Links
Advertisement
Table of Contents

Related Manuals for Durafly ME-163 V2


Summary of Contents for Durafly ME-163 V2
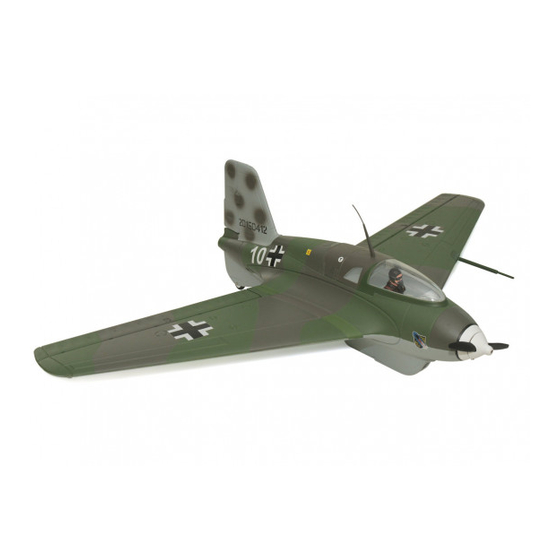
- Page 1 MESSERSHMITT ME- B "WHITE " V INTERCEPTOR FIGHTER...
- Page 2 A WARNING: Read this instruction manual fully so as to become completely familiar with the features of this product before operating. Failure to operate this product correctly could result in damage to the product, personal property and cause serious injury. This is a sophisticated hobby product and is NOT a toy.
-
Page 3: Table Of Contents
CONTENTS Introduction -------------------------------------------------------------- 1 Specifications ----------------------------------------------------------- 1 Contents ------------------------------------------------------------------ 2 Required to Complete ------------------------------------------------- 2 Assembly ----------------------------------------------------------------- 3-8 Receiver and Battery Installation ----------------------------------- 8 Setting Up ---------------------------------------------------------------- 9-11 C of G --------------------------------------------------------------------- 12 Model Flying Precautions -------------------------------------------- 13 Pre-flight Checks ------------------------------------------------------- 14 Flying the Me-163 ------------------------------------------------------ 15 Take-off Dolly Guide --------------------------------------------------- 16 Hand Launching Guide ----------------------------------------------- 16... -
Page 4: Introduction
INTRODUCTION: This V2 version of the Durafly Me-163 retains some of the unique features of the original version, with the addition of some new ones. The V2 now features a gravity release scale 'dolly' style undercarriage making the take-off procedure less complicated whilst reducing weight, it also has a wider wheelbase for better ground handling. -
Page 5: Contents
4. Carbon Wing Joining Spar 8. Accessory Pack REQUIRED TO COMPLETE MODEL: In its ‘Plug N Fly’ format the Durafly Me-163 requires some additional components to get it flight ready. Durafly recommends the products below for optimum performance and great value. Available at hobbyking.com... -
Page 6: Assembly
ASSEMBLY: Note: For the assembly of the Durafly Me-163 Komet use a good quality foam contact adhesive such as "UHU Por". 1. Before you start assembling it is necessary to flex each control surface back and forth 6 to 8 times to release the tension of the reinforced hinge line. - Page 7 3. Dry fit the main wing spar through the fuselage, then slide the wing panels onto the spar, ensure you achieve a good fit. Once satisfied with the fit, remove the components. Apply glue to the spar, spar tube, wing roots, and fuselage, then glue the complete assembly together. If you prefer, you can glue one wing panel on at a time to make things a little easier.
- Page 8 PB1.7X12mm 5. Following the illustration above, screw the a control horn to the rudder control surface, once again, a small amount of foam contact glue can be applied to the base of the horn. With the servo at 90 degree’s (neutral), connect the push rod to the servo arm (outer hole) then to the control horn and clip the clevis in place.
- Page 9 90 degree 7. With the glue still curing you will need to check the alignment of the vertical stabilizer to the wing to ensure it is straight and true. Looking from the rear of the fuselage, check that the vertical stabilizer is at 90° to the fuselage center section. If not, adjust accordingly and if necessary temporarily hold in place until the glue begins to dry.
- Page 10 9. Locate the scale plastic aerial mast and wing pitot tube, glue each in place on the model one at a time as shown above. DO NOT use an excessive amount of glue but DO allow the glue to become tacky before gluing these parts in place. 10.
-
Page 11: Receiver And Battery Installation
Assembly of your Durafly Me-163 V2 is now complete. Before you move onto the final set-up of the model, we suggest you perform a quick check on all screws, bolts and components to ensure all are secure and firmly in place. - Page 12 SETTING UP YOUR MODEL: 1. With your receiver installed and all servos plugged into their corresponding channels (follow the instructions provided by your radio manufacturer for ‘Delta’ or ‘Elevons’ set-up procedures). Connect the flight battery to the ESC to power up the electronics. With the model now armed, ensure all servos are centered and the rudder control surface is neutral as shown.
- Page 13 2. Check all control surfaces are moving in the correct direction with the applicable stick input (see below).
-
Page 14: Setting Up
SETTING UP: 1. The Durafly Me-163 V2 handles very well in flight but requires setting up beforehand. Please follow the recommended settings below for good all round flight performance. CONTROL THROWS: 25-40mm 10-20mm 10-20mm 25-40mm Rudder 205-213mm 10-20mm 10-20mm * Elevator ‘low rates’ 10mm ‘high rates’ 20mm in either direction from neutral. -
Page 15: C Of G
205-213mm CG 205-213mm ~ from front of cowl With assembly and set-up now complete, your Durafly Me-163 V2 should now be ready for flight. However we highly recommend you read and follow the advice given in the following stages of this... -
Page 16: Model Flying Precautions
MODEL FLYING PRECAUTIONS:... -
Page 17: Pre-Flight Checks
PRE-FLIGHT CHECKS: Always range check your model before any flight (especially when flying a new model for the first time). Follow your radio manufacturers guidelines for performing this check. Check all screw/ bolts and mounting points are firmly secured, including control horns and clevises. -
Page 18: Flying The Me-163
’smooth and enjoyable start to your flight. Once in the air the Durafly Me-163 is an exceptionally well behaved model and will amaze you with its performance and agility. At full throttle you'll enjoy unlimited vertical performance and always with full and precise responsiveness and control. -
Page 19: Take-Off Dolly Guide
TAKE - OFF DOLLY GUIDELINES: *Always follow these guidelines when using the scale dolly to take off. 1. Ensure that the CG is in the correct location before you attach the dolly. The correct CG is critical for a smooth take-off run. Too far forwards and the Me-163 will bounce hard along the grass before jumping into the air. -
Page 20: Optional Rocket Motor
OPTIONAL ROCKET MOTOR: Your Durafly Me-163 can support the use of a standard ‘18mm class’ model rocket engine if you wish. Sufficient space at the rear fuselage allows for both the mounting of the engine and the running of the switch wires internally beneath it. -
Page 21: Optional Magnetic Take-Off Dolly Release
OPTIONAL MAGNETIC DOLLY RELEASE: The optional magnetic dolly release operates via a 2 position gear/aux switch on your radio, in conjunction with the magnet embedded in the take-off dolly. With the dolly servo connected to the corresponding channel on your receiver, ensure that the dolly drops freely, and that its held firm again once the switch is flicked back. -
Page 22: General Tips
If the prop is in any way damaged it must be replaced and any loose fixings must be tightened. Thank you again for purchasing the Durafly Me-163 V2. We hope you’ll have many happy days of flying and look forward to bringing you more Durafly models in the future. -
Page 23: Spare Parts
SPARE PARTS: 9306000187-0 OPTION PARTS: 9107000266-0... -
Page 24: Trouble Shooting
TROUBLE SHOOTING: Problem Cause Solution Charge the batteries. Battery is not fully charged. Transmitter battery low. Install a full charged battery. Motors not connected. Check for connection between the ESC and motor. Motor does The motor is damaged. Replace motor. not turn Rec ver is not bound to Consult adio manual and... -
Page 25: Contact Information
CONTACT INFORMATION:... - Page 26 APEX CE SPECIALISTS LIMITED UK REP M1 4HT, UK APEX CE SPECIALISTS LIMITED...
Need help?
Do you have a question about the ME-163 V2 and is the answer not in the manual?
Questions and answers