Table of Contents
Advertisement
Available languages
Available languages
Quick Links
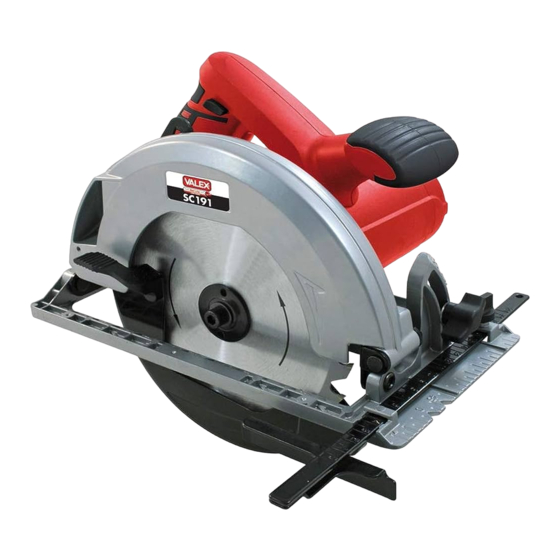
Sega circolare portatile
ISTRUZIONI D'USO
Istruzioni originali
Portable circular saw
OPERATING INSTRUCTIONS
Translation of the original instructions
ATTENZIONE! Prima di usare la macchina, leggete e comprendete le istruzioni di sicurezza e le istruzioni d'uso fornite
WARNING! Before using the machine, read and understand the supplied safety instructions and operating instructions
Final dimension: A5
SC191
S410232
03.11.2017
Advertisement
Table of Contents

Summary of Contents for Valex SC191
- Page 1 Final dimension: A5 S410232 03.11.2017 SC191 Sega circolare portatile ISTRUZIONI D’USO Istruzioni originali Portable circular saw OPERATING INSTRUCTIONS Translation of the original instructions ATTENZIONE! Prima di usare la macchina, leggete e comprendete le istruzioni di sicurezza e le istruzioni d’uso fornite...
- Page 2 - 2 -...
- Page 3 - 3 -...
- Page 4 - 4 -...
-
Page 5: Dati Tecnici
è conforme ai requisiti essenziali di sicurezza e file is in salute contenuti nelle seguenti direttive europee: 2006/42/CE, 2014/35/CE, 2014/30/CE, 2011/65/CE Valex SpA - Via Lago Maggiore, 24 DECLARATION OF CONFORMITY 36015 Schio (VI) - Italy The firm indicated on the label declares, under 11.2017... -
Page 6: Installazione
COMPONENTI Fare riferimento alla fig.A e seguenti, allegate alle presenti istruzioni. ATTENZIONE! La sega circolare è idonea 1 Corpo motore a tagliare pannelli di legno. E’ vietato il taglio 2 Volantino anteriore per regolazione inclina- di materiali pericolosi, metalli, plastica e zione taglio l’utilizzo in ambienti con pericolo di incendio/ 3 Piastra di guida... -
Page 7: Messa In Servizio
MESSA IN SERVIZIO ATTENZIONE! Il motore e la lama conti- Nel luogo che utilizzerete l’utensile elettrico è nuano a girare per alcuni secondi dopo aver opportuno considerare: spento l’utensile. Durante la fase di arresto - che la zona non sia umida e sia al riparo dagli queste parti non devono essere toccate, peri- agenti atmosferici. - Page 8 REGOLAZIONE DELLA PROFONDITÁ DI TAGLIO non dovrà esserci nessun ostacolo. Si ottiene variando la sporgenza della lama Attenzione! Per la vostra sicurezza è impor- rispetto alla piastra di guida. tante che il pannello sia fissato stabilmente, Sbloccate il volantino regolazione altezza di taglio in modo da non cadere una volta tagliato con (pos.17) e spostate la piastra di guida (pos.3) pericolo per l’operatore.
-
Page 9: Manutenzione
prive dei dati tecnici. Esse devono riportare SOSTITUZIONE DELLA LAMA (fig. E) le dimensioni nominali, il numero di denti, il ATTENZIONE! Prima di effettuare le se- numero di giri massimo, la freccia che indica guenti operazioni assicuratevi che la spina il senso di rotazione. -
Page 10: Garanzia
SPAZZOLE MOTORE IMMAGAZZINAMENTO Il motore di questa macchina è equipaggiato con Effettuate una accurata pulizia di tutto l’utensile una coppia di spazzole in grafite; la verifica e la e sue parti accessorie (vedi paragrafo Manuten- sostituzione deve essere eseguita da un centro zione). -
Page 11: Installation
COMPONENTS Refer to fig. A and the following figures, attached to these instructions. IMPORTANT! The circular saw is suitable 1 Motor body for cutting wooden panels. It is prohibited to 2 Front cutting inclination adjustment han- cut dangerous materials, metals, plastics or dwheel to use the tool in environments with risk of 3 Guide panel... -
Page 12: Starting And Stopping
- that the place is not damp and is protected IMPORTANT! Never press the blade lock from the elements. button (pos.21) while the blade is moving. - that there should be a large operational area free from obstacles. Before starting the machine check the integrity - that there is good lighting and sufficient air of all the components and that all the bolts and exchange. -
Page 13: Performing The Cut
The maximum cutting depth is obtained with an PERFORMING THE CUT inclination of 0°. Adjust the cutting depth to the Some types of panels could chip in the area thickness of the panel to be cut; make the teeth where the blade comes out: take care to perform stick out only a few millimeters in any case for a the cut resting the tool on the less important lower measurement than the height of the teeth. -
Page 14: Maintenance
wheels. When replacing the blade, proceed as follows. The - Always carry out a simple visual check: there operation must be carried out by an expert; if in must be no deformations, breakages, damage doubt please contact an authorised service centre. or rust. -
Page 15: Problems, Causes And Solutions
PROBLEMS, CAUSES AND SOLUTIONS DISPOSAL In order to protect the environment, proceed PROBLEM CAUSES SOLUTIONS according to the local laws in force. Contact the relevant authorities for more information. The electrical Power supply Check the electric When the machine is not longer useable or re- tool fails to line discon- power supply line...


Need help?
Do you have a question about the SC191 and is the answer not in the manual?
Questions and answers