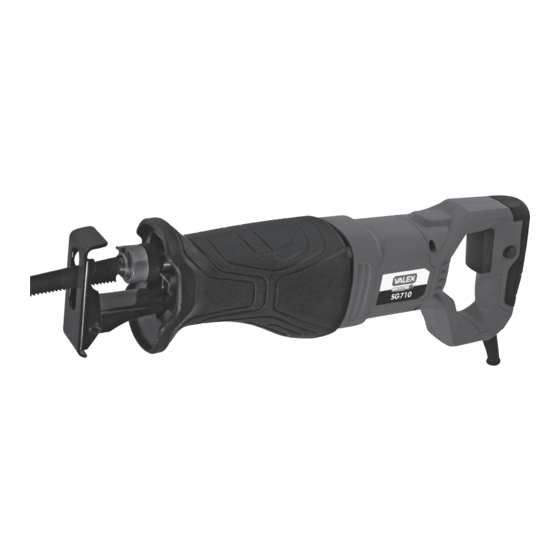
Table of Contents
Advertisement
Available languages
Available languages
Quick Links
Sega a gattuccio
ISTRUZIONI D'USO
Istruzioni originali
Reciprocating saw
OPERATING INSTRUCTIONS
Translation of the original instructions
ATTENZIONE! Prima di usare la macchina, leggete e comprendete le istruzioni di sicurezza e le istruzioni d'uso fornite
WARNING! Before using the machine, read and understand the supplied safety instructions and operating instructions
Final dimension: A5
S411144
20.04.2017
SG710
Advertisement
Table of Contents

Summary of Contents for Valex SG710
- Page 1 Final dimension: A5 S411144 20.04.2017 SG710 Sega a gattuccio ISTRUZIONI D’USO Istruzioni originali Reciprocating saw OPERATING INSTRUCTIONS Translation of the original instructions ATTENZIONE! Prima di usare la macchina, leggete e comprendete le istruzioni di sicurezza e le istruzioni d’uso fornite...
- Page 2 - 2 -...
- Page 3 - 3 -...
-
Page 4: Dati Tecnici
è conforme ai requisiti essenziali di sicurezza e salute contenuti nelle seguenti direttive europee: Valex SpA 2006/42/CE, 2014/35/CE, 2014/30/CE, 2011/65/CE Via Lago Maggiore, 24 DECLARATION OF CONFORMITY 36015 Schio (VI) - Italy... -
Page 5: Installazione
INSTALLAZIONE ATTENZIONE! La Ditta costruttrice declina ATTENZIONE! La sega a gattuccio è idonea ogni responsabilità per gli eventuali danni a tagliare, mediante una specifica lama, legno, diretti e/o indiretti causati da un errato al- materiale plastico, tubi o lamiere di metallo a lacciamento. -
Page 6: Avviamento Ed Arresto
ATTENZIONE! Le parti taglienti provocano Avviamento (fig.E) gravi ferite, utilizzate i guanti di protezione! - Per avviare premete l’interruttore (1) L’interruttore è del tipo ad azione mantenuta; ATTENZIONE! Il montaggio della lama deve pertanto l’utensile elettrico rimarrà acceso per il essere eseguito a perfetta regola d’arte. - Page 7 chiodi o viti, eventualmente rimuoverli. Approntate l’utensile elettrico e tutto il materiale LAME occorrente al lavoro (non incluso): pezzo in la- vorazione, dispositivi di protezione individuale e ATTENZIONE! La parte tagliente provoca alcuni attrezzi come matita, squadra millimetrata gravi ferite, utilizzate i guanti di protezione! e, se necessaria, una prolunga elettrica.
-
Page 8: Manutenzione
e la sua durata sarà breve fino al mancato La durata e il costo d’esercizio dipendono anche funzionamento. Durante l’avanzamento non da una costante e scrupolosa manutenzione. arretrate e non inclinate lateralmente l’utensile. Pulite regolarmente ed abbiate cura del vostro 6 Al termine del taglio spegnete l’utensile, utensile elettrico, vi garantirete una perfetta attendete l’arresto completo, sollevatelo dal... -
Page 9: Problemi, Cause E Rimedi
9. Rilasciate il dispositivo di aggancio lama. prova di acquisto e richiedendo ricambi origi- Tirate la lama verso l’esterno per verificare nali. Fate sempre riferimento alle informazioni che sia ben fissata. riportate sull’etichetta dati tecnici. 10. Verificare il corretto assemblaggio dei componenti, il serraggio delle viti e il fissaggio IMMAGAZZINAMENTO della lama. -
Page 10: Installation
INSTALLATION IMPORTANT! The manufacturer is not IMPORTANT! The keyhole saw has a specific liable for any direct and/or indirect damage blade that makes it suitable to cut wood, plastic, caused by incorrect connections. pipes or sheet metal with low carbon content, IMPORTANT! Before you perform the aluminium profiles, plasterboard and bricks. -
Page 11: Switching On And Off
must be carried out with absolute precision. tool firmly. Incorrect assembly causes danger. IMPORTANT! After switching off the tool Before proceeding, closely observe the compo- the blade will continue moving for a few nents of the tool and fig. C-D. If you are not fa- seconds. - Page 12 carbon steel) or BIM (bimetal), with a suitable some clamps. connection (see fig. C) and suitable for the mate- Wear the personal protective equipment listed rial you are working on; consult your retailer who in the “Warnings” chapter. will advise you. Our company produces a wide range of accessories suitable for various uses.
-
Page 13: Maintenance
If the blade gets stuck in the workpiece, switch - Remove any traces of resin that will deposit on off the power tool straight away and using a the tool. tool open the cutting groove then free the blade - Be careful when cleaning the switch, motor fan and extract it. -
Page 14: Problems, Causes And Solutions
PROBLEMS, CAUSES AND SOLUTIONS STORAGE Clean the tool and all its accessories thoroughly PROBLEM CAUSES SOLUTIONS (see Maintenance section). Protect the unpainted parts with protective oil and use the original The electrical Power supply line Check the electric tool fails to disconnected power supply line packaging or case (where fitted) to protect it. - Page 15 - 15 -...


Need help?
Do you have a question about the SG710 and is the answer not in the manual?
Questions and answers