
Related Manuals for Eaton GVX9000


Summary of Contents for Eaton GVX9000
- Page 1 GVX9000 AF Drives User Manual New Information June 2006 MN04000001E For more information visit: www.EatonElectrical.com...
- Page 3 TRADE, ARE MADE REGARDING THE INFORMATION, RECOMMENDATIONS AND DESCRIPTIONS CONTAINED HEREIN. In no event will Eaton Electrical Inc. be responsible to the purchaser or user in contract, in tort (including negligence), strict liability or otherwise for any special, indirect, incidental or consequential damage or loss whatsoever,...
- Page 4 This page intentionally left blank. GVX9000 User Manual...
-
Page 5: Table Of Contents
Related Publications ..........1-4 CHAPTER 2 — OVERVIEW OF THE GVX9000 DRIVE ....2-1 Receiving and Inspection . - Page 6 GVX9000 Parameter Listings ........
- Page 7 EC Declaration of Conformity ........F-3 GVX9000 User Manual...
-
Page 8: List Of Figures
Figure 5-21: Digital Input Terminal Setting 24 ......5-18 Figure 5-22: Digital Input Terminal Setting 25 ......5-19 GVX9000 User Manual... -
Page 9: Figure
Figure D-4: 20 – 30 hp — Approximate Dimensions in Inches (mm) ..D-5 Figure D-5: 40 – 100 hp — Approximate Dimensions in Inches (mm) ..D-6 GVX9000 User Manual... -
Page 10: List Of Tables
Table 7-2: Warning Codes ......... . 7-5 Table A-1: GVX9000 230V Specifications ......A-2 Table A-2: GVX9000 460V Specifications... -
Page 11: Safety Messages
Always work with another person in case an emergency occurs. Disconnect power before checking controllers or performing maintenance. Be sure equipment is properly grounded. Wear safety glasses whenever working on electronic controllers or rotating machinery. GVX9000 User Manual... -
Page 12: High Voltage, Warnings And Cautions
600V for 575V models) and the mains supply current capacity must be equal or less than 5000A RMS (equal or less than 10000A RMS for the 40 hp [30 kW] models). WARNING! Disconnect AC power before proceeding! GVX9000 User Manual... - Page 13 Be sure that the input voltage matches the inverter specifications: • Single-/Three-phase 200 to 240V 50/60 Hz (up to 2.2 kW) • Three-phase 200 to 230V 50/60 Hz (above 2.2 kW) • Three-phase 380 to 460V 50/60 Hz • Three-phase 500 to 600V 50/60 Hz GVX9000 User Manual...
- Page 14 (50 Hz/60 Hz), be sure to check the motor and machine specifications with the respective manufacturer. Only operate the motor at elevated frequencies after getting their approval. Otherwise, there is the danger of equipment damage. GVX9000 User Manual...
-
Page 15: Chapter 1 - Introduction
Warranty and Liability Information ....Related Publications ......GVX9000 User Manual... -
Page 16: How To Use This Manual
Chapter 1 — Introduction is the chapter you are reading now. Chapter 2 — Overview of the GVX9000 Drive describes receiving and inspection procedures and provides an introduction to digital keypad operation. Chapter 3 — Storage and Installation describes planning for drive installation and drive mounting. -
Page 17: Intended Audience
• Knowledge of standard electrical wiring practices, electronic components, and electrical schematic symbols. The audience for this manual will install, start-up, and service the Eaton GVX9000 Drives. Conventions Used in This Manual Listed below are terms and language conventions used in this manual. These terms and conventions are defined here to help you understand their meanings... -
Page 18: Warranty And Liability Information
The maximum liability of this warranty is limited to the purchase price of the product. In no event, regardless of cause, shall Eaton Electrical Inc. be liable (a) for penalties or penalty clauses of any description, or (b) for certification not otherwise specifically provided herein and/or indemnification of purchaser or... -
Page 19: Chapter 2 - Overview Of The Gvx9000 Drive
Chapter 2 Overview of the GVX9000 Drive Inside this chapter … Receiving and Inspection ..... . Nameplate Information ..... -
Page 20: Receiving And Inspection
Receiving and Inspection Receiving and Inspection This GVX9000 AC drive has gone through quality control tests at the factory before shipment. After receiving the AC motor drive, please check for the following: • Check to make sure that the package includes an AC drive and User Manual. -
Page 21: Catalog Number
Receiving and Inspection Catalog Number Table 2-1: GVX9000 Catalog Numbering System G V X 0 0 1 A 1 - 2 Model Number Voltage 2 = 230V AC 4 = 460V AC Motor Horsepower 5 = 575V AC 001 = 1 hp (0.7 kW) 025 = 25 hp (18.5 kW) -
Page 22: Style Number
External Parts and Label Locations S T O L O C +2 B U/T1 V/T2 W/T3 Screw Torque : 18Kgf-cm Wire Gauge : 18~10AWG R/L1 S/L2 T/L3 Figure 2-2: Parts and Label GVX9000 User Manual... -
Page 23: Digital Keypad Operation
STOP • motor STOP from the panel; active control place has to be selected at “Panel” RESET • used to reset an Active Fault on the drive and shown in the display GVX9000 User Manual... - Page 24 • move either up or down the parameter list in order to select the desired parameter in the group. • increasing/decreasing of reference value on the keyboard (when selected). GVX9000 User Manual...
-
Page 25: Chapter 3 - Storage And Installation
Wiring Notes ....... . 3-17 Motor Operation Precautions ....3-18 GVX9000 User Manual... -
Page 26: Storage
Maximum 5.88 m/s (0.6G) at 20 to 50 Hz Pollution Degree UL Type 0, Pollution Degree 2: good for a factory type environment Relative Humidity: Less than 90%, no condensation allowed Atmosphere Pressure: 86 to 106 kPa GVX9000 User Manual... -
Page 27: Mounting Area
5.9 (150) or More Figure 3-1: Mounting in an Enclosure in Inches (mm) CAUTION! When mounting in an enclosure, allow for the recommended free space. Failure to allow adequate air flow may result in drive over temperature. GVX9000 User Manual... -
Page 28: Wiring
Wait five minutes for DC bus capacitors discharge. Any electrical or mechanical modification to this equipment without prior written consent of Eaton will void all warranties and may result in a safety hazard in addition to voiding the UL listing. -
Page 29: Basic Wiring Diagram
Basic Wiring Diagram Basic Wiring Diagram For Models of GVX9000 Series — 1 to 5 horsepower Braking Resistor/Unit (Optional) Refer to Appendix for the use of Special Braking Resistor/Unit DC Chock (Optional) Fuse/NFB Jumper (None Fuse Breaker) +2/B1 (minus sign) -
Page 30: Figure 3-3: Wiring Diagram - 7-1/2 - 100 Hp
Basic Wiring Diagram For Models of GVX9000 Series — 7-1/2 to 100 horsepower Braking Resistor/Unit (Optional) Refer to Appendix for the use of Special Braking Resistor/Unit DC Chock (Optional) Fuse/NFB Jumper (None Fuse Breaker) (minus sign) Motor R(L1) R(L1) U(T1) -
Page 31: Figure 3-4: Wiring Diagram - Sink And Source Modes
Factory Reset Setting E.F. Digital Signal Common * Don’t apply the mains voltage directly to above terminals. Main Circuit (Power) Terminals Control Circuit Terminals Shielded Leads & Cable Figure 3-4: Wiring Diagram — Sink and Source Modes GVX9000 User Manual... -
Page 32: External Wiring
V/T2 W/T3 Output AC Output AC Line Reactor Line Reactor Do Not Connect Motor Motor Resistor Directly to Drive. Figure 3-5: External Wiring — Figure 3-6: External Wiring — 1 – 15 hp 20 – 100 hp GVX9000 User Manual... -
Page 33: Table 3-1: Wiring Items
Used to reduce stopping time of the motor. Please refer to (Optional) the Braking Resistor table in Appendix C for specific Braking Resistors. Note: Please refer to Appendix C for more details on the Circuit Breaker and Fuse Specification tables. GVX9000 User Manual... -
Page 34: Control Terminal Wiring (Factory Settings)
Digital Frequency Output NC Relay Output Digital Signal Common Factory Setting Drive Running NO Relay Output Figure 3-8: Control Terminal Wiring (Source Mode) Note: For Wire Gauge and Torque tightening specifications, please refer to Table 3-3. 3-10 GVX9000 User Manual... -
Page 35: Main Circuit Wiring
Main Circuit Wiring Model GVX001A1-2 GVX002A1-2 GVX003A1-2 +2 B U/T1 V/T2 W/T3 GVX005A1-2 Screw Torque : 18Kgf-cm GVX001A1-4 Wire Gauge : 18~10AWG GVX002A1-4 R/L1 S/L2 T/L3 GVX003A1-4 GVX005A1-4 Figure 3-9: Main Circuit — 1 to 5 hp GVX9000 User Manual 3-11... -
Page 36: Figure 3-10: Main Circuit - 7-1/2 To 15 Hp
Main Circuit Wiring R/L1 S/L2 T/L3 U/T1 V/T2 W/T3 Model POWER MOTOR GVX007A1-2 GVX010A1-2 GVX015A1-2 GVX007A1-4 GVX010A1-4 GVX015A1-4 Figure 3-10: Main Circuit — 7-1/2 to 15 hp 3-12 GVX9000 User Manual... -
Page 37: Figure 3-11: Main Circuit - 20 To 30 Hp
Main Circuit Wiring R/L1 S/L2 T/L3 U/T1 V/T2 W/T3 DC + ( ) ( ) - POWER MOTOR Model GVX020A1-2 GVX025A1-2 GVX030A1-2 GVX020A1-4 GVX025A1-4 GVX030A1-4 Figure 3-11: Main Circuit — 20 to 30 hp GVX9000 User Manual 3-13... -
Page 38: Figure 3-12: Main Circuit - 40 To 50 Hp, 460V
Main Circuit Wiring R/L1 S/L2 T/L3 U/T1 V/T2 W/T3 POWER MOTOR Model GVX040A1-4 GVX050A1-4 Figure 3-12: Main Circuit — 40 to 50 hp, 460V 3-14 GVX9000 User Manual... -
Page 39: Figure 3-13: Main Circuit - 40 To 50 Hp, 230V; 60 To 100 Hp, 460V
Main Circuit Wiring R/L1 S/L2 T/L3 U/T1 V/T2 W/T3 Screw Torque: POWER MOTOR 200kgf-cm (173in-lbf) Model GVX060A1-4 GVX075A1-4 GVX100A1-4 GVX040A1-2 GVX050A1-2 Figure 3-13: Main Circuit — 40 to 50 hp, 230V; 60 to 100 hp, 460V GVX9000 User Manual 3-15... -
Page 40: Table 3-3: Wire Gauge And Torque Tightening
2 (33.6) 57 [49.5] GVX060A1-4 480V, 60 hp 110 / 110 1/0 (53.5) 200 [173.6] GVX075A1-4 480V, 75 hp 150 / 150 3/0 (85) 200 [173.6] GVX100A1-4 480V, 100 hp 180 / 180 4/0 (107.2) 200 [173.6] 3-16 GVX9000 User Manual... -
Page 41: Wiring Notes
• Multiple GVX9000 units can be installed in one location. All the units should be grounded directly to a common ground terminal. The GVX9000 ground terminals may also be connected in parallel, as shown in the Figure 3-14. -
Page 42: Motor Operation Precautions
filter close to U/T1, V/T2, W/T3 side of AC drive. Do not use a Capacitor or L-C Filter (Inductance-Capacitance) or R-C Filter (Resistance-Capacitance), unless approved by Eaton. • When using a GFCI (Ground Fault Circuit Interrupt), select a current sensor with sensitivity of 200 mA, and not less than 0.1-second detection to avoid... -
Page 43: Chapter 4 - Start-Up Procedures
Power-Up Test ......4-11 Powering the Inverter ..... . 4-12 GVX9000 User Manual... -
Page 44: Step-By-Step Installation
Step-by-Step Installation This chapter will explain the installation of the GVX9000 general purpose drive. Be sure to read and follow all instructions for a successful installation. WARNING! This equipment should be installed, adjusted, and serviced by qualified electrical maintenance personnel familiar with the construction and operation of the equipment and the hazards involved. -
Page 45: Figure 4-1: Clearances And Air Flow In Inches (Mm)
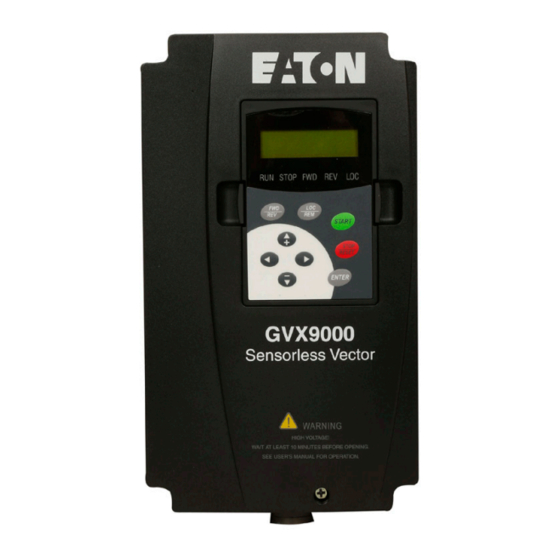
2.0 (50) or More or More GVX9000 Sensorless Vector WARNING HIGH VOLTAGE! WAIT AT LEASTS 10 MINUTES BEFORE OPENING. SEE USER’S MANUAL FOR OPERATION. 5.9 (150) or More Figure 4-1: Clearances and Air Flow in Inches (mm) GVX9000 User Manual... -
Page 46: Inverter Mounting
Be sure to ground the unit. Otherwise, there is danger of electric shock and/or fire. HIGH VOLTAGE! Wiring work shall be carried out only by qualified personnel. Otherwise, there is a danger of electric shock or fire. GVX9000 User Manual... -
Page 47: Wire Sizes
Note 2: Be sure to consider the capacity of the circuit breaker to be used. Note 3: Be sure to use larger wires for the power lines in the distance exceeds 20 meters. GVX9000 User Manual... -
Page 48: Fuses And Circuit Breakers
Fusing The GVX9000 has been UL tested and approved for use with input fuses. The ratings in Table 4-2 are the minimum recommended values for use with each drive rating. The devices listed in this table are provided to serve as a guide. -
Page 49: Table 4-2: Fuse Specification Chart
JJS-100 XTPR040BC1 XTCE040D10_ GVX020A1-4 JJS-150 XTPR050BC1 XTCE050D10_ GVX025A1-4 JJS-150 XTPR063BC1 XTCE065D10_ GVX030A1-4 JJS-200 Consult Consult factory GVX040A1-4 JJS-225 factory GVX050A1-4 JJS-300 GVX060A1-4 JJS-350 Consult Consult factory GVX075A1-4 JJS-450 factory GVX100A1-4 JJS-500 Note: Contact Eaton for 575V information. GVX9000 User Manual... -
Page 50: Table 4-3: Heat Loss Data
Fuses and Circuit Breakers Table 4-3: Heat Loss Data When mounting the GVX9000 in an enclosure the following inverter heat loss should be considered. Failure to provide adequate cooling may cause premature failure of the inverter and/or overtemperature faults. Voltage... -
Page 51: Wiring The Inverter To Incoming Power
fire. Note: L1, L2, L3: Three-phase 200 to 230V 50/60 Hz Three-phase 380 to 460V 50/60 Hz Three-phase 500 to 600V 50/60 Hz Any two inputs: Single-phase 200 to 240V 50/60 Hz GVX9000 User Manual... -
Page 52: Wiring The Motor To The Inverter Output
After completing the wiring: • Check all wire connections both at the inverter and motor to make sure they are secure. • Close all access doors. • Remove any covering placed on the inverter ventilation openings. 4-10 GVX9000 User Manual... -
Page 53: Power-Up Test
(50 Hz/60 Hz), be sure to check the motor and machine specifications with the respective manufacturer. Only operate the motor at elevated frequencies after getting their approval. Otherwise, there is the danger of equipment damage. GVX9000 User Manual 4-11... -
Page 54: Powering The Inverter
Note: If the inverter has been previously powered and programmed, the LEDs (other than the POWER LED) may illuminate differently than as indicated above. If necessary, you can initialize all parameters to the factory default settings. See the initialization instructions in the Programming section. 4-12 GVX9000 User Manual... -
Page 55: Chapter 5 - Descriptions Of Parameter Settings
Group 80 — Keypad / Display ....5-62 Group 90 — Communication ....5-67 GVX9000 User Manual... -
Page 56: Viewing And Changing Parameter Settings
Viewing and Changing Parameter Settings This chapter contains the descriptions of the GVX9000 parameters. Parameters are addressed and changed via the keypad for the GVX9000. For more information on keypad operation, see Keypad Operation located in Chapter 2. Viewing and Changing Parameter Settings Parameters are grouped in a page arrangement. -
Page 57: Figure 5-3: Parameter Setting
Use the ENTER key to enter the programming mode. The displayed parameter will flash indicating the parameter can be changed. This digit flashes. The right arrow key changes the flashing digit location. A1 Max Volt In 30.01 = 10.00Vdc RUN STOP FWD REV Figure 5-5: Programming Mode GVX9000 User Manual... -
Page 58: Parameter Groups
90 — Communication ..........5-67 GVX9000 User Manual... -
Page 59: Group 20 - Easy Mode Settings
Analog Speed Command Closed Loop Vector Control This parameter will automatically set the GVX9000 parameters to the most common settings for each application listed (options 1 – 9). The parameters that have been changed are shown in Appendix E. The parameters may be further changed to tune the drive to your specific... -
Page 60: Group 30 - Inputs
This parameter sets the maximum input voltage on terminal A2 30.07 A2 Minimum Range: 0.00 to 20.00 mA Default: 4.00 mA Input Current Unit: 0.01 (0 – 20 mA) This parameter sets the minimum input voltage on terminal A2 GVX9000 User Manual... - Page 61 Unit: 0.1 This parameter sets the command frequency related to 30.12 30.15 A3 Reverse Range: 00 to 02 Default: 01 Option Negative input = 30.14 Negative input = Reverse direction Negative input = Frequency command only, no Direction GVX9000 User Manual...
- Page 62 D2: REV / FWD 3-wire Operation Mode D1: RUN D2: REV / FWD D3: STOP Note: When 30.20 = 3, 30.21 (D3) will be set to 0 and used for the third terminal. Please see Figure 5-7. GVX9000 User Manual...
-
Page 63: Figure 5-7: D1 And D2 Settings
Range: 00 to 33 Default: 05 Terminal (D3) Parameter Disable External Fault (NO) EF External Fault (NC) EF External Reset (NO) External Reset (NC) Preset Speed Switch 1 Preset Speed Switch 2 Preset Speed Switch 3 Preset Speed Switch 4 GVX9000 User Manual... - Page 64 Forced Stop (NC) 30.22 Digital Input Range: See Parameter 30.21 Default: 06 Terminal (D4) 30.23 Digital Input Range: See Parameter 30.21 Default: 07 Terminal (D5) 30.24 Digital Input Range: See Parameter 30.21 Default: 08 Terminal (D6) 5-10 GVX9000 User Manual...
-
Page 65: Explanations: Digital Input Terminal
“E.F” on digital keypad, and the motor will coast to a stop. Normal operation will resume after the External Fault is cleared and the AC drive is reset. + 24 V 02: External Fault (NC) 01: External Fault (NO) Figure 5-8: Digital Input Terminal Settings 01, 02 GVX9000 User Manual 5-11... - Page 66 Settings 05, 06, 07, 08 These four inputs select the preset speeds defined by 30.31 to 30.45. Switch 1 Switch 2 Switch 3 Switch 4 30.31 30.32 30.33 30.34 30.35 30.36 30.37 30.38 30.39 30.40 30.41 30.42 30.43 30.44 30.45 5-12 GVX9000 User Manual...
- Page 67 30.45 Master Speed 10 11 12 13 14 15 Run Signal Switch 1 Switch 2 Switch 3 Switch 4 Jog Freq. Multi-Step Speed via External Terminals Figure 5-10: Digital Input Terminal Settings 05, 06, 07, 08 GVX9000 User Manual 5-13...
- Page 68 Used to select the Operation Command location of the AC drive. + 24 V 12: Control Location Hand – HOA 13: Control Location Auto – HOA 14: Control Location Remote – Local/Remote (close for remote) Figure 5-13: Digital Input Terminal Settings 12, 13, 14 5-14 GVX9000 User Manual...
- Page 69 Figure 5-15: Digital Input Terminal Setting 17 Setting 18 A digital input terminal may be used to disable users from changing the parameters. + 24 V 18: Parameter Lock Figure 5-16: Digital Input Terminal Setting 18 GVX9000 User Manual 5-15...
- Page 70 Figure 5-17: Digital Input Terminal Setting 19 Setting 20 A digital input may be used to Enable or Disable the RUN command. Used as a Safety device. + 24 V 20: Run Enable Figure 5-18: Digital Input Terminal Setting 20 5-16 GVX9000 User Manual...
- Page 71 Figure 5-19: Digital Input Terminal Settings 21, 22 Setting 23 Allows an input terminal to disable PID operation as shown in Figure 5-20. + 24 V 23: PID Disable Figure 5-20: Digital Input Terminal Setting 23 GVX9000 User Manual 5-17...
- Page 72 2 ms.(<250 Hz) counter value is attained. (40.03 - 40.06) Intermediate Count Value Attained (30.29=5) Signal output with 30.29 counter value is attained. (40.03 - 40.06) Final Count Value Attained Figure 5-21: Digital Input Terminal Setting 24 5-18 GVX9000 User Manual...
-
Page 73: Figure 5-22: Digital Input Terminal Setting 25
A digital input may be used to shut the output off (pause) and not display a fault. + 24 V 30: Output Shut Off (NC) 29: Output Shut Off (NO) Figure 5-24: Digital Input Terminal Settings 29, 30 GVX9000 User Manual 5-19... - Page 74 A digital input may be used as an External Emergency Stop (Forced Stop). This is not a fault condition, rather the highest priority STOP condition. + 24 V 34: Forced Stop (NC) 33: Forced Stop (NO) Figure 5-27: Digital Input Terminal Settings 33, 34 5-20 GVX9000 User Manual...
- Page 75 30.29 Final Count Value Range: 00 to 65000 Default: 00 This parameter defines the final count value for the GVX9000 internal counter. The counter is incremented by a low-to-high transition on a Digital Input Terminal: D3 to D10. A selected Digital/Relay Output Terminal may be programmed to activate upon completion of the final count.
- Page 76 Unit: 0.01 Hz These parameters may be set during operation. The Digital Input Terminals (refer to 30.21 to 30.28) are used to select one of the GVX9000 Preset Speeds. The speeds (frequencies) are determined by 30.31 to 30.45. 5-22 GVX9000 User Manual...
- Page 77 300 degrees of rotation after it receives the Index command. 30.50 Deceleration Time Range: 0.0 to 100.0 Default: 0.0 for Simple Index Units: 0.1 sec. Function This parameter sets the deceleration time for the simple Index function. GVX9000 User Manual 5-23...
-
Page 78: Group 40 - Outputs
For Example: When using the meter with full scale of 5 volts, adjust 40.02 to 50% 40.03 Digital Output Range: 00 to 33 Default: 02 Terminal Relay A (RA1, RA2, RA3) 40.04 Digital Output Range: 00 to 33 Default: 03 Terminal Relay B (RB1, RB2) 5-24 GVX9000 User Manual... - Page 79 = 0.0 Hz (any state, STOP or RUN) E-Stop Above Frequency Attained 2 (40.09) Soft Braking Signal = 0.0 Hz (during a RUN command) > F PG Error Low Voltage indication (User Defined) Inverter RUN command state Brake ON/ Brake OFF (40.10, 40.11) GVX9000 User Manual 5-25...
-
Page 80: Function Explanations
Reverse direction command: The output terminal will be active when the drive is in reverse. Under Current detection: The output terminal will be active when the output current is under 70.11 and the time has exceeded 70.13. 5-26 GVX9000 User Manual... - Page 81 RUN state. Desired Freq Attained 3 (Brake Freq): The output terminal will be active when 40.10 is reached. The output will be off when the Output Frequency falls below 40.11 after a Stop command. See Figure 5-29. GVX9000 User Manual 5-27...
- Page 82 Range: 0.00 to 400.00 Hz Default: 0.00 Attained 2 Unit: 0.01 Hz If a Digital/Relay output terminal is set to function as Frequency Attained, then the output will be activated when the programmed frequency is attained. 5-28 GVX9000 User Manual...
- Page 83 Display EF when midpoint count is reached Frequency Output Note: Case 1: 40.11 40.10 Case 2: 40.11 40.10 Case 1: 40.11 40.10 Case 2: 40.11 Time Run/Stop Case 1: DOx=33 Case 2: DOx=33 Figure 5-29: GVX Digital Output Option 33 GVX9000 User Manual 5-29...
-
Page 84: Group 50 - Ac Drive Control
Operating commands determined by the External Control Terminals. Keypad STOP key is not enabled. Operating commands determined by the RS-485 communication interface. Keypad STOP key is enabled. Operating commands determined by the RS-485 communication interface. Keypad STOP key is not enabled. 5-30 GVX9000 User Manual... - Page 85 This parameter sets the percentage of trim applied when 50.05 is set to 03. 50.07 Keypad Range: 50.00 to 400.00 Hz Default: 60.00 Frequency Unit: 0.01 Hz Setting This parameter sets the start up frequency of the keypad. GVX9000 User Manual 5-31...
- Page 86 Signal Loss Decel to 0 Hz Stop immediately and display EF Continue operation at last known frequency This parameter determines how the drive will react to a loss of analog input signal (4 – 20 mA). 5-32 GVX9000 User Manual...
- Page 87 For example: If the drive is rated for 460V AC output and the Maximum Voltage Frequency is set to 60 Hz, the drive will maintain a constant ratio of 7.66 v/ Hz. The setting value must be equal to or greater than the Mid-Point Frequency (50.17). GVX9000 User Manual 5-33...
- Page 88 Range: 0.00 to 20.00 Hz Default: 1.50 Frequency Unit: 0.01 Hz This parameter sets the Minimum Output Frequency of the AC drive V/F curve. This parameter must be equal to or less than the Mid-Point Output Frequency (50.17). 5-34 GVX9000 User Manual...
- Page 89 Standard V/F Curve Figure 5-31: V/F Curve Changes Voltage Voltage 50.16 50.16 50.18 50.18 50.20 50.20 Frequency Frequency 50.19 50.17 50.15 50.14 50.19 50.17 50.14 50.15 Custom V/F Curve Fan/Pump V/F Curve Figure 5-31: V/F Curve Changes (Continued) GVX9000 User Manual 5-35...
- Page 90 Default: 00 V/F Closed Loop Sensorless Vector (SV) Vector Closed Loop (CLV) This parameter selects the Control Mode for the GVX9000. For the best results, please conduct the following. 1. Set the correct Motor Nameplate Voltage and Base Frequency. 2. Set the correct Motor Rated slip (60.13).
- Page 91 10 seconds. The actual time for the AC drive to accelerate from start-up to 60 Hz is 9.83 seconds and the deceleration time is also 9.83 seconds. Remember the drive always starts timing from 0 Hz. GVX9000 User Manual 5-37...
- Page 92 Parameter 50.34 allows the user to program a frequency point where the drive will automatically change from Accel Time 1 to Accel Time 2. This saves Input Points from being used to do the same process. 5-38 GVX9000 User Manual...
- Page 93 The above two parameters are used to smooth out the transition between the acceleration/deceleration and steady state speed. The S-Curve is enabled with settings of 1 to 7, with the highest number generating the smoothest transition. GVX9000 User Manual 5-39...
- Page 94 Acceleration for Jog operation. 50.39 Jog Decel Time Range: 0.01 to d 3600.0 sec. Default: 10.00 Unit: Deceleration for Jog operation. 50.40 Jog Frequency Range: 0.1 to 400.00 Hz Default: 6.00 Unit: Frequency for Jog operation. 5-40 GVX9000 User Manual...
- Page 95 50.42 Momentary Range: Default: 0 Power Loss Stop operation after momentary power loss Continue operation after momentary power loss, speed search from Speed Reference Continue operation after momentary power loss, speed search from Minimum Speed GVX9000 User Manual 5-41...
- Page 96 Speed Search Range: 30 to 200% Default: 150 Maximum Current 50.45 Speed Search Range: Default: 0 Start Point Start at last known freq command Start at minimum speed 50.46 Flying Start Mode Range: Default: 0 Disable Enable 5-42 GVX9000 User Manual...
- Page 97 Skip Frequency 1 Range: 0.0 to 400.00 Hz Default: 0 50.51 Skip Frequency 2 Range: 0.0 to 400.00 Hz Default: 0 50.52 Skip Frequency 3 Range: 0.0 to 400.00 Hz Default: 0 50.53 Skip Frequency 4 Range: 0.0 to 400.00 Hz Default: 0 GVX9000 User Manual 5-43...
- Page 98 50.54 to 50.57 determine the frequency band for a given Skip Frequency. Half of the Skip Frequency Band is above the Skip Frequency and the other half is below. Programming this parameter to 0.0 disables all skip frequencies. 5-44 GVX9000 User Manual...
- Page 99 PID Upper Limit Range: 00 to 100% Default: 100 for Integral Control 50.64 PID Output Delay Range: 0.0 to 2.5 sec. Default: 0.0 Filter Time This parameter generates a delay before the PID will respond to a change. GVX9000 User Manual 5-45...
- Page 100 Range: Default: 01 the Feedback Warning and Inverter Stop Deviation Error Warning and Continue Operation This parameter determines the GVX9000 operation when the PID feedback signal is lost. 50.70 Sleep Frequency Range: Default: 0.00 0.0 Disabled 0.00 to 400 Hz Enabled The Master Frequency point where the AC drive begins to “Sleep”...
- Page 101 There must be a minimum of 5 Hz difference between the start frequency and stop frequency of auxiliary motor. (50.73 – 50.74) > 5 Hz. 50.75 Delay Time Before Range: 0.0 to 3600.0 sec. Default: 0.0 Starting Motor 2 Unit: 0.1 GVX9000 User Manual 5-47...
- Page 102 Start Delay Timer Stop Delay Timer of Auxiliary of Auxiliary Motor Begins Motor Begins Counter 10 Sec. Counter 5 Sec. Start the Stop the Auxiliary Motor Auxiliary Motor in Order in Order Figure 5-38: Auxiliary Motor Flowchart 5-48 GVX9000 User Manual...
-
Page 103: Group 60 - Motor Control
DC Braking current, please note that 100% is equal to the rated output current of the drive. It is recommended to start with a low DC Braking Current Level and then increase until proper holding torque has been attained. GVX9000 User Manual 5-49... - Page 104 DC Braking during stopping is used to decrease stopping time and also to hold a stopped load in position. For high inertia loads, a dynamic braking resistor may be needed for quick decelerations. 5-50 GVX9000 User Manual...
- Page 105 The maximum increase in output frequency is determined by the setting of this parameter. A setting of 5% will increase output frequency from 60 Hz to 63 Hz percentage. This parameter may be set during operation. GVX9000 User Manual 5-51...
-
Page 106: Table 5-1: Carrier Frequency
This parameter selects the time delay for Slip Compensation. Compensation 60.17 Hunting Range: 0 ~ 1000 Default: 0 Coefficient This parameter helps eliminate the drive from hunting for speed. Suggested value is about 500 – 1000. 5-52 GVX9000 User Manual... - Page 107 This parameter selects how the drive will operate when the encoder signal is lost. 60.25 CLV — Encoder Range: 0.01 ~ 10.00 sec. Default: 1.00 Feedback Fault This parameter determines the time between encoder pulses. Detection Time GVX9000 User Manual 5-53...
- Page 108 This parameter determines the amount of voltage applied to the motor during RUN command when the frequency is less than or equal to 50.19 and 60.29 = 1. Be careful adjusting this value to avoid over current or over heat of the GVX9000. 5-54 GVX9000 User Manual...
-
Page 109: Group 70 - Protective Functions
AC drive will automatically extend the deceleration time. If deceleration time is critical for the application, then a dynamic braking resistor should be used. DC Bus Voltage Over-Voltage Level 70.01 Time Output Freq. Time Figure 5-40: Over-Voltage Stall Prevention GVX9000 User Manual 5-55... - Page 110 70.03. Output Current Output Current Over- Over- Current Current Level Level 70.03 70.02 Time Time Output Output Freq. Freq. Time Time Over-Current Stall Prevention Over-Current Stall Prevention during Operation during Acceleration Figure 5-41: Over-Current Stall Prevention 5-56 GVX9000 User Manual...
- Page 111 Range: 30 to 300 sec. Default: 60 Thermal The parameter determines the time required to activate the I Characteristic electronic thermal motor overload function. Figure 5-42 shows I curves for 150% output power for 1 minute. GVX9000 User Manual 5-57...
- Page 112 180V to 264V AC, due to the input voltage varying between 180V to 264V AC. Selecting value 2 enables the AVR function and also disables the AVR function during deceleration. This offers a quicker deceleration and is most commonly used. 5-58 GVX9000 User Manual...
- Page 113 Setting 2 = If the output current falls below 70.11, then the drive will standby and restart after delay time in 70.14. 70.13 Under Current Range: 0.0 to 20.0 sec. Default: 1.0 Detection Time The parameter determines the delay time before an under current output fault will occur. GVX9000 User Manual 5-59...
- Page 114 RUN command on the digital input terminals when the drive powers up or is changed from one command location to another command location using HOA or LOC/REM. Note: This parameter also functions when changing parameters 50.03 or 50.04. 5-60 GVX9000 User Manual...
- Page 115 Over Voltage has occurred during a STOP state. This could help with nuisance Over Voltage faults that occur at night when the power grid rises beyond our threshold. Caution: If the input voltage rises beyond the drives input rating, the drive will be permanently damaged. GVX9000 User Manual 5-61...
-
Page 116: Group 80 - Keypad / Display
GVX040A1-4 (480V AC, 40 hp – CT) GVX050A1-4 (480V AC, 50 hp – CT) GVX060A1-4 (480V AC, 60 hp – CT) GVX075A1-4 (480V AC, 75 hp – CT) GVX100A1-4 (480V AC, 100 hp – CT) GVX125A1-4 (480V AC, 125 hp – VT) 5-62 GVX9000 User Manual... - Page 117 GVX075A1-6 (575V AC, 75 hp – CT) GVX100A1-5 (575V AC, 100 hp – CT) Read only. 80.04 Fault Record 1 Range: 00 – 26 Default: 0 Read only. 80.05 Fault Record 2 Range: 00 – 26 Default: 0 Read only. GVX9000 User Manual 5-63...
- Page 118 Ground fault or fuse failure Reserved 3-phase Input Power Loss Reserved Auto Adjust accel/decel failure Software protection code IGBT Short circuit Loss of 4 – 20 mA Under Current Detected Encoder Fault Feedback Deviation Err Count Attained Read only. 5-64 GVX9000 User Manual...
- Page 119 Run Time — Range: 0 to 65535 Default: 0 Timer Day 80.13 Run Time — Range: 0 to 65535 Default: 0 Timer Minutes 80.14 Power On Time — Range: 0 to 65535 Default: 0 Timer Day GVX9000 User Manual 5-65...
- Page 120 Enter your password for the first time in this parameter. 80.19 Password Decode Range: 0 ~ 65535 Default: 0 If a password has been entered this parameter will display a 1. To unlock the drive, enter your password into this parameter. 5-66 GVX9000 User Manual...
-
Page 121: Group 90 - Communication
Display fault and Coast to stop No fault displayed and continue operating 90.05 Over Time Range: 0.0 to 120.0 sec. Default: 0 Detection 0.0 Disable 90.06 Communication Range: 0.0 to 400.0 Hz Default: 0.00 Hz Frequency Reference GVX9000 User Manual 5-67... - Page 122 Overload Overload 1 Over Torque External Fault CPU Failure 1 CPU Failure 2 CPU Failure 3 Hardware Protection Failure Over-current during accel Over-current during decel Over-current during steady state Ground fault or fuse failure Under Voltage 5-68 GVX9000 User Manual...
- Page 123 Bit 11 1 Parameters have been locked Bit 12-15 Reserved 90.11 Status Monitor Range: 0.0 to 400.0 Hz (%) Default: N/A Communication Frequency 90.12 Status Monitor Range: 0.0 to 400.0 Hz (%) Default: N/A for Output Frequency GVX9000 User Manual 5-69...
- Page 124 Default: N/A for Multi-Step 90.20 Status Monitor Range: 00 to 65535 Default: N/A for Counter 90.21 Feedback Signal Range: 0.0 to 400.0 Hz (%) Default: N/A 90.22 PID Setpoint Range: 0.0 to 400.0 Hz (%) Default: N/A 5-70 GVX9000 User Manual...
- Page 125 Word)/Unit Time 90.28 Motor Speed Range: 00 to 65535 Default: N/A (rpm) 90.29 Torque Range: ####.# Default: N/A 90.30 Output Power Range: ###.## kW Default: N/A 90.31 Digital Input Range: 00 to 65535 Default: N/A State GVX9000 User Manual 5-71...
- Page 126 This page intentionally left blank. 5-72 GVX9000 User Manual...
-
Page 127: Chapter 6 - Maintenance And Inspection
Periodic Inspection ......Periodic Maintenance ......GVX9000 User Manual... -
Page 128: Periodic Inspection
5 hours before attempting to run a motor with it. 5. Clean off any dust and dirt with a vacuum cleaner. Place special emphasis on cleaning the ventilation ports and PCBs. Always keep these areas clean, as accumulation of dust and dirt can cause unforeseen failures. GVX9000 User Manual... -
Page 129: Chapter 7 - Troubleshooting And Fault Information
Common Problems and Solutions ....Warning Codes ......GVX9000 User Manual... -
Page 130: Common Problems And Solutions
4. Provide enough spacing for adequate ventilation. Low Voltage The AC drive detects Check that the input voltage falls within the that the DC bus voltage rated AC drive’s input voltage. has fallen below its minimum value. GVX9000 User Manual... - Page 131 2. Check for possible motor stall. motor output. 3. Replace the AC drive with one that has a higher output capacity (next hp size). 2. Sudden increase in motor loading. 3. AC drive output capacity is too small. GVX9000 User Manual...
- Page 132 External Pause. 1. When the external input terminal AC drive output is (pause) is active, the AC drive output turned off. will be turned off. 2. Disable this (pause) and the AC drive will begin to work again. GVX9000 User Manual...
-
Page 133: Warning Codes
The Drive check error for saving to Check whether the the drive. communication wiring is correct and function is normal. It allows copying when the voltage and horsepower is the same. Under Current Under current fault. Check parameter 70.11 to 70.13. GVX9000 User Manual... - Page 134 This page intentionally left blank. GVX9000 User Manual...
-
Page 135: Appendix A Technical Data
Inside this chapter … Technical Data ....... GVX9000 User Manual... -
Page 136: Table A-1: Gvx9000 230V Specifications
Technical Data Technical Data Table A-1: GVX9000 230V Specifications Voltage Class 230V Class Model Number GVX-XXXA1-2 002 003 005 CT/VT: Max. 0.75 18.5 Applicable Motor Output (kW) CT/VT: Max. 7-1/2 Applicable Motor Output (hp) Output Rating CT/VT: Rated 12.5 18.3 24.7... -
Page 137: Table A-2: Gvx9000 460V Specifications
Technical Data Table A-2: GVX9000 460V Specifications Voltage Class 460V Class Model Number GVX- XXXA1-4 001 002 003 005 007 010 015 030 040 050 060 075 100 CT: Max. 0.75 1.5 18.5 Applicable Motor Output (kW) VT: Max. 0.75 1.5 18.5... -
Page 138: Table A-3: Gvx9000 575V Specifications
Technical Data Table A-3: GVX9000 575V Specifications Voltage Class 575V Class Model Number GVX- XXXA1-4 001 002 003 005 007 010 015 030 040 050 060 075 100 Max. 0.75 18.5 Applicable Motor Output (kW) Max. 7-1/2 Applicable Motor Output... -
Page 139: Table A-4: General Specifications
-10 to 50°C (Non-condensing and not frozen) -10 to 40°C for the Temperature models of 5.5 kW and higher Storage Temperature -20 to 60°C Ambient Humidity Below 90% RH (non-condensing) Vibration 9.80665 m/s (1G) less than 20 Hz, 5.88 m/s (0.6G) at 20 to 50 Hz GVX9000 User Manual... - Page 140 This page intentionally left blank. GVX9000 User Manual...
-
Page 141: Appendix B Parameter Tables
Parameter Tables Inside this chapter … GVX9000 Parameter Listings 20 — Easy Mode Settings ....30 — Inputs ...... -
Page 142: Gvx9000 Parameter Listings
GVX9000 Parameter Listings GVX9000 Parameter Listings Table B-1: 20 — Easy Mode Settings Parameter User Modbus Groups Page # Description Range Default Settings 20.01 Easy Mode Selection 00 – 09 Factory Settings Basic V/F Curve PID Control Preset Speeds Local/Remote... - Page 143 GVX9000 Parameter Listings Table B-2: 30 — Inputs (Continued) Parameter User Modbus Groups Page # Description Range Default Settings 010BH 30.12 A3 Minimum Input -10.00 to 10.00V -10.00V Voltage (-10 – 10V) 010CH 30.13 A3 Maximum Output -400.0 to 400.0 Hz 60.00...
- Page 144 GVX9000 Parameter Listings Table B-2: 30 — Inputs (Continued) Parameter User Modbus Groups Page # Description Range Default Settings 0114H 30.21 Digital Input Terminal Control Location Remote — (D3) Local/Remote (close for remote) Increase Master Frequency Decrease Master Frequency Forward / Reverse...
-
Page 145: Table B-3: 40 - Outputs
GVX9000 Parameter Listings Table B-2: 30 — Inputs (Continued) Parameter User Modbus Groups Page # Description Range Default Settings 0121H 30.34 5-21 Preset Speed 4 0.00 to 400.00 Hz 0.00 Hz 0122H 30.35 5-21 Preset Speed 5 0.00 to 400.00 Hz 0.00 Hz... - Page 146 GVX9000 Parameter Listings Table B-3: 40 — Outputs (Continued) Parameter User Modbus Groups Page # Description Range Default Settings 0204H 40.05 5-25 Digital Output 00 to 33 Terminal DO1 0205H 40.06 5-25 Digital Output Not Used Terminal DO2 Ready Inverter output is active...
-
Page 147: Table B-4: 50 - Ac Drive Control
GVX9000 Parameter Listings Table B-3: 40 — Outputs (Continued) Parameter User Modbus Groups Page # Description Range Default Settings 0205H 40.06 5-25 Digital Output Inverter RUN command Terminal DO2 state Brake ON/ Brake OFF (40.10, 40.11) 0206H 40.07 5-28 Frequency Attained 1 0.00 to 400.00 Hz... - Page 148 GVX9000 Parameter Listings Table B-4: 50 — AC Drive Control (Continued) Parameter User Modbus Groups Page # Description Range Default Settings 0301H 50.02 5-30 Source of Master Frequency REMOTE/AUTO determined by digital Frequency keypad on the drive. Master Frequency determined by 0 – 10V on terminal AI1.
- Page 149 GVX9000 Parameter Listings Table B-4: 50 — AC Drive Control (Continued) Parameter User Modbus Groups Page # Description Range Default Settings 0303H 50.04 5-31 Source of Operating commands REMOTE/AUTO determined by the Digital Operation Command Keypad. Operating commands determined by the External Control Terminals.
- Page 150 GVX9000 Parameter Listings Table B-4: 50 — AC Drive Control (Continued) Parameter User Modbus Groups Page # Description Range Default Settings 030DH 50.14 5-33 Maximum Output 50 to 400.0 Hz 60.00 Frequency 030EH 50.15 5-33 Motor Nameplate 10.00 to 400.00 Hz 60.00...
- Page 151 GVX9000 Parameter Listings Table B-4: 50 — AC Drive Control (Continued) Parameter User Modbus Groups Page # Description Range Default Settings 031EH 50.31 5-37 Deceleration Time 4 0.01 to d 36000 sec. Depends on drive 031FH 50.32 5-38 Accel/Decel Time Unit 0 1 sec.
- Page 152 GVX9000 Parameter Listings Table B-4: 50 — AC Drive Control (Continued) Parameter User Modbus Groups Page # Description Range Default Settings 032FH 50.48 5-43 Upper Frequency 0.01 to 400.00 Hz 400.00 Limit (Safety) 0330H 50.49 5-43 Lower Frequency 0.0 to 400.00 Hz...
-
Page 153: Table B-5: 60 - Motor Control
GVX9000 Parameter Listings Table B-4: 50 — AC Drive Control (Continued) Parameter User Modbus Groups Page # Description Range Default Settings 0346H 50.71 5-46 Wake Frequency 0.00 to 400.00 Hz 0.00 0347H 50.72 5-47 Sleep Time Delay 0.0 to 600 sec. -
Page 154: Table B-6: 70 - Protective Functions
GVX9000 Parameter Listings Table B-5: 60 — Motor Control (Continued) Parameter User Modbus Groups Page # Description Range Default Settings 0412H 60.19 5-53 CLV — Encoder Mode 00 PG disable Single-phase Forward / Counterclockwise rotation Reverse / Clockwise rotation 0413H 60.20... - Page 155 GVX9000 Parameter Listings Table B-6: 70 — Protective Functions (Continued) Parameter User Modbus Groups Page # Description Range Default Settings 0503H 70.04 5-57 Over-Torque Disabled Detection Mode Enabled during constant speed operation, drive halted after fault Enabled during constant speed operation, operation...
-
Page 156: Table B-7: 80 - Keypad / Display
GVX9000 Parameter Listings Table B-6: 70 — Protective Functions (Continued) Parameter User Modbus Groups Page # Description Range Default Settings 0510H 70.17 5-60 Cooling Fan Mode Always on Fan is off one minute after stop command Fan on with run, fan off with... - Page 157 GVX9000 Parameter Listings Table B-7: 80 — Keypad / Display (Continued) Parameter User Modbus Groups Page # Description Range Default Settings 0602H 80.03 5-62 Manufacturer Model GVX001A1-2 (240V AC, Information 1 hp – CT) GVX002A1-2 (240V AC, 2 hp – CT) GVX003A1-2 (240V AC, 3 hp –...
- Page 158 GVX9000 Parameter Listings Table B-7: 80 — Keypad / Display (Continued) Parameter User Modbus Groups Page # Description Range Default Settings 0602H 80.03 5-62 Manufacturer Model GVX060A1-4 (480V AC, Information 60 hp – CT) GVX075A1-4 (480V AC, 75 hp – CT) GVX100A1-4 (480V AC, 100 hp –...
- Page 159 GVX9000 Parameter Listings Table B-7: 80 — Keypad / Display (Continued) Parameter User Modbus Groups Page # Description Range Default Settings 0606H 80.07 5-64 Fault Record 4 No fault occurred Over Current Over Voltage Overheat Overload Overload 1 Over Torque...
- Page 160 GVX9000 Parameter Listings Table B-7: 80 — Keypad / Display (Continued) Parameter User Modbus Groups Page # Description Range Default Settings 060BH 80.12 5-65 Run Time — Timer 0 to 65535 060CH 80.13 5-65 Run Time — Timer 0 to 65535...
-
Page 161: Table B-8: 90 - Communication
GVX9000 Parameter Listings Table B-8: 90 — Communication Parameter User Modbus Groups Page # Description Range Default Settings 0700H 90.01 5-67 Communication Modbus ASCII Mode < 7 Protocol data bits, no parity, 2 stop bits > Modbus ASCII Mode < 7 data bits, even parity, 1 stop bit >... - Page 162 GVX9000 Parameter Listings Table B-8: 90 — Communication (Continued) Parameter User Modbus Groups Page # Description Range Default Settings 0708H 90.09 5-68 Status Monitor for No Fault occurred Error Code Over-current Over-voltage Overheat Overload Overload 1 Over Torque External Fault...
- Page 163 GVX9000 Parameter Listings Table B-8: 90 — Communication (Continued) Parameter User Modbus Groups Page # Description Range Default Settings 0709H 90.10 5-69 Status Monitor for AC Bit 0-1 00 Stop Drive 01 Decelerate during the drive stopping 10 The drive standby...
- Page 164 GVX9000 Parameter Listings Table B-8: 90 — Communication (Continued) Parameter User Modbus Groups Page # Description Range Default Settings 0715H 90.22 5-70 PID Setpoint 0.0 to 400.0 Hz (%) 0716H 90.23 5-71 AI1 Signal 0.00 ~ 100.00% 0717H 90.24 5-71 AI2 Signal 0.00 ~ 100.00%...
-
Page 165: Appendix C Accessories
EMI Filter Cross-Reference ..... Keypad Remote Mounting Kit (P/N GVXRM) ..C-19 GVX9000 User Manual... -
Page 166: Table C-1: Fuse Specifications - 230V
GVX030A1-4 JJS-200 Consult Consult factory GVX040A1-4 JJS-225 factory GVX050A1-4 JJS-300 GVX060A1-4 JJS-350 Consult Consult factory GVX075A1-4 JJS-450 factory GVX100A1-4 JJS-500 Note: Smaller fuses than those shown in the table are permitted. Note: Contact Eaton for 575V information. GVX9000 User Manual... -
Page 167: Wiring
10m. EMI Filter (Optional) Used to reduce the electromagnetic interference. Braking Resistor Used to reduce stopping time of the motor. Please refer to (Optional) the Braking Resistor tables on Pages C-4 and C-5 for specific Braking Resistors. GVX9000 User Manual... -
Page 168: Braking
Braking All Braking Resistors and Braking Units Used in AC Motor Drives Note: Please only use Eaton resistors and recommended values. Other resistors and values will void Eaton’s warranty. Please contact your nearest Eaton representative for use of special resistors. For instance, in 460V Series, 100 hp/75 kW, the AC motor drive needs 2 braking units with total of 16 braking resistors, so each braking unit uses 8 braking resistors. - Page 169 (ED%). 2. If damage to the drive or other equipment are due to the fact that the braking resistors and the braking modules in use are not provided by Eaton, the warranty will be void. 3. Take into consideration the safety of the environment when installing the braking resistors.
-
Page 170: External Brake Unit
Braking External Brake Unit 4.76 .13 (3.3) (121.0) Rad. 3.15 5.12 (80.0) (130.0) 7.87 7.46 (200.0) (189.5) Figure C-1: GBM2022, GBM4045, GBM5055 Braking Unit GVX9000 User Manual... -
Page 171: Table C-5: Braking Unit Specifications
Indoor (no corrosive gases, metallic dust) Location Operating -10 ~ +50°C Temperature Storage -20 ~ +60°C Temperature Humidity 90% R.H., Non-condensing Vibration 9.8 m/s (1G) under 20 Hz 2 m/s (0.2G) at 20 ~ 50 Hz Mechanical Wall-mounted enclosed type IP50 Configuration GVX9000 User Manual... -
Page 172: Dimensions For Braking Resistors
1.50 CR300 (228.6) (76.2) (38.1) K13-000034-0852 (2) CR300-400 P 9.00 3.00 1.50 CR300 (228.6) (76.2) (38.1) 5WR2000-GCE5-NC 2000 12.00 16.00 5.00 GCE5 (304.8) (406.4) (127.0) Two units required connected in parallel. Three units required connected in parallel. GVX9000 User Manual... -
Page 173: Table C-7: Emi Filter Cross-Reference
— 50TDS4W4C GVX010A1-2 GVX015A1-4 GVX020A1-4 GVX015A1-2 — — — — 100TDS84C GVX020A1-2 GVX025A1-4 GVX030A1-4 GVX040A1-4 GVX025A1-2 — — — — 150TDS84C GVX030A1-2 GVX040A1-2 GVX050A1-4 GVX050A1-2 — — — — 180TDS84C GVX060A1-4 GVX075A1-4 200TDDS84C 150TCSS84C — — — GVX9000 User Manual... -
Page 174: Emi Filter Cross-Reference
EMI Filter Cross-Reference Catalog Number: RF022B21BA / RF037B43BA 2.36 5.90 (60.0) (150.0) 1.18 4.33 (30.0) (110.0) 11.9 12.4 11.89 (302.0) (315.0) (302.0) 1.18 (15) (30) (5.5) Figure C-2: Approximate Dimensions in Inches (mm) — RF022B21BA / RF037B43BA C-10 GVX9000 User Manual... -
Page 175: Emi Filter Cross-Reference
EMI Filter Cross-Reference Catalog Number: RF110B43CA 2.36 7.87 (60.0) (200.0) 4.72 (33.0) (120.0) 15.04 15.04 15.67 (382.0) (382.0) (398.0) 1.02 (20) (26) (7.0) Figure C-3: Approximate Dimensions in Inches (mm) — RF110B43CA GVX9000 User Manual C-11... - Page 176 11.18 ± .04 .18 (4.5) Rad. (122.0 ± 1.0) (50.0 ± 2) (284.0 ± 1.0) .31 (8.0) Dia. (4 Places) 11.18 ± .04 (284.0 ± 1.0) .98±.04 (25.0±1.0) Figure C-4: Approximate Dimensions in Inches (mm) — 26TDT1W4C C-12 GVX9000 User Manual...
- Page 177 M6 x 1.0 (50.0) Typ. 4 Places 1015 AWG (20.0) 10 Y/G T/L3 5.91 ± .08 S/L2 (150.0 ± 2.0) R/L1 (20.0) (20.0) 1015 AWG 10 Blue Figure C-5: Approximate Dimensions in Inches (mm) — 50TDS4W4C GVX9000 User Manual C-13...
- Page 178 M8 x 1.25 Typ. 6 Places 2.36 (60.0) 2.36 (60.0) 13.86 (352.0) Max. 14.57 ± .08 (370.0 ± 2.0) 7.95 ± .04 15.35 (390.0) (202.0 ± 1.0) Max. Figure C-6: Approximate Dimensions in Inches (mm) — 100TDS84C C-14 GVX9000 User Manual...
- Page 179 Typ. 4 Places Typ. 6 Places 2.36 (60.0) 2.36 (60.0) 15.83 (402.0) Max. 16.54 ± .08 (420.0 ± 2.0) 7.95 ± .04 17.32 (440.0) (202.0 ± 1.0) Max. Figure C-7: Approximate Dimensions in Inches (mm) — 150TDS84C GVX9000 User Manual C-15...
- Page 180 Typ. 4 Places Typ. 6 Places 2.36 (60.0) 2.36 (60.0) 15.83 (402.0) Max. 16.54 ± .08 (420.0 ± 2.0) 7.95 ± .04 17.32 (440.0) (202.0 ± 1.0) Max. Figure C-8: Approximate Dimensions in Inches (mm) — 180TDS84C C-16 GVX9000 User Manual...
- Page 181 4.80 ± .04 .18 (4.5) Rad. (284.0 ± 1.0) (50.0 ± 2) (122.0 ± 1.0) .31 (8.0) Dia. (4 Places) 11.18 ± .04 (284.0 ± 1.0) .98±.04 (25.0±1.0) Figure C-9: Approximate Dimensions in Inches (mm) — 20TDT1W4C GVX9000 User Manual C-17...
- Page 182 2.76 (70.0) 37.40 (950.0) Ref. .26 x .31 (6.5 x 8.0) .24 (6.0) (4 Places) (4 Places) 35.43 (900.0) Ref. 5.59 (142.0) Max. .59 (15.0) (12 Places) Figure C-10: Approximate Dimensions in Inches (mm) — 200TDDS84C C-18 GVX9000 User Manual...
-
Page 183: Keypad Remote Mounting Kit (P/N Gvxrm
Cut-Out for the Thickness 3.27 (1.0 to 3.0) Extension Cable (17.0) (83.0) Rubber Gasket 2.41 (61.1) (9.6) (12.3) 3’3.36” (1m) (16.4) Hole Dimension for Mounting (6.6) (13.3) Phone Cable Figure C-11: Approximate Kit Dimensions in Inches (mm) GVX9000 User Manual C-19... - Page 184 This page intentionally left blank. C-20 GVX9000 User Manual...
-
Page 185: Appendix D Dimensions
Drives ........GVX9000 User Manual... -
Page 186: Digital Keypad
(40.0) RUN STOP FWD REV 4.33 3.27 (110.0) (83.0) M4 P .03 (.7) x .19 (4.8) Deep for Mounting Screw (Typ. 3 Places) .75 (19.0) .36 (9.1) Figure D-1: Digital Keypad — Approximate Dimensions in Inches (mm) GVX9000 User Manual... -
Page 187: Drives
HIGH VOLTAGE! WAIT AT LEASTS 10 MINUTES BEFORE OPENING. SEE USER’S MANUAL FOR OPERATION. .26 (6.5) Dia. Model GVX001A1-2 GVX001A1-4 GVX002A1-2 GVX002A1-4 GVX003A1-2 GVX003A1-4 GVX005A1-2 GVX005A1-4 Figure D-2: 1 – 5 hp — Approximate Dimensions in Inches (mm) GVX9000 User Manual... - Page 188 GVX9000 Sensorless Vector WARNING HIGH VOLTAGE! WAIT AT LEASTS 10 MINUTES BEFORE OPENING. SEE USER’S MANUAL FOR OPERATION. Model GVX007A1-2 GVX007A1-4 GVX010A1-2 GVX010A1-4 GVX015A1-2 GVX015A1-4 Figure D-3: 7-1/2 – 15 hp — Approximate Dimensions in Inches (mm) GVX9000 User Manual...
- Page 189 GVX9000 Sensorless Vector WARNING HIGH VOLTAGE! WAIT AT LEASTS 10 MINUTES BEFORE OPENING. SEE USER’S MANUAL FOR OPERATION. Model GVX020A1-2 GVX020A1-4 GVX025A1-2 GVX025A1-4 GVX030A1-2 GVX030A1-4 Figure D-4: 20 – 30 hp — Approximate Dimensions in Inches (mm) GVX9000 User Manual...
- Page 190 WAIT AT LEASTS 10 MINUTES BEFORE OPENING. SEE USER’S MANUAL FOR OPERATION. 23.19 (589.0) .71 (18.0) .71(18.0) Dia. 5.22 (132.5) Model GVX040A1-2 GVX040A1-4 GVX050A1-2 GVX050A1-4 GVX075A1-4 GVX060A1-4 GVX100A1-4 Figure D-5: 40 – 100 hp — Approximate Dimensions in Inches (mm) GVX9000 User Manual...
-
Page 191: Appendix E Easy Mode Settings
08 — Analog Speed Command ....E-10 09 — Closed Loop Vector Control ... . E-11 GVX9000 User Manual... -
Page 192: Choosing Easy Mode
Minimum Output Voltage 230V Series: 0.1 to 50V 460V Series: 0.1 to 100V 575V Series: 0.1 to 637V 032FH 50.48 Upper Frequency Limit 0.01 to 400.00 Hz 55.00 (Safety) 0330H 50.49 Lower Frequency Limit 0.0 to 400.00 Hz (Safety) GVX9000 User Manual... -
Page 193: Table E-3: 02 - Pid Control
Mid-Point Output Frequency 0.00 to 400.00 Hz 0.50 0311H 50.18 Mid-Point Output Voltage 230V Series: 0.1 to 255V 460V Series: 0.1 to 510V 575V Series: 0.1 to 637V 0312H 50.19 Minimum Output Frequency 0.00 to 20.00 Hz 0.50 GVX9000 User Manual... -
Page 194: Table E-4: 03 - Preset Speeds
Preset Speed 2 0.00 to 400.00 Hz 50.00 0120H 30.33 Preset Speed 3 0.00 to 400.00 Hz 40.00 0121H 30.34 Preset Speed 4 0.00 to 400.00 Hz 30.00 0122H 30.35 Preset Speed 5 0.00 to 400.00 Hz 20.00 GVX9000 User Manual... - Page 195 Minimum Output Voltage 230V Series: 0.1 to 50V 460V Series: 0.1 to 100V 575V Series: 0.1 to 637V 032FH 50.48 Upper Frequency Limit 0.01 to 400.00 Hz 65.00 (Safety) 0330H 50.49 Lower Frequency Limit 0.0 to 400.00 Hz (Safety) GVX9000 User Manual...
-
Page 196: Table E-5: 04 - Local/Remote
460.0 575V Series: 0.1 to 637.0V 575.0 0310H 50.17 Mid-Point Output Frequency 0.00 to 400.00 Hz 0.50 0311H 50.18 Mid-Point Output Voltage 230V Series: 0.1 to 255V 460V Series: 0.1 to 510V 575V Series: 0.1 to 637V GVX9000 User Manual... -
Page 197: Table E-6: 05 - Hand Off Auto (Hoa
10.00 to 400.00 Hz 60.00 030FH 50.16 Motor Nameplate Voltage 230V Series: 0.1 to 255.0V 230.0 460V Series: 0.1 to 510.0V 460.0 575V Series: 0.1 to 637.0V 575.0 0310H 50.17 Mid-Point Output Frequency 0.00 to 400.00 Hz 0.50 GVX9000 User Manual... -
Page 198: Table E-7: 06 - Variable Torque (Pump/Fan
Digital Output Terminal DO2 Over torque detection 0300H 50.01 Source of LOCAL/HAND Master Frequency determined by Frequency digital keypad on the drive. 0301H 50.02 Source of REMOTE/AUTO Master Frequency determined by 4 – Frequency 20 mA on terminal AI2. GVX9000 User Manual... -
Page 199: Table E-8: 07 - Spindle Motor
External Reset (NO) 011BH 30.28 Digital Input Terminal (D10) 0202H 40.03 Digital Output Terminal Inverter Fault Relay A (RA1, RA2, RA3) 0203H 40.04 Digital Output Terminal Ready Relay B (RB1, RB2) 0204H 40.05 Digital Output Terminal DO1 At speed GVX9000 User Manual... -
Page 200: Table E-9: 08 - Analog Speed Command
Negative input = 30.04 Negative input = Reverse direction Negative input = Frequency command only, no Direction 0200H 40.01 Analog Output Reference Output Frequency (0 to Maximum Output Frequency) 0201H 40.02 Analog Output Gain 0 to 200% E-10 GVX9000 User Manual... -
Page 201: Table E-10: 09 - Closed Loop Vector Control
Brake ON/ Brake OFF (40.10, 40.11) Relay A (RA1, RA2, RA3) 0203H 40.04 Digital Output Terminal Inverter Fault Relay B (RB1, RB2) 0204H 40.05 Digital Output Terminal DO1 Low Voltage indication (User Defined) 31 0205H 40.06 Digital Output Terminal DO2 Ready GVX9000 User Manual E-11... - Page 202 0.002 ~ 1.00 041AH 60.27 CLV — Encoder Slip Range 0.0 ~ 50.0% 10.0 (Deviation Range) 041BH 60.28 CLV — Encoder Stall Level 0 ~ 115% (Over Speed) 0508H 70.09 Auto Voltage Regulation AVR disabled (AVR) E-12 GVX9000 User Manual...
-
Page 203: Appendix F - Declaration Of Conformity
Electromagnetic Compatibility ....EC Declaration of Conformity ....GVX9000 User Manual... -
Page 204: Low Voltage Directive
Amendment Directive 93/68/EEC. For the evaluation of the compliance with this Directive, the following standard was applied: EN 50178 The following manufacturer/importer is responsible for this declaration: Eaton Electrical (Company Name) 31-1, Shien Pan Road, Kuei San Industrial Zone, Taoyuan Shien, Taiwan, R.O.C. (Company Address) GVX9000 User Manual... -
Page 205: Electromagnetic Compatibility
EN61800-3, EN55011, EN61000-6-4, EN61000-6-2, EN61000-4-2, EN61000-4-3, EN61000-4-4, EN61000-4-5, EN61000-4-6, EN61000-4-8 The following manufacturer/importer is responsible for this declaration: Eaton Electrical (Company Name) 31-1, Shien Pan Road, Kuei San Industrial Zone, Taoyuan Shien, Taiwan, R.O.C. (Company Address) GVX9000 User Manual... - Page 206 This page intentionally left blank. GVX9000 User Manual...
- Page 208 OEM markets. For more information, visit www.EatonElectrical.com. Eaton Corporation is a diversified industrial manufacturer with 2005 sales of $11.1 billion. Eaton is a global leader in electrical systems and components for power quality, distribution and control; fluid power systems and services for industrial, mobile and aircraft equipment;...
Need help?
Do you have a question about the GVX9000 and is the answer not in the manual?
Questions and answers