Table of Contents
Advertisement
Please read this manual carefully before installation and keep it for future reference.
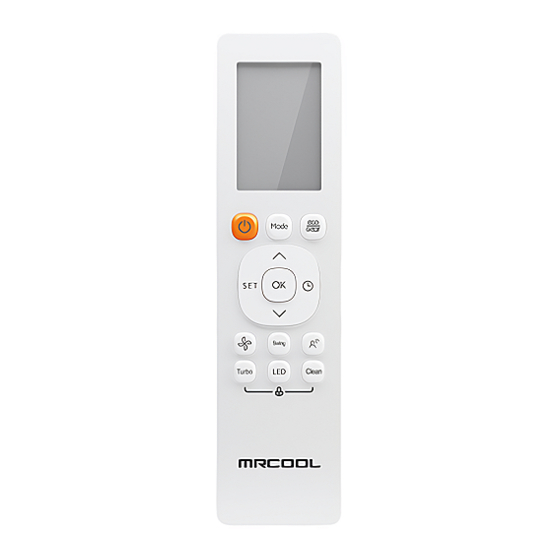
Remote Control
User Manual
Due to updates and constantly improving performance, the information and instructions within this
manual are subject to change without notice. Please visit www.mrcool.com/documentation to
ensure you have the latest version of this manual.
Version Date: 09-29-21
For more info visit www.mrcool.com
Advertisement
Table of Contents

Related Manuals for MrCool Easy Pro RG10A


Summary of Contents for MrCool Easy Pro RG10A
- Page 1 Remote Control User Manual Due to updates and constantly improving performance, the information and instructions within this manual are subject to change without notice. Please visit www.mrcool.com/documentation to ensure you have the latest version of this manual. Version Date: 09-29-21...
-
Page 2: Table Of Contents
E-Star™ Remote Controller ..........12 ® Buttons & Functions ......12 Remote Screen Indicators ....13 How to Use Basic Functions .... 14 Setting the Timer ......... 16 How to Use Advanced Functions ..17 E-Star™ Remote Controller ® Model #: RG10A4(D1)/BGEFU1 Page 1 mrcool.com... -
Page 3: Remote Controller Specifications & Quick Start Guide
When there are differences between the “Remote Controller Manual” and the “USER’S • MANUAL” when it comes to function description, the description of “USER’S MANUAL” should take precedence. mrcool.com Page 2... -
Page 4: Handling The Remote Controller
• Curtains, other materials and direct sunlight void user’s authority to operate the can interfere with the infrared signal receiver. equipment. Remove batteries if the remote will not be used more than 2 months. Page 3 mrcool.com... -
Page 5: Easy Pro™ Remote Controller
1% increments. SWING TURBO Starts and stops the horizontal Enables unit to reach the preset louver movement. Hold down temperature in the shortest possible for 2 seconds to initiate vertical time. louver auto swing feature. mrcool.com Page 4... -
Page 6: Remote Screen Indicators
This display is blank when the fan speed values between operating in FAN mode. AU-100%. NOTE: All indicators shown are for demonstration purposes. During actual operation, only the relative and active functions will be shown in the display window. Page 5 mrcool.com... -
Page 7: How To Use Basic Functions
FAN Mode Select FAN mode Set the fan speed Turn on the air conditioner MODE NOTE: In FAN mode, the temperature cannot be set or adjusted. As a result, no temperature reading will display on the remote screen. mrcool.com Page 6... -
Page 8: Setting The Timer
(3:30PM) and then turn off Current 4 PM 5 PM 2 PM 3 PM 3:30 PM 6 PM time 1 PM at 6:00PM (5 hours after the timer 2.5 hours later is originally set). 5 hours later Page 7 mrcool.com... -
Page 9: How To Use Advanced Functions
Press and hold the LED button for more than 5 seconds again and the display will revert back to the set temperature. mrcool.com Page 8... - Page 10 Due to low frequency operation of compressor, this function could result in insufficient cooling and heating capacity. Pressing the ON/OFF, MODE, SLEEP, TURBO or CLEAN button while the system is operating with the silence function activated will cancel it. Page 9 mrcool.com...
- Page 11 Turbo When the TURBO button is pressed while the unit is in HEAT mode, for units with electric heat elements, the electric heater will activate and speed up the heating process. mrcool.com Page 10...
- Page 12 For some units, it does not work Follow Me function. by pressing the SET button. To enter the AP mode, continuously press the LED button seven times within 10 seconds. Page 11 mrcool.com...
-
Page 13: Diy ® E-Star™ Remote Controller
2 seconds to initiate vertical time. louver auto swing feature. NOTE: Press and hold the temperature & buttons at the same time for 3 seconds and it will alternate the temperature display between °F and C° readings. mrcool.com Page 12... -
Page 14: Remote Screen Indicators
AUTO or DRY mode. This display is blank when operating in FAN mode. NOTE: All indicators shown are for demonstration purposes. During actual operation, only the relative and active functions will be shown in the display window. Page 13 mrcool.com... -
Page 15: How To Use Basic Functions
1. Press the MODE button and select COOL mode. 2. Set your desired temperature using the TEMPERATURE buttons. 3. Press the FAN button to select the desired fan speed: AUTO, LOW, MED, or HIGH. 4. Press the ON/OFF button to start the unit. mrcool.com Page 14... - Page 16 4. Press the ON/OFF button to start the unit. NOTE: As the outdoor temperature drops, the performance of the unit’s HEAT function may be affected. If this occurs, we recommend using other heating appliances in conjunction with the unit. Page 15 mrcool.com...
-
Page 17: Setting The Timer
(3:30PM) and then turn off Current 4 PM 5 PM 2 PM 3 PM 3:30 PM 6 PM time 1 PM at 6:00PM (5 hours after the timer 2.5 hours later is originally set). 5 hours later mrcool.com Page 16... -
Page 18: How To Use Advanced Functions
Press and hold the LED button for more than 5 seconds again and the display will revert back to the set temperature. Page 17 mrcool.com... - Page 19 5 seconds will activate the LOCK function. Clean Turbo With this feature activated no buttons pressed will respond, except when these two buttons are pressed again for two seconds in order to disable the LOCK function. mrcool.com Page 18...
- Page 20 Turbo When the TURBO button is pressed while the unit is in HEAT mode, for units with electric heat elements, the electric heater will activate and speed up the heating process. Page 19 mrcool.com...
- Page 21 If the memory feature is stopped, “OF” seven times within 10 seconds. will display for 3 seconds on the screen. While the memory feature is activated, press the ON/OFF button, shift the mode or power failure will not cancel the Follow Me function. mrcool.com Page 20...
- Page 22 Due to updates and constantly improving performance, the information and instructions within this manual are subject to change without notice. Please visit www.mrcool.com/documentation to ensure you have the latest version of this manual. Version Date: 09-29-21...
Need help?
Do you have a question about the Easy Pro RG10A and is the answer not in the manual?
Questions and answers