Comica CVM-WM200 User Manual
Uhf wireless microphone
Hide thumbs
Also See for CVM-WM200:
- User manual (98 pages) ,
- User manual (44 pages) ,
- User manual (49 pages)
Table of Contents
Advertisement
Quick Links
Advertisement
Table of Contents

Subscribe to Our Youtube Channel
Related Manuals for Comica CVM-WM200


Summary of Contents for Comica CVM-WM200
- Page 1 UHF Wireless Microphone User Manual...
-
Page 2: Main Features
Foreword Thanks for purchasing Comica WM200 PRO Main Features Dual-channel Wireless Microphone, One Touch to Switch Channel ● Support Maximum Capacity of 128G Micro SD Card for External Memory ● 96 Channels for Multiple Devices Working Together ● 180° Rotatable Antenna, Working Distance Up to 120m ●... -
Page 3: Fcc Statement
FCC statement This device complies with Part 15 of the FCC rules. Operation is subject to the following two conditions: 1) this device may not cause harmful interference, and 2) this device must accept any interference received, including interference that may cause undesired operation. -
Page 4: Packing List
Packing List Main Part: Lavalier Transmitter (TX) Handheld Transmitter (HTX) Receiver (RX) Multiple Selections: WM200 PRO (A) = 2TX + RX WM200 PRO (C) = TX + RX WM200 PRO-TX WM200 PRO-HTX... - Page 5 Accessories: ① 3.5mm TRS Lavalier Microphone ⑥ Cold Shoe Mount ② 3.5mm TRS-TRS Audio Cable ⑦ Wind Mu ③ 3.5mm TRS-XLR Audio Cable ⑧ Portable Box ④ Charging Cable ⑨ User Manual ⑤ Belt Clip ⑩ Warranty Card ① ② ③...
- Page 6 Components and Instruction Lavalier Transmitter (TX): ① ② ③ ⑦ ⑧ ④ ⑪ ⑫ ⑤ ⑥ ⑩ ⑬ ⑮ ⑭ ⑨ ⑯ ① IR Sensor ⑨ SET Function Menu/ Recording Button ② MIC / Line in Audio Input Port ⑩ Function Selection Button + ③...
- Page 7 Handheld Transmitter (HTX): ① ② ③ High ④ ⑤ ⑥ ① Mic Capsule ② LCD Screen ③ Power / Muting Button ④ IR Sensor ⑤ Low Cut Filter/Normal Audio Switch ⑥ Signal Strength “High/Low” Switch...
- Page 8 Receiver (RX) : ② ① ③ ④ ⑨ ⑧ ⑤ ⑩ ⑥ ⑬ ⑦ ⑪ ⑭ ⑮ ⑫ ⑯ ⑨ Group B Antenna ① 3.5mm Audio Output Port ② IR Sensor ⑩ Group B Working Status Indicator ③ 3.5mm Monitoring Port ⑪...
- Page 9 Indicator Light Instruction Lavalier Transmitter (TX) : Blue Light Keeps on Channel matches (No matter the channel matched or not) Red Light Flickers Channel is matching (only for IR Sync) Blue Light Keeps on Normal recording status AUDIO Red Light Keeps on Muting mode Red Light Flickers Low power reminder...
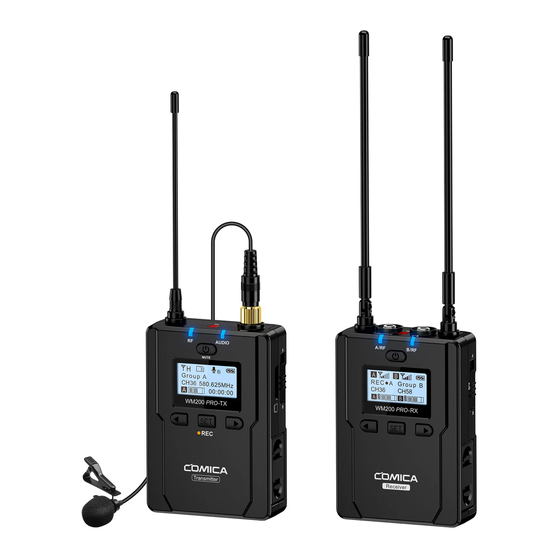
- Page 10 Screen Display and Operation Instruction Lavalier Transmitter (TX) Screen Display Instruction: Recording ● TF Card Inserted Muting (Unlocking) TF Card Removed Muting (Locking) Signal Strength High Normal Recording Signal Strength Low Muting Battery Power Group A Group A/B CH36 543.125MHz Channel Channel Frequency 00:00:00...
- Page 11 Operation Instruction: 1.Group A/B Selection You could choose Group A or Group B based on your demand Group A/B Switch Button 2. Recording Function At the home page and the screen lights up for long pressing button to record, of the screen flashes is recording; At the home page and screen lights up for long pressing button to stop recording;...
- Page 12 3. Manually Adjust the Channel of Transmitter 3.1 Short press button to CH setting page CH Setting CH36 3.2 Long press button to enter the CH adjustment state CH Setting CH36 3.3 Short press button to the right channel CH Setting CH11 3.4 Short press button to confirm and other button of pages operate in the same...
- Page 13 4. MIC/Line in Input Mode Adjustment Input Setting Input Setting Line in Mic mode is for Microphone input; Line in mode is for external audio input, such as smartphone music player. Selecting the corresponding input mode will bring you a better audio e ect. 5.
- Page 14 7. Muting Mode On/O Muting Muting Enable Disable When set to ‘ Disable ’, the muting function cannot be used, the icon is: When set to ‘ Enable ’, the muting function works, the icon is: The muting mode can be controlled only when the screen is on, press any button to light the screen and then press the Power/Muting Button to switch the muting mode.
-
Page 15: Update & Copy
11. Update & Copy Update & Copy Update & Copy 1. The recording function can only be used when the "update & copy" mode is o , there are not a disk on the computer 2. When the "update & copy" mode is on, two disks appear after WM200 PRO is connected with the computer, you can update firmware and copy audio file 3. - Page 16 Handheld Transmitter (HTX) Screen Display Instruction: Normal Recording Muting Battery Power Channel Group A/B Operation Instruction: 1.Turn on and Muting Mode Switch 1.1 Long press switch button for 2 seconds to turn on or o 1.2 when the screen is lighted on, short press the button to select muting mode Normal Recording Muting...
- Page 17 Receiver (RX) Screen Display Instruction: Group A Signal Strength Group B Signal Strength Battery Power Group A Group B Group A Group B CH 36 CH 58 Group A Channel Group B Channel Group A transmitter Battery Group B transmitter Battery Group A Audio Dynamic Bar Group B Audio Dynamic Bar R E C A...
- Page 18 2. Audio Output Mode ‘Stereo/Mono’ Adjustment 2.1 Short press button to ‘ Output Mode ’ page Output Modle Stereo 2.2 Long press button to ‘ Output Mode ’ page Output Modle Stereo 2.3 Short press button to select ‘ Mono/ Stereo ’ Output Mode Output Modle Mono 2.4 Short press...
- Page 19 3. Group A/B Function Setting (Select the group you need to set) Setting Setting Group A Group B 4. Group A/B Channel Frequency Setting Group A Setting CH46 5. Group A/B Volume Adjustment Group A Setting Volume 12 6. Group A/B Automatic Channel Scan (Automatically scan the optimal frequency) Group A Setting Auto scan?...
- Page 20 7. Sync Group A Setting Sync? Yes 8. Time Adjustment for Backlight Backlight 9. System Language Language(语言) English...
-
Page 21: Update Mode
10. Update Mode Update Mode Update Mode 1.When the update mode is o , there are not a disk on the computer 2.When the update mode is on, a WM200_PRO disk appears after WM200 PRO is connected with the computer, put the upgrade file to the disk and then restart the WM200 PRO to upgrade WM200_PRO 11. -
Page 22: Installation And Usage
Installation and Usage POWER 5V/1A POWER 5V/1A 1. Install two AA batteries into the battery tray according to the positive and negative electrode. It supports external power supplying through USB-C Plug When it needs to be used for a long time, it can be connected to the external power to realize charging while using. - Page 23 30cm IR Sensor IR Sensor 30cm IR Sensor IR Sensor 2. Long press the power button to turn on, set the "Sync" function of receiver, and then match the IR sensor of receiver and transmitter...
- Page 24 3. Insert the 3.5mm TRS microphone into the MIC port, install the belt clip to the belt clip port and wear it correctly. You can choose to use the lavalier transmitter or handheld transmitter to meet your needs...
- Page 25 4. Connect the receiver and devices through the cold shoe mount and 3.5mm TRS-TRS audio cable / 3.5mm TRS-XLR audio cable, and insert the headphone into the 3.5mm monitoring port to monitor...
-
Page 26: Specification
Specification Lavalier Transmitter (TX) Signal / Noise >65dB Antenna 1/4 Wavelength Wire Antenna Stray Radiation <-60dBc Sound Delay <20ms Audio Distortion <0.5% Battery AA Batteries x 2pcs Dimension 84 x 63.5 x 23mm Net Weight 123g Operating Temperature ℃ ~ 50℃ Storage Temperature -20℃... - Page 27 Receiver (RX) Signal / Noise >65dB Antenna 1/4 Wavelength Wire Antenna Receiving Sensitivity <-93dBm Stray Radiation <-60dBc Sound Delay <20ms Audio Distortion <0.5% Battery AA Batteries x 2pcs Dimension 84 x 63.5 x 23mm Net Weight 144g Operating Temperature ℃ ~ 50℃ Storage Temperature -20℃...
- Page 28 This device operates on a no-interference, no-protection basis. Should the user seek to obtain protection from other radio services operating in the same TV bands, a radio licence is required. For further details, consult Innovation, Science and Economic Development Canada's Client Procedures Circular CPC-2-1-28, Voluntary Licensing of Licence-Exempt Wireless Microphones in the TV Bands.
- Page 29 Email: support@comica-audio.com...
- Page 30 FCC Statement This device complies with part 15 of the FCC rules. Operation is subject to the following two conditions: (1) this device may not cause harmful interference, and (2) this device must accept any interference received, including interference that may cause undesired operation.
- Page 31 ISED Statement ‐ English: This device complies with Industry Canada license ‐ exempt RSS standard(s). Operation is subject to the following two conditions: (1) This device may not cause interference, and (2) This device must accept any interference, including interference that may cause undesired operation of the device.
Need help?
Do you have a question about the CVM-WM200 and is the answer not in the manual?
Questions and answers