Table of Contents
Advertisement
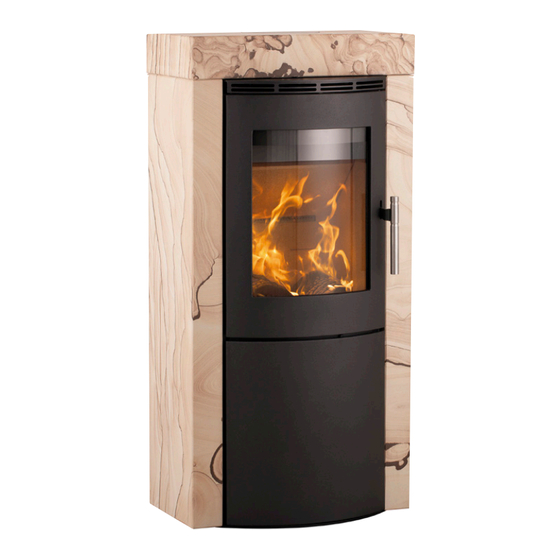
SCAN-LINE 800-SERIES
Scan-Line 800, 810, 820, 820 with baking oven, 820 with thermasto-
nes, 830 with thermastones, 840, 840 with baking oven, 840 with ther-
mastones, 850 on a pedestal and 850 on a turnable pedestal
APPROVED FOR USE IN SMOKE CONTROL
AREAS WHEN BURNING DRY WOOD LOGS OR
AUTHORISED FUELS
www.heta.dk
www.heta.dk
GB
1
Installation and Operating Instructions for Heta SL800 stoves Pevex1019/AH/ver1:Jan 2013
Pevex1019/AH/ver1:Jan 2013
Advertisement
Table of Contents

Summary of Contents for Heta SCAN-LINE 840
- Page 1 SCAN-LINE 800-SERIES Scan-Line 800, 810, 820, 820 with baking oven, 820 with thermasto- nes, 830 with thermastones, 840, 840 with baking oven, 840 with ther- mastones, 850 on a pedestal and 850 on a turnable pedestal APPROVED FOR USE IN SMOKE CONTROL...
-
Page 2: Installation Instructions
Howe- below the ashpan. ver, the area of the opening should never be less than 175 cm , which corresponds to a diameter of 150 mm. Installation and Operating Instructions for Heta SL800 stoves Pevex1019/AH/ver1:Jan 2013... -
Page 3: Draft Conditions
The minimum chimney the airflow into the stove. draft to ensure satisfactory combu- Installation and Operating Instructions for Heta SL800 stoves Pevex1019/AH/ver1:Jan 2013... -
Page 4: Instructions For Use
Mountain Poplar ney. Thus it is important to use dry, pine well seasoned wood, i.e. wood with Willow a moisture content of no more than Installation and Operating Instructions for Heta SL800 stoves Pevex1019/AH/ver1:Jan 2013... -
Page 5: Chimney Fires
Installation and Operating Instructions for Heta SL800 stoves Pevex1019/AH/ver1:Jan 2013... - Page 6 The wood will light in 2/3 minutes. Adjust the air slider for optimum combustion. Installation and Operating Instructions for Heta SL800 stoves Pevex1019/AH/ver1:Jan 2013...
- Page 7 Do not forget that the operated with air controls or dampers combustion airflow must never be left open except as directed in the completely closed when lighting up. instructions. Installation and Operating Instructions for Heta SL800 stoves Pevex1019/AH/ver1:Jan 2013...
-
Page 8: Risk Of Explosion
Craft ø150 0.13 sandstone / granite The nominal output is the output to which the stove has been tested. The test was carried out with the secondary air 80% open. Installation and Operating Instructions for Heta SL800 stoves Pevex1019/AH/ver1:Jan 2013... -
Page 9: Operational Problems
This soot can be easily and effectively can be repaired using touch-up paint, removed by using proprietary stove which is available in spray cans. glass cleaner. Installation and Operating Instructions for Heta SL800 stoves Pevex1019/AH/ver1:Jan 2013... - Page 10 • The glass non-original spares will void • The sealing rope the guarantee. • The grate frame The stove is prepared for a fresh air intake. Installation and Operating Instructions for Heta SL800 stoves Pevex1019/AH/ver1:Jan 2013...
- Page 11 Mount a suitable length of flexible ducting between the ø100 con- nector on the stove and the loose connector. We recommend Lindab Aluflex duc- ting, which can withstand tempera- tures up to 200° Installation and Operating Instructions for Heta SL800 stoves Pevex1019/AH/ver1:Jan 2013...
- Page 12 If required, attach 3 x 8 mm self-adhesive glass door seal on the end of the air connector. • You can now connect external air flow up through the column Installation and Operating Instructions for Heta SL800 stoves Pevex1019/AH/ver1:Jan 2013...
- Page 13 Emptying the ash pan, fig. 5-8 Changing to back smoke outlet Fig. 9-16 Installation and Operating Instructions for Heta SL800 stoves Pevex1019/AH/ver1:Jan 2013...
- Page 14 Cleaning after sweeping the chimney andreplacing the stones. Fig 17-23 - Scan-Line 800 standard Installation and Operating Instructions for Heta SL800 stoves Pevex1019/AH/ver1:Jan 2013...
- Page 15 2. Ensure that there is at least 547 mm between the lower edge of the glass in the door and the floor (see fig. 24) alternatively, the floor must be non-combustible. Installation and Operating Instructions for Heta SL800 stoves Pevex1019/AH/ver1:Jan 2013...
- Page 16 SETSCREWS Installation and Operating Instructions for Heta SL800 stoves Pevex1019/AH/ver1:Jan 2013...
- Page 17 Ministers in the de- of smoke control areas and you can volved administrations for those coun- contact them for details of Clean Air tries. Separate legislation, the Clean Act requirements. Installation and Operating Instructions for Heta SL800 stoves Pevex1019/AH/ver1:Jan 2013...


Need help?
Do you have a question about the SCAN-LINE 840 and is the answer not in the manual?
Questions and answers