Heta Scan-Line 800 Operating And Installation Instructions
Xlb baking oven
Hide thumbs
Also See for Scan-Line 800:
- Operating instructions manual (18 pages) ,
- Operating and installation instructions (32 pages) ,
- Manual (16 pages)

Related Manuals for Heta Scan-Line 800


Summary of Contents for Heta Scan-Line 800
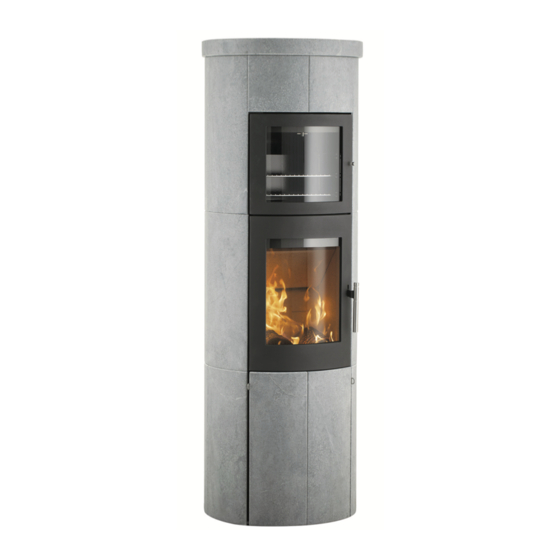
- Page 1 OPERATING AND INSTALLATION INSTRUCTIONS SCAN-LINE 80 XLB BAKING OVEN APPROVED FOR USE IN SMOKE CONTROL AREAS WHEN BURNING DRY WOOD LOGS OR AUTHORISED FUELS www.heta.dk DANISH DESIGN . DANISH QUALITY . DANISH PRODUCTION...
- Page 2 Scan-Line 800 combustion chamber, and are therefore approved, like the Scan-Line 800, under EN 13240, DINplus, 15 a B-VG and NS 3058/3059. Approval means that consumers can be sure, that the stove meets a range of specifications and requirements intended to ensure that the materials...
-
Page 3: Installation Instructions
INSTALLATION INSTRUCTIONS The chimney connection Safety clearances The chimney opening must follow national and Stoves must always be installed in line with nati- local regulations. However, the area of the ope- onal and, if applicable, local regulations. It is im- ning should never be less than 175 cm , which portant to abide by local regulations regarding... - Page 4 • The chimney contains false air. chimney and the low temperature of the fresh • The chimney and flue gas pipe are blocked. air. The length and insulation of the chimney, • The house is too airtight (i.e. when there is wind and weather conditions also have an effect on the ability of the chimney to generate appro- an insufficient supply of fresh air).
-
Page 5: Chimney Fires
1.3 kg CO every time you have used 1 kg nor- mal wood. Chimney fires In the event of a chimney fire – which often re- sults from incorrect operation or protracted fi- ring with moist wood – close the door and shut off the secondary/start-up air supply to smother the fire. -
Page 6: Reduced Burning
soot as the secondary air “washes” down over it. Please note that the stove will, naturally, produ- ce soot if both the start-up mechanism* and se- condary air intakes are closed completely. This will prevent oxygen from being drawn into the Max. -
Page 7: Maintenance
Soapstone is a relatively soft natural product. It of soapstone powder and waterglass (available is therefore possible to repair scratches or other from Heta A/S). Mix the powder and waterglass damage to the surface. to an appropriate consistency. Clean off any dust before applying the mixture. -
Page 8: Operational Problems
GUARANTEE Heta wood stoves, subjected to a strict quality - Damage caused by improper use. control during production and before delivery to - Transportation costs for warranty repair. -
Page 9: Emptying The Ash Pan
Emptying the ash pan The ash pan is located behind the large pull- out front (see fig. 1) and is emptied as shown in fig. 2-5. Lubricate Ash pan Grease not included. 2 x Grease Changing flue outlet position from top to rear The stove flue outlet position must be changed to the rear position before installing the cladding. - Page 10 For top flue outlet Cut the small metal bridge connecting the cover to the convection vent. For rear flue outlet If the rear flue outlet is being used, the cover in the convection vent must NOT be removed. The cladding must be positioned with holes at the top, in line with the installation instructions for soapstone/ceramic stoves on page 11-19.
- Page 11 Cleaning after sweeping the chimney and replacing the stones INSTALLING SOAPSTONE AND CERAMIC PANELS Heta recommends that stove installation be carried out by two people. The soapstone and ceramic panels must be handled with extreme care, as the corners and edges are very fragile.
- Page 12 CLADDING TYPE AND PRODUCT NUMBERS Product no. Qty SL 80XLB soapstone baking oven 0023-2277 0023-2278 0023-2279 0023-2280 0023-2281 0023-2283 0023-2381 CLADDING TYPE AND PRODUCT NUMBERS Product no. Qty SL 80XLB ceramic baking oven 0023-2365 0023-2366 0023-2367 0023-2368 0023-2370 0023-2372...
- Page 13 Start installing the cladding at the bottom rear Remove the air adjustment lever before section of the stove. installing the cladding. The first cladding stone (C or D) has a hole for (10 mm spanner) outside air connection. Attach the cladding stone to the casing and insert the mounting pegs (47 mm from the top of the cladding stone) in the large circular holes in the keyholes, close to the side panel.
- Page 15 Install the front stones near the door (G) fol- lowing the same procedure as for the other stones. When adjusting the cladding under the door, there must be at least a 4 mm gap between the door and the cladding. Pull the door out slightly before installation.
- Page 16 The soapstone panels have no fixed top or bot- tom, leaving you free to orient them how you wish. Fourteen cladding stone panels (E) are needed for the Scan-Line 80 XLB baking oven. These panels can be arranged however you want, as the same type of cladding stone panels are used on the opposite side of the stove.
- Page 17 The soapstone/ceramic panels may need to be adjusted to be level with the cladding stones on the sides of the stove. Do this by loosening the four screws, two on each side. (use a 4 mm hex key) Start by loosening the bottom two screws while the cladding is attached.
- Page 18 There is space for one 0023-0121 thermastone near the top flue outlet on the Scan-Line 80 XLB oven, which can be installed before or after the cladding is installed. The Scan-Line 80 XLB is shipped from the fac- tory with the thermastone. Remove the transportation bracket before using the stove or installing additional ther- mastones.
- Page 19 INSTALLATION OF CERAMIC TOP AND CONVECTION TOP PANEL Install the convection top panel as follows: 1: push (x) into the slot (y) in the top stone. 2: then push (z) into position in the hole between the top stones. If the top flue outlet is being used, remove the Correct installation of the convection centre cover plate using pliers.
- Page 20 It devolved administrations. is also an offence to acquire an ”unauthorised The Scan-Line 800 series have been recom- fuel” for use within a smoke control area unless mended as suitable for use in smoke control it is used in an ”exempt”...
Need help?
Do you have a question about the Scan-Line 800 and is the answer not in the manual?
Questions and answers