Heta SCAN-LINE 80XL Operating And Installation Instructions
Baking oven
Hide thumbs
Also See for SCAN-LINE 80XL:
- Operating instructions manual (12 pages) ,
- Operating and installation instructions (20 pages) ,
- Operating and installation instructions (28 pages)

Related Manuals for Heta SCAN-LINE 80XL


Summary of Contents for Heta SCAN-LINE 80XL
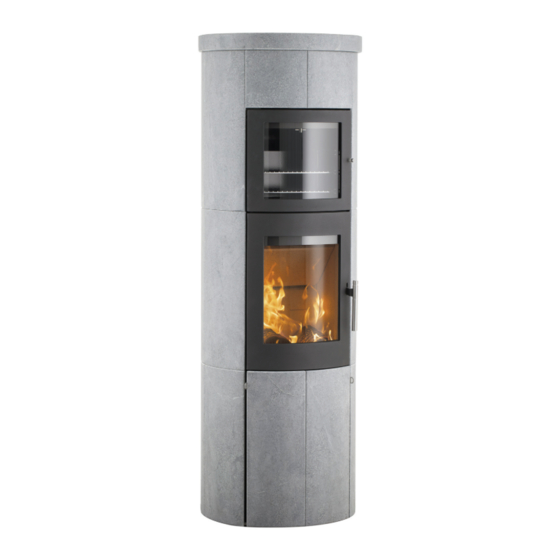
- Page 1 Scan-Line 80XL baking oven www.heta.dk Danish Design . Danish Quality . Danish ProDuction...
-
Page 2: Installation Instructions
Congratulations on your new stove. We specifications and requirements inten- are sure that you will be happy with your ded to ensure that the materials used investment, especially if you follow the are of good quality, that the stove does advice and instructions we have put not adversely affect the environment, together in these operating instructions. -
Page 3: Draft Conditions
Draft conditions damper is fitted in the flue gas pipe, there must always be at least 20 cm Poor draft may result in smoke being of free passage, even when the dam- emitted from the stove when the door per is in its “closed” position. If local is opened. -
Page 4: First Firing
good draft occurs when: • The difference in temperature between the chimney and outdoor air is high. • The weather is fine. • The wind is blowing strongly. • The chimney is of the correct height: at least 4.00 m above the stove and free of the roof ridge. -
Page 5: Chimney Fires
lighting the stove Wood with a moistness of 18% has a efficiency of about 4.18 kW/hour per To light the stove, use firelighters, kg, and one litre heating oil contains paraffin firelighter bags or small about 10 kW/hour. pieces of wood. Place over the grate. Fig. -
Page 6: Risk Of Explosion
optimal combustion embers, at right angles to the stove door. Turn handle into top position For optimal combustion and heating, (max. Combustion- airflow). Keep this stove is designed to provide an door ajar if necessary. (The door optimum mix of primary and se- should not be left open but fuel will condary air (in these instructions, we ignite more quickly while the door is... - Page 7 PurPose of the conVection Vent Stoves in the Scan-Line 80 series are radiated-heat stoves, which use sev- eral kilograms of soapstone and stone mass to store heat. You can get even more out of the stored heat by regu- lating the convection air flow. Once the stove has heated up, pull out the Fig.
-
Page 8: Operational Problems
It is therefore possible to piece is intact, it can be glued in place repair scratches or other damage to the using ’waterglass’ (available from Heta surface. A/S). Apply waterglass to the surfaces, clamp in place for 24 hours, then sand cleaning soapstone surfaces using sandpaper (120 grit). - Page 9 The hardened surface can be sanded af- (available from Heta A/S). Mix the pow- ter 24 hours. Use 60-80 grit sandpaper der and waterglass to an appropriate initially, and then 120 grit sandpaper to consistency. Clean off any dust before finish.
- Page 10 guarantee The model Scan-Line 800 stoves are Damage resulting from incorrect use subjected to stringent quality con- Transport costs in connection with trol procedures both throughout the repairs carried out under guarantee produc-tion process and immediately Installation/disassembly in connection before delivery to the dealer. Therefo- with repairs carried out under guaran- re, the stoves are guaranteed against tee.
- Page 11 The stove allows connection to out- side air through a Ø 100 mm inlet An aluflex Ø 100 mm hose is re- commended (available from Heta), which can handle temperatures up to 200° C Fig. 6 illustrates the two options –...
- Page 12 emptying the ash pan, fig. 7-10 Fig. 7 The ash pan is located behind the large pull-out front (see fig. 7) and is emptied as shown in fig. 8-11. NB! Be sure to correctly orient the ash pan, otherwise it will not close properly. lubricate ash pan Grease not included.
- Page 13 changing flue outlet position from top to rear Flue outlet Fig. 12 The stove flue outlet position must be changed to the rear position before in- stalling the cladding. It is a good idea to remove the two heat storage stones before making the change.
- Page 14 If the rear flue outlet is being used, the cover in the convection vent must NOT be removed. The cladding must be positioned with holes at the top, in line with the installation instructions for soapstone/ceramic Scan-Line 80XL baking oven stoves. The dimensions on the drawing below have been measured from the bottom edge of the backplate, and do not take into account the height of the adjustable feet.
- Page 15 cleaning after sweeping the chimney and replacing the stones. fig 17-23...
- Page 16 Panels Heta recommends that stove installation be carried out by two people. The soapstone and ceramic panels must be handled with extreme care, as the corners and edges are very fragile. If the rear flue outlet is to be used, it is best to change this before installing the cladding.
- Page 17 claDDing tyPe anD ProDuct nuMbers Product no. Qty SL 80XL soapstone baking oven 0023-2277 0023-2278 0023-2279 0023-2280 0023-2281 0023-2283 0023-2381 The product numbers are shown on the rear sides of the elements.
- Page 18 claDDing tyPe anD ProDuct nuMbers Product no. Qty SL 80XL ceramic baking oven 0023-2365 0023-2366 0023-2367 0023-2368 0023-2370 0023-2372 The product numbers are shown on the rear sides of the elements.
- Page 19 Remove the air adjustment lever before installing the cladding (10 mm spanner). Start installing the cladding at the bottom rear section of the stove. The first cladding stone (C or D) has a hole for outside air connection. Attach the cladding stone to the casing and insert the mounting pegs (47 mm from the top of the cladding stone) in the large circular holes in the keyholes, close to the side panel.
- Page 20 These two brack- ets may need to be adjusted up or down to adjust the height of the soapstone/ceramic panels in relation to the door. This can be done using pliers or a hammer. Stoves are shipped from the factory with a 1 mm gap between the side plates.
- Page 21 Justering af lågen ...
- Page 22 ...
- Page 23 When adjusting the cladding under the door, there must be at least a 4 mm gap between the door and the cladding. Install the front stones near the door (G) following the same procedure as for the other stones. Pull the door out slightly before instal- lation.
- Page 24 Start by attaching the tiles to the right of the door and work your way around the stove. Start again by attaching the tiles to the right of the oven door and work your way around the stove.
- Page 25 The soapstone panels have no fixed top or bottom, leaving you free to orient them how you wish. Fourteen cladding stone panels (E) are needed for the Scan-Line 80 XL baking oven. These panels can be arranged however you want, as the same type of cladding stone panels are used on the opposite side of the stove.
- Page 26 Side 21 Billeder af sten over bageovn Side 21 Billeder af sten over bageovn These two cladding stones (H) are interchangeable. Once the cladding stones (E) have been installed, install the top front stones (H). Follow the same procedure as for the other cladding stones, except that the distance from the top of the cladding stones to the mounting pegs is 55 mm.
- Page 27 The soapstone/ceramic panels may need to be adjusted to be level with the cladding stones on the sides of the stove. Do this by loosening the four screws, two on each side. (use a 4 mm hex key) Start by loosening the bottom two screws while the cladding is attached. Push the cladding in or out as required.
- Page 28 If there is an outside air connec- tion, a flexible hose can be run from the air adjustment valve to the air outlet on the back of the stove. It is also possible to run the exter- nal air connection up through the floor using a flexible hose.
- Page 29 Screw the air adjustment lever back into place after installing the side cladding, before installing the top cladding. installation of soaPstone toP anD conVection toP Panel When installing the top cladding, Then install (B) place (A) first.
- Page 30 Install the convection top panel as follows: 1: push (x) into the slot (y) in the top stone. 2: then push (z) into position in the hole between the top stones. If the top flue outlet is being used, remove the centre cover plate using pliers. Correct installation of the convection top panel and top cladding.
- Page 31 installation of ceraMic toP anD conVection toP Pa-...
- Page 32 Install the convection top panel as follows: 1: push (x) into the slot (y) in the top stone. 2: then push (z) into position in the hole between the top stones. If the top flue outlet is being used, remove the centre cover plate using pliers. Correct installation of the convection top panel and top cladding.
Need help?
Do you have a question about the SCAN-LINE 80XL and is the answer not in the manual?
Questions and answers