Table of Contents
Advertisement
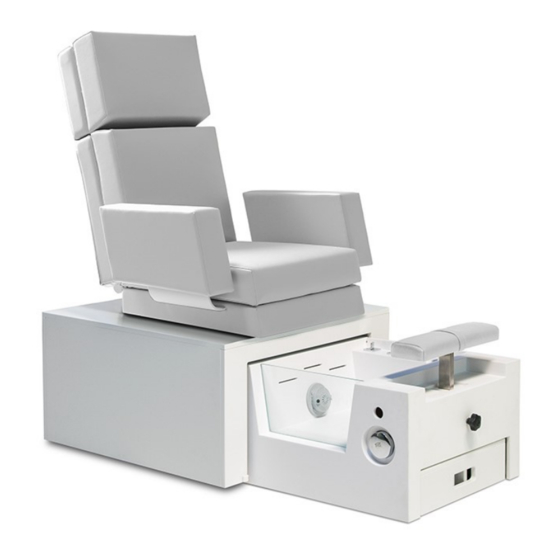
Quick Links
Advertisement
Table of Contents

Related Manuals for GHARiENi Pedispa Compact


Summary of Contents for GHARiENi Pedispa Compact
- Page 1 Pedispa Compact Installation and User Manual Gharieni Group GmbH Gutenbergstraße 40 D-47443 Moers Tel.: +49(0)2841/88300-163 Email: service@gharieni.de Fax: +49(0)2841/88300-999 Internet: www.gharieni.de Service Hotline: +49(0)2841/88300-40 Ver.001-1-2019...
-
Page 2: Table Of Contents
Annex 1 - Space requirements & implementation example drawings. Corner space Implementation example (fig.16) P19. Room space dual Pedispa compact Implementation example (fig.17) P20. Room space Quadruple Pedispa compact Implementation example (fig.18) P21. Room space Circular Pedispa compact circle Implementation P22. -
Page 3: I- Safety Instruction
I- Safety Instruction 1. Safety symbols used. You will find the following safety instructions in this manual: Caution! If this safety instruction is not observed, the user's safety is endangered or the device may be damaged! Danger of electric current! Danger of electric shock! Danger of getting crushed! Danger of falling! Do not dispose of this product as regular domestic waste at the end of its lifecycle, but hand it in... - Page 4 - Immediately stop using defective equipment and make sure that it cannot be used by unauthorized users again. - Before starting to use the Gharieni “Pedispa Compact”, check the cabling (no damage). The mains lead must not be run over nor overstretched during use.
-
Page 5: Ii- Intend Use
Do not leave children unsupervised near the equipment. 8. Drawing and plans Gharieni Group GmbH reserves all rights of intellectual property with respect to the data in our offers and/or agreements, and/or the models, samples, drawings, representations and/or instructions for use made available by us. -
Page 6: Full Spread Position (Fig.3). P6
Unfolded position (fig.2) Full Spread Position (fig.3) -
Page 7: Iii- Before Installation
III- Before Installation Over-All Dimension Over-All Dimension front view (fig.4) Metric Inch... - Page 8 Over-All Dimension Side view in fully folded position (fig.5) Metric Inch Over-All Dimension side view – unfolded position (fig.6) Metric Inch...
-
Page 9: Over-All Dimension Side View - Full Spread (Fig.7) .P9
Over-All Dimension side view – Full Spread (fig.7) Metric Inch 2. Weight Net-Weight: 120.00Kg / 265.00lbs +- 10 pounds / +- 4.5 Kg depending on options... -
Page 10: Iv -Treatment Room Implementation
IV –Treatment Room Implementation Electricity Inlets (Optional If Pipeless Massage Pump included). 6mA GFCI Requirements: costumer must provide electric source under circuit breaker Electric power: Europe 220V-50Hz. GFCI circuit breaker 6.00 A sens. 6.00mA. 100V-60Hz. GFCI Circuit breaker 12.00 A sens. 6.00mA. ... -
Page 11: Installation
V- Installation 1. Treatment Room Implementation Make sure that sufficient space has been planned in manner that the “Pedispa compact” does not bump against any other objects when fully unfolded and fully spread (see Space Requirements in Overall Dimensions fig.7. -
Page 12: Base Frame Installation. P12
2. Base Frame installation The first and lonely part to fix to the ground is “the Base frame” (fig.9), please make sure to identify the four fixation holes (refer to the below drawing fig. N°10) and be aware of the space requirements and related full spread dimensions you can find see in overall dimensions. - Page 13 Perspective of the Base frame fixation and inlets implementation drawing (fig.11)
-
Page 14: Vi - Embedded System
VI – Embedded System 1- Electric components embedded systems Electric circuit & organs connections schematic diagram (fig.12) -
Page 15: Vii- How To Manipulate
VII- How to manipulate Depending on options The “Pedispa Compact” could be electric or Non-Electric. Having one or more of the following options means that your Pedispa is electric; Assisted Seat Positioning Backward / Forward / Tilting. Feet Hydro-massage. -
Page 16: Full Spread Position (Fig.15). P16
Full Spread Position (fig.15) You can fully spread the Pedispa by pulling out also the lower step part out of the fixed part as the below picture. Pull on this direction to spread The lower Sliding Part Fixed part user components identification (fig.16) ¼... -
Page 17: Iix - Periodic Preventive Maintenance
IIX – Periodic Preventive Maintenance Water checking list Monthly check the filters cleanness. Check the hot water: Between 50° & 65° C (Neutral Ph. 7°). Check the Cold Water temp: Between 5° & 15°C (Neutral Ph. 7°). Check the Service Pressure: Between Min 0.8 Bars Max 2.00Bars. Check Hot and Cold Water hardness to be the nearest to neutral = Ph. -
Page 18: Ec Declaration Of Conformity
Executive president Issued Modification (pages) Date First edition August 2017 Copyright of this texts and drawings belong to Gharieni Group GmbH and no part may be reproduced or utilised in any way whatsoever without prior written consent of Gharieni Group GmbH. -
Page 19: Annex 1 - Space Requirements & Implementation Example Drawings
Annex 1 - Space requirements & implementation example drawings. Corner space Implementation example (fig.16) - Page 20 Room space dual Pedispa compact Implementation example (fig.17)
- Page 21 Room space Quadruple Pedispa compact Implementation example (fig.18)
- Page 22 Room space Pedispa compact Circular Implementation Centralized single backwash station example (fig.19)
Need help?
Do you have a question about the Pedispa Compact and is the answer not in the manual?
Questions and answers