
Subscribe to Our Youtube Channel
Related Manuals for 3Com 3CR990-FX-97


Summary of Contents for 3Com 3CR990-FX-97
-
Page 1: User Guide
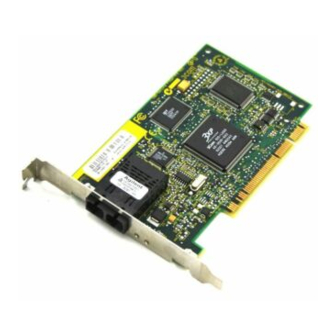
User Guide ® 3Com 100 Secure Fiber-FX Network Interface Card 3CR990-FX-97 http://www.3com.com/ http://support.3com.com/registration/frontpg.pl Published December 2001 User guide version 1.0.0... - Page 2 U.S.A. Copyright © 2001 3Com Corporation. All rights reserved. No part of this documentation may be reproduced in any form or by any means or used to make any derivative work (such as translation, transformation, or adaptation) without written permission from 3Com Corporation.
-
Page 3: Table Of Contents
Contents About This Guide Conventions Introduction Onboard 3XP Processor Data Encryption 3CR990-FX-97 NIC Features Offload Features Remote Wake-Up Remote Wake-Up Requirements Remote Wake-Up and Multiple NIC Installations Integrated Boot ROM with Managed PC Boot Agent (MBA) Desktop Management Interface (DMI) 2.0... - Page 4 Verifying the Driver Installation Windows 95 Installing the Driver Verifying the Driver Installation Installing the 3Com NIC Diagnostics Program Starting the 3Com NIC Diagnostics Program Updating the Network Driver and NIC Software Installing Multiple NICs Windows XP, Windows 2000, Windows Me, Windows 98 and 95 Windows NT 4.0...
- Page 5 Configuring the NIC Default NIC Settings Configuration Methods Changing General NIC Configuration Settings Using the 3Com NIC Diagnostics Program Using the 3Com DOS Configuration Program Configuring the Managed PC Boot Agent (MBA) Enabling or Disabling the Boot ROM Setting Booting From the Network...
- Page 6 Running the 3Com DOS Diagnostics Program Running the NIC Diagnostics Tests Running the Network Test Running the NIC Test Viewing the NIC LEDs in the 3Com Diagnostics Program Viewing Network Statistics Using the 3Com Icon in the Windows System Tray Enabling the Icon...
- Page 7 Contents Index Regulatory Compliance Information FCC Class B Statement FCC Declaration of Conformity Industry Canada Class B Emission Compliance Statement Avis de Conformité à la Réglementation d’Industrie Canada VCCI Class B Statement MIC Notice (Republic of Korea only) B Class Device...
-
Page 9: About This Guide
About This Guide This guide describes how to install, configure, and troubleshoot the 3Com Fiber-FX-97 network interface card (NIC). This guide is intended for those who install and configure Ethernet NICs. Some familiarity with Ethernet networks and NICs is assumed. - Page 10 About This Guide Convention Screen displays Commands The words “enter” and “type” Words in italics Description This typeface represents information as it appears on the screen. The word “command” means that you must enter the command exactly as shown and then press Return or Enter. Commands appear in bold. Example: To launch the DOS diagnostics program, enter the following command: a: install...
-
Page 11: Introduction
RISC processor; secure transactions are achieved through data encryption. Onboard 3XP Processor The 3CR990-FX-97 NIC represents a new generation of secure, intelligent NICs with an onboard RISC processor (3XP processor). The 3XP processor is designed to optimize system and network performance. The NIC off-loads key networking and security tasks... -
Page 12: 3Cr990-Fx-97 Nic Features
3CR990-FX-97 NIC Features The 3CR990-FX-97 NIC and accompanying software provide features that relieve network congestion and ensure high performance and maximum bandwidth availability. The 3CR990-FX-97 NIC provides these features for supported IP and IPX environments: Supported NIC Feature Support for Offload Features... -
Page 13: Offload Features
Offload Features The 3CR990-FX-97 NIC supports Windows 2000 and Windows XP offload features in an IP environment. The Windows offload features are designed to enhance the operating system capabilities by off-loading key TCP/IP networking and security tasks from the operating system:... -
Page 14: Integrated Boot Rom With Managed Pc Boot Agent (Mba)
For information on configuring the MBA to boot from the network, see “Configuring the Managed PC Boot Agent (MBA)” on page 51. For detailed information on the MBA, refer to the 3Com Managed PC Boot Agent User Guide , located with the MBA software on the 3Com EtherCD . -
Page 15: Remote Control
Hot Plug NIC Installation If your computer supports PCI hot plug specifications, you can add a new 3Com NIC or remove and replace a 3Com NIC without turning off power to the computer. Hot plug NIC installation allows you to expand connections without taking the computer out of service. -
Page 16: Link Negotiation
NICs. The configuration program within the DOS diagnostics program is used for a PC running DOS or NetWare. The 3Com NIC diagnostics program (3Com NIC Doctor) is a Windows-based program used for a PC running Windows XP, Windows 2000,... -
Page 17: Installing And Connecting The Nic
This chapter describes how to install the NIC in your PC and connect it to a Fast Ethernet network. Before starting the installation procedure, you can gain some familiarity with the directory structure and various files on the EtherCD supplied with the 3CR990-FX-97 NIC by reading Appendix C, "EtherCD Content and Navigation." Installation Overview... -
Page 18: Installation Requirements
Remote Wake-Up — For requirements, see “Remote Wake-Up” on page 5. Installing Multiple NICs If you are installing multiple 3CR990-FX-97 NICs in one computer running Windows, see the instructions in “Installing Multiple NICs” on page 28. If you are installing multiple 3CR990-FX-97 NICs in one computer running NetWare, follow the instructions in “Installing Multiple NICs”... -
Page 19: Upgrading Windows 98 To Windows Me
HELP directory on the EtherCD. Updating the Network Driver and NIC Software If you already have a 3CR990-FX-97 NIC installed and want to update the network driver, follow the instructions in “Updating the Network Driver and NIC Software” on page 28. -
Page 20: Product Registration
Product Registration The United States government places registration requirements on using data encryption products. To obtain customer support for the 3CR990-FX-97 NIC, you are required to electronically register your NIC product with 3Com. In addition to enabling customer support for your NIC, registration also entitles you to receive upgrade information and advance feature information. -
Page 21: Preparing The Nic And The Computer
The SC port provides a 100 Mbps connection automatically, depending on the speed of the connected hub or switch. The following table shows the connector, cable, and maximum network segments for the 3CR990-FX-97 NIC: Connector 2 Unpack and inspect the NIC for damage. -
Page 22: Installing And Connecting The Nic
Installing and Connecting the NIC Installing and Connecting the NIC Observe the safety precautions listed in “Safety Precautions” on page 9. Prepare the NIC and the computer as described in “Preparing the NIC and the Computer” on page 13. The following instructions apply to installing the NIC in most computers. If these instructions are not appropriate for your computer, refer to the documentation that accompanied the computer. -
Page 23: Understanding The Leds
5 Insert the network cable SC connector into the NIC port, as shown in the next figure. 6 Connect the other end of the network cable to a 100BASE-FX Fast Ethernet hub or switch that is connected to the network. 7 Turn on the power to the computer. -
Page 24: Installing Software
Caldera OpenUnix 8, Linux 2.4, Solaris (for PC)) and instructions on how to install them, go to the 3Com Web site and search for “3CR990” and “drivers.” NOTE: If you are installing multiple 3Com Secure Fiber-FX NICs in one computer running Windows, see the instructions in “Installing Multiple NICs” on page 28. If you are installing multiple 3Com Secure Fiber-FX NICs in one computer running NetWare, follow the instructions in “Installing Multiple NICs”... -
Page 25: Installing Nic Drivers And Diagnostics For Windows
For a list of minimum installation prerequisites, see “Installation Requirements” on page 10. Getting Help To display the Help system during the software installation, click Help on any 3Com window. NOTE: For instructions on using the installation diskettes (which can be created from the EtherCD) to install the network driver, see “Installing From Diskette”... -
Page 26: Installing The Network Driver Using The Ethercd
Installing NIC Drivers and Diagnostics For Windows Installing the Network Driver Using the EtherCD To install the network driver using the EtherCD, follow the steps in the section that is specific to your Windows operating system. Before Installing the Network Driver Before installing the network driver, make sure: The NIC is installed in the PC and connected to the network. -
Page 27: Verifying The Driver Installation
2 Select the Hardware tab. 3 Click Device Manager. 4 Double-click Network adapters and make sure the name of the 3Com 3CR990-FX-97 NIC appears. If a red X or a yellow exclamation point (!) appears by the name of the NIC, the installation was not successful. -
Page 28: Verifying The Driver Installation
1 Right-click the My Computer icon, and then click Properties. 2 Select the Hardware tab, and then click Device Manager in the middle panel. 3 Double click Network Adapters and make sure the name of the 3Com 10/100 PCI NIC appears. -
Page 29: Verifying The Driver Installation
See “Troubleshooting the NIC Installation” on page 57 for troubleshooting help. After you have verified the driver has been installed properly, the next step is to install the 3Com NIC Diagnostics program for Windows operating systems (see “Installing the 3Com NIC Diagnostics Program” later in this chapter). -
Page 30: Windows Me
1 Right-click the My Computer icon, and then click Properties. 2 Select the Device Manager tab. 3 Double-click Network adapters and make sure the name of the 3Com 3CR990-FX-97 NIC appears. If a red X or a yellow exclamation point (!) appears by the name of the NIC, the installation was not successful. -
Page 31: Windows 98
1 Right-click the My Computer icon, and then click Properties. 2 Select the Device Manager tab. 3 Double-click Network adapters and make sure the name of the 3CR990-FX-97 NIC appears. If a red X or a yellow exclamation point (!) appears by the name of the NIC, the installation was not successful. -
Page 32: Windows 95
This section describes how to install the network driver and NIC software in a PC client or server running Windows 95. CAUTION: Do not install a 3CR990-FX-97 NIC while installing Windows 95 OSR2 using the “Custom” option. Install Windows 95 OSR2 first, then install the 3CR990-FX-97 NIC. - Page 33 Installing the Network Driver Using the EtherCD 5 Do either of the following: If the Windows 95 files were not copied to your hard drive, remove the EtherCD from the CD-ROM drive, insert the Windows 95 CD, enter the path to the CD-ROM drive, and then click OK.
-
Page 34: Verifying The Driver Installation
Windows NT 4.0, Windows XP Professional Edition, and Windows 98, 95, or Me. The 3Com NIC Diagnostics program allows you to run tests that determine the status of your network and the NIC. It also allows you to configure the NIC, view network statistics and LEDs, and access support databases. -
Page 35: Starting The 3Com Nic Diagnostics Program
“Running the NIC Diagnostics Tests” on page 62. Alternatively, you can also start the 3Com NIC Diagnostics program using the following procedure if the 3Com NIC Diagnostics icon is displayed on the right side of the Windows task bar: 1 Double-click the 3Com NIC Diagnostics icon. -
Page 36: Updating The Network Driver And Nic Software
8 Restart Windows. The installation is complete. Installing Multiple NICs This section describes how to install multiple 3Com 100 Secure Fiber-FX NICs in a computer running Windows XP, Windows 2000, Windows Me, Windows 98 or 95, or Windows NT 4.0. -
Page 37: Windows Nt 4.0
3 Insert the EtherCD when prompted, and then click OK. 4 Follow the prompts on the screen to install the network driver. See “Windows XP Professional” on page 18, “Windows 2000” on page 19, “Windows NT 4.0” on page 20, “Windows Me” on page 22, “Windows 98” on page 23, or “Windows 95”... - Page 38 Installing NIC Drivers and Diagnostics For Windows 13 When Windows NT starts, repeat step 3 through step 11 for each newly installed NIC. NOTE: You are not prompted for the EtherCD when you install the network driver for the second NIC.
-
Page 39: Using Windows Offload Features
This chapter provides instructions for enabling offloads in a Windows 2000 environment. It also describes configuring IPSec offloads in a Windows 2000 environment. The 3CR990-FX-97 NIC supports offload features for Windows 2000 and Windows XP in an IP environment. The offload features are designed to enhance the Windows operating... -
Page 40: Configuring Offloads For A Group Of Different Nics
NICs in the group. For example, if you have created a group consisting of a 3CR990-FX-97 NIC and another NIC that does not have any offload capabilities, then the group does not support any offloads. -
Page 41: Offloading Encryption Processing
You can configure any two (or more) computers running Windows 2000 or Windows XP to perform IPSec encryption by changing the Local Security Setting in the operating system. With most non-3CR990-FX-97 NICs, all the IPSec processing is done by the host central processing unit (CPU), which significantly diminishes CPU performance. The 3CR990-FX-97 NIC can offload all the encryption processing from the host CPU, thereby... -
Page 42: Creating A Security Policy
Using Windows Offload Features The following table shows the available levels of encryption: Encryption Type Custom Creating a Security Policy The process you use to create and enable a security policy depends on your network environment requirements. The following is an example of one approach to creating a security policy. - Page 43 Creating the Policy This sequence creates and names the new security policy. The Console1 and Console Root screen appears with IP Security Policies on Local Machine displayed in the list. 1 In the left pane, click IP Security Policies on Local Machine. 2 Right-click inside the right pane below the list items.
- Page 44 Using Windows Offload Features 7 Accept the default, and then click Next. 8 Click Finish to close the IP Filter Wizard. 9 Click Close to close the IP Filter List screen. Binding the Filter The IP Filter List screen appears. 1 Enable the option for the new filter name and make sure the new filter name is selected.
-
Page 45: Downloading The High Encryption Pack For Windows 2000
Disabling Encryption An encryption policy must exist in the Console Root\IP Security Policies on the Local Machine screen, and be enabled, before you can disable encryption on the 3CR990-FX-97 NIC. To disable encryption: 1 Right-click the desired policy icon in the right pane of the screen. -
Page 47: Installing Netware Drivers
EtherCD in the NWSERVER directory, or they can be obtained from Novell. Using the Latest Support Packs The 3CR990-FX-97 NIC does not support NetWare 3.x or 4.0x. The 3CR990-FX-97 NIC does not support NetWare 4.11 servers that are not updated to the latest Novell Support Pack. -
Page 48: Obtaining Netware Loadable Modules
NICs. If you are installing the software during the installation of the network operating system, see Appendix D, “Installing a 3Com NIC While Installing the NOS.” For a list of additional installation requirements, see “Installation Requirements” on page 10. -
Page 49: Slot Numbers For Multiple Nics
10001 or larger. Follow this procedure to obtain slot numbers for a multi-NIC installation: 1 Install only one 3CR990-FX-97 NIC, as described in “Installing and Connecting the NIC” on page 14. 2 Follow the installation instructions in this chapter to load the EtherCD, copy the driver, and load the driver. -
Page 50: Installing The Netware Driver Using Inetcfg
Installing NetWare Drivers Installing the NetWare Driver Using INETCFG To install the NetWare driver: 1 Copy the MSM.NLM, ETHERTSM.NLM, and NBI.NLM files from the NWSERVER directory on the EtherCD to the system directory; or use the latest service pack from Novell. NOTE: Copy the NLM files only if the versions existing on the server are older than the versions supplied on the EtherCD. -
Page 51: Installing Multiple Nics
The values <slot1> and <slot2> are the numbers of the PCI slots in which the NICs are physically installed. To view the numbers of these PCI slots, use the 3Com Configuration and Diagnostic program for DOS. See “Verifying the PCI Slot Number” below for instructions. -
Page 52: Verifying The Installation And Configuration
Installing NetWare Drivers 3 NetWare lists the valid slot number(s) for the NIC, depending on how many NICs are installed. The values appearing in the list are the slot values you should use. Example: After you issue the command, a message appears. At the end of the message, additional text similar to the following appears: Total of 2 3C99x PCI adapter card(s) found. -
Page 53: Changing Netware Driver Configuration Parameters
Changing NetWare Driver Configuration Parameters You can change server configuration parameters using the NetWare installation program Configuration screen. The following table lists the parameters shown on the Configuration screen. Default values are shown in uppercase text. Parameter Range of Values Slot Number All PCI slot numbers valid to the system... -
Page 55: Configuring The Nic
Half-Duplex sets the NIC to operate in half-duplex mode. You must also set the NIC Media Type setting. Note: If you are running Windows 2000, changes made to the Duplex setting though the 3Com NIC Diagnostics are not reflected in the registry unless you also change the Media Select property setting in Windows 2000: 1 In the Device Manager window, double-click Network adapters. -
Page 56: Configuration Methods
Configure the NIC locally. Advanced Tab NOTE: This section describes how to configure the NIC using the 3Com NIC Diagnostics program for Windows. For instructions on using the other two methods, see the file or section mentioned in the table. -
Page 57: Changing General Nic Configuration Settings
To obtain specific information about any topic on a screen, click the question mark (?) in the upper right corner of the screen, move it over a topic, and click once. NOTE: For complete instructions on using the 3Com NIC Diagnostics program, see Chapter 8, “Running NIC Diagnostics.”... -
Page 58: Using The 3Com Dos Configuration Program
Auto Select. NOTE: Note that any configuration change you make through the Windows 2000 Advanced tab overrides the same configuration setting made through the 3Com NIC (Windows) Diagnostic program or the 3Com DOS Diagnostic program. 5 Continue this procedure for other options. For more information on a specific option, select the option and press F1. -
Page 59: Configuring The Managed Pc Boot Agent (Mba)
Refer to your PC documentation if you do not know which type of PC you have. Configuring the Managed PC Boot Agent (MBA) NOTE: For detailed information on using, configuring, and troubleshooting the MBA boot ROM, refer to the 3Com Managed PC Boot Agent User Guide, located with the MBA software on the EtherCD. -
Page 60: Bbs Bios-Compatible Pcs
The MBACFG.EXE program does not work properly if you restart in MS-DOS mode with the 3CR990-FX-97 NIC drivers loaded. NOTE: For more information on using, configuring, and troubleshooting the MBA boot ROM, refer to the 3Com Managed PC Boot Agent User Guide, located with the MBA software on the EtherCD. -
Page 61: Disabling The 3Com Logo
3 Select Programs, and then 3Com NIC Utilities. 4 Click 3Com NIC Doctor. The 3Com NIC Diagnostics General screen appears. 5 On the General screen, make sure the check box next to Show 3Com Logo on Startup is not selected. 6 Exit the 3Com NIC Diagnostics program. -
Page 63: Troubleshooting The Nic
Viewing the NIC LEDs in the Diagnostics Program To view the LEDs in the 3Com NIC Diagnostics program: 1 Make sure the NIC, the network driver, and the 3Com NIC Diagnostics program are installed. 2 Open the Windows Start menu. -
Page 64: Troubleshooting Problems With The Leds
Accessing the 3Com NIC Help System To access the 3Com NIC Help system: 1 Make sure the NIC, its driver, and the 3Com NIC Diagnostics program are installed. See “Installing the 3Com NIC Diagnostics Program” on page 26 for instructions. -
Page 65: Cleaning Up A Broken Installation
5 Click Proceed. The uninstall process begins. A warning message appears. 6 Click OK. A message appears stating that all of the 3CR990-FX-97 NICs have been removed from your system. 7 Click OK. 8 Exit the EtherCD, and then exit Windows. -
Page 66: Troubleshooting The Network Connection
Troubleshooting the NIC If you are prompted for 3Com files when Windows restarts, open the drop-down box and select the following path: \options\cabs See Chapter 3, “Installing NIC Drivers and Diagnostics For Windows,” for information about confirming that the NIC and driver are properly installed. -
Page 67: Troubleshooting Remote Wake-Up
2 Make sure you are using the latest driver for the NIC. This driver is shipped with the NIC on the EtherCD. It can also be downloaded from the 3Com Software Library. Point your Web browser to the 3Com home page: http://www.3com.com/ Under “Service and Support,”... -
Page 68: Windows Nt 4.0
6 Click OK to confirm the device removal. NOTE: Note that removing the network driver does not result in the removal of the diagnostics software. See “Removing the 3Com NIC Diagnostics Program” on page 65. You are prompted to restart the computer. -
Page 69: Running Nic Diagnostics
Windows XP Professional Windows Me Windows 98 Windows 95 Use the 3Com DOS Diagnostics program if you are running any of the following operating systems: NetWare NOTE: The following sections explain how to start both NIC diagnostics programs. However, specific instructions are provided only for using the Windows-based 3Com NIC Diagnostics program. -
Page 70: Running The 3Com Dos Diagnostics Program
Network To run the NIC Test or Network Test: 1 Make sure the NIC, the network driver, and the 3Com NIC Diagnostics program are installed. 2 Open the Windows Start menu. 3 Select Programs, and then 3Com NIC Utilities. -
Page 71: Running The Network Test
Select the Diagnostics tab to access diagnostics tests you can run on the installed NIC. Support Select the Support tab to access various 3Com customer support resources. Utilities Select the Utilities tab to: - Update firmware for the installed NIC. -
Page 72: Running The Nic Test
Viewing the NIC LEDs in the 3Com Diagnostics Program To view the LEDs in the 3Com NIC Diagnostics program: 1 Make sure the NIC, the network driver, and the 3Com NIC Diagnostics program are installed. 2 Open the Windows Start menu. -
Page 73: Using The 3Com Icon In The Windows System Tray
The 3Com icon, which can be enabled to appear in the Windows system tray, allows you to start the 3Com NIC Diagnostics program. It also allows you to view the NIC’s link speed and number of frames sent and received. -
Page 75: Specifications And Cabling Requirements
Specifications and Cabling Requirements This appendix lists the specifications, standards conformance, and cable requirements for the 3Com 100 Secure Fiber-FX (3CR990-FX-97) NIC. 3CR990-FX-97 NIC Specifications The following table provides environmental, interface, and standards information for the 3Com 100 Secure Fiber-FX (3CR990-FX-97) NIC. -
Page 76: Cabling Requirements
Electronic Industries Association/Telecommunications Industries Association (EIA/TIA) 568 Commercial Building Wiring Standard and the Technical Services Bulletin TSB38 standards. Network connection criteria are shown below: NIC: 3CR990-FX-97 Cable: Long-wavelength fiber-optic (1300 nm): 50 µ/125 µ multimode fiber 62.5 µ/125 µ multimode fiber... -
Page 77: Installing The 3Com Dmi Agent
NIC. For a description of each MIF supported by the 3Com DMI Agent, refer to the 3Com DMI Agent User Guide included with the 3Com DMI Agent software on the EtherCD. -
Page 78: System Requirements
Intel LANDesk Client Manager Installing the 3Com DMI Agent This section describes how to install the 3Com DMI Agent on a PC running Windows XP, Windows 2000, Windows NT 4.0, Windows Me, Windows 98, or Windows 95. To install the 3Com DMI Agent: 1 Make sure the PC meets the requirements listed in “Client PC Requirements”... - Page 79 Copy the 3Com DMI Agent User Guide to your computer hard drive. NOTE: The 3Com DMI Agent User Guide is in Microsoft Word format. If you do not currently have access to Microsoft Word, you can download a free version of the Microsoft Word reader from the Microsoft Web site.
- Page 81 EtherCD Content and Navigation This appendix provides information about EtherCD content and navigation. If auto insert is enabled for your CD-ROM drive, the 3Com Welcome screen is displayed when you insert the EtherCD in your CD-ROM drive. If the Welcome screen is not displayed when you insert the EtherCD in your CD-ROM drive, you can: Enable the auto insert feature for your CD-ROM drive (see “Enabling Auto Insert”...
-
Page 82: C Ethercd Content And Navigation Root Subdirectories List
This subdirectory contains copies of Adobe Acrobat Reader (4.0 or 3.0), 3Com Desktop Management Interface (DMI) Agent installation files, the Disk Copy utility with 3Com EtherCD diskette images, and the PDF version of the user guide. -
Page 83: Text Files List
Text Files List The following table lists the text files included in the Help directory on the 3Com EtherCD. File Name client32.txt license.txt netware.txt nwdosodi.txt register.txt support.txt trouble.txt unt_nt4.txt unt_w98.txt w95ndis.txt w95netwr.txt wakefaq.txt win2000.txt win98.txt winnt.txt In addition to the Help directory, you can find general installation information and the latest release notes in the \INSTALLS\README.TXT file (or on EtherDisk 1, if you install... -
Page 85: Installing A 3Com Nic While Installing The Nos
Windows Fresh Installation For installation requirements, see “Installation Requirements” on page 10. To display the Help system during the driver installation, click Help on any 3Com window. Windows NT For instructions, see the WINNT.TXT file in the HELP directory on the EtherCD. - Page 86 Installing a 3Com NIC While Installing the NOS 10 Enter the location of the driver on the 3Com EtherCD. For example: D:\nwserver 11 In the Driver Summary screen, select 3C99X.LAN and press Enter. Edit parameters as necessary. 12 From the Additional Driver Options menu, select Return to Driver Summary.
-
Page 87: Technical Support
3Com recommends that you access the 3Com Corporation World Wide Web site. Online Technical Services 3Com offers worldwide product support 24 hours a day, 7 days a week, through the following online systems: World Wide Web site 3Com Knowledgebase Web Services... -
Page 88: Support From Your Network Supplier
3Com. Support from 3Com If you are unable to obtain assistance from the 3Com online technical resources or from your network supplier, 3Com offers technical telephone support services. To find out more about your support options, go to the Web site associated with your region of the world shown below. - Page 89 Program for DOS 48 3Com DMI Agent client PC requirements 70 installing 70 network management requirements 70 overview 69, 77 3Com icon, in Windows system tray removing 65 showing 65 3Com Knowledgebase Web Services 79 3Com logo, disabling 53 3Com NIC Diagnostics program...
- Page 90 Index EIA/TIA 568 standards 68 ENABLE_CHKSUM 45 encryption (3CR990-FX-97 NIC) overview 32 encryption (Windows 2000) binding a filter 36 binding a filter action 36 creating a policy 34 defining a Console 34 disabling 37 enabling 37 filter action, creating a 36 filter, creating a 35...
- Page 91 Remote System Alert Manager 7 Remote Wake-Up multiple NIC Installations 5 overview 5 requirements 5 troubleshooting 59 removing NIC software 59, 60 requirements 3Com DMI Agent 70 cabling 68 computer 10 driver installation 40, 77 NetWare 17, 77 Windows hardware and software 10, 16...
- Page 92 Index Windows NT 4.0 help, driver installation 17, 77 multiple NIC installations 29 removing NIC software 60 Windows system tray, 3Com icon 65 Windows XP Professional installing the driver 18 offload features 5 workgroup keep-alive packet 7 World Wide Web (WWW) 79...
-
Page 93: Regulatory Compliance Information
This booklet is available from the U.S. Government Printing Office, Washington, D.C. 20402. Stock No. 004-000-00345-4. NOTE: In order to maintain compliance with the limits of a Class B digital device, 3Com requires that you use quality interface cables when connecting to this device. Changes or modifications not expressly approved by 3Com could void the user’s authority to operate this equipment. -
Page 94: Fcc Declaration Of Conformity
Federal Communications Commission 47 CFR Part 15, subpart B 15.107 (e) Class B Conducted Limits 15.109 (g) Class B Radiated Emissions Limits 3Com Corporation, 5400 Bayfront Plaza, P.O. Box 58145, Santa Clara, CA 95052-8145 (408) 326-5000 Industry Canada Class B Emission Compliance Statement This Class B digital apparatus complies with Canadian ICES-003.
Need help?
Do you have a question about the 3CR990-FX-97 and is the answer not in the manual?
Questions and answers