Subscribe to Our Youtube Channel
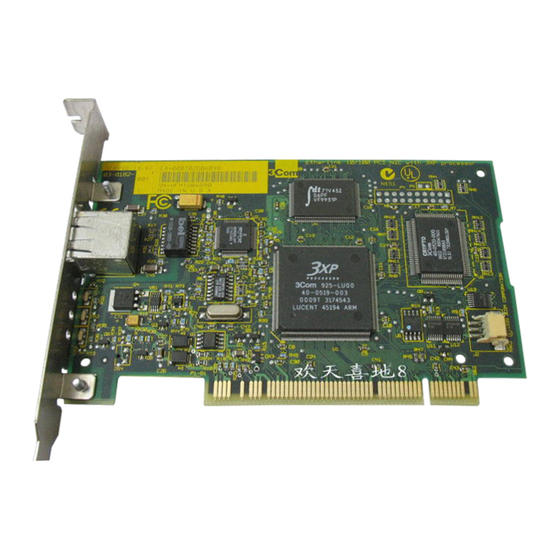
Summary of Contents for 3Com 3CR990
- Page 1 Quick Start Guide 3Com Embedded Firewall ® Software for the 3CR990 Network Interface Card (NIC) Family http://www.3com.com/ http://www.3com.com/registration/frontpg.pl 09-2110-000 Published December 2001...
- Page 2 95052-8145 U.S.A. Copyright © 2001 3Com Corporation. All rights reserved. No part of this documentation may be reproduced in any form or by any means or used to make any derivative work (such as translation, transformation, or adaptation) without written permission from 3Com Corporation.
-
Page 3: Table Of Contents
Contents What You Will Need Installing EFW Policy Server and Management Console Software Initializing the Policy Server Starting the Management Console and connecting to the Policy Server Setting up License-activation Keys Creating and retaining a recovery diskette Importing the “No sniffing, no spoofing” pre-defined Policy and Assigning it to the Default Device Set Installing and Registering an EFW NIC Verifying NIC Registration... -
Page 5: What You Will Need
An understanding of how to import and create policies An understanding of how to change the policy for a NIC The final section in this guide points you to key sections in the 3Com Embedded Firewall Administration Guide that provide detailed information for expanding your EFW system to best suit your security needs. -
Page 6: Installing Efw Policy Server And Management Console Software
The steps below provide instructions for installing a Policy Server and Management Console on a single system using the Typical installation method. 1 Insert the 3Com product CD in the appropriate drive; the Installation wizard launches automatically, and a Welcome window appears. -
Page 7: Initializing The Policy Server
If you are interested in examining this option in detail now, refer to the section “Joining a New Policy Server to a Domain” in the 3Com Embedded Firewall Administration Guide. 2 Select Confirm Create New Domain . -
Page 8: Starting The Management Console And Connecting To The Policy Server
You can configure the system and view data using the Management Console. To start the Management Console, follow the steps below. 1 From the Windows Start menu, select Programs -> 3Com Embedded Firewall Management . One of the following two options appears: 3Com Embedded Firewall Management Console—... -
Page 9: Creating And Retaining A Recovery Diskette
1 Insert a formatted 3.5” diskette into the a: drive of the computer hosting the Policy Server. 2 Save the public.key and server.keystore files to diskette. (These files are located in Program Files -> 3Com Corporation -> 3Com EFW.) Creating and retaining a recovery diskette... -
Page 10: Importing The "No Sniffing, No Spoofing" Pre-Defined Policy And Assigning It To The Default Device Set
1 From the Main menu, select Import Policy/Rule set. The Import Policy/Rule Set window appears. 2 Select Policy and click Next. 3 Click Browse and navigate to Program Files -> 3Com Corporation -> 3Com EFW -> predefined-policies-rulesets.xml. Click Next. A list of the policies contained in the file appears. -
Page 11: Installing And Registering An Efw Nic
6 Manually copy the contents of the folder specified in Step 4 to a temporary directory on the computer that will receive the EFW NIC installation (on a computer on which a 3Com 3CR990 NIC is installed). Installing and Registering an EFW NIC... -
Page 12: Verifying Nic Registration
NOTE: Before you change the policy for the EFW NIC, test your Internet access to ensure that the system hosting the EFW NIC can navigate to the 3Com Web site, by connecting to www.3com.com. In a later section, you will attempt to access the same Web site, which at that... -
Page 13: Importing The "Windows 2000 Standard" Rule Set
Set window appears. 2 Select Rule Set and click Next. 3 Click Browse and navigate to Program Files -> 3Com Corporation -> 3Com EFW -> predefined-policies-rulesets.xml. Click Next. A list of the rule sets contained in the file is displayed. - Page 14 Quick Start Guide To create the “No IP Initiation” policy, follow the steps below. 1 In the Management Console Main menu, select New -> Policy. The Create a New Policy window appears. 2 Type No IP Initiation in the Policy field and click OK. The new policy information appears in the working frame.
-
Page 15: Creating A Sample Device Set
8 Click Save to save the new policy information. For more information on creating policies, refer to the section “Creating Policies and Rules” in the 3Com Embedded Firewall Administration Guide. Creating a Sample Device Set Next you will create a sample device set that enforces the policy you created in the previous section. -
Page 16: Moving The Efw Nic To The New Device Set
1 On the machine hosting the EFW NIC, attempt to connect to www.3com.com. If you were denied access to the site, the EFW NIC is correctly enforcing the “No IP Initiation” policy. If you were able to connect to the site, go back to the “Creating a Policy”... -
Page 17: Expanding Your Efw Configuration
Now that you have a basic EFW system configured and running, you can expand your configuration as needed to best suit your organization’s security needs. The following list provides some sectional references to the 3Com Embedded Firewall Administration Guide that will assist you in expanding your configuration.


Need help?
Do you have a question about the 3CR990 and is the answer not in the manual?
Questions and answers