Table of Contents
Advertisement
Quick Links
Advertisement
Table of Contents

Related Manuals for gorilla sports 101198


Summary of Contents for gorilla sports 101198
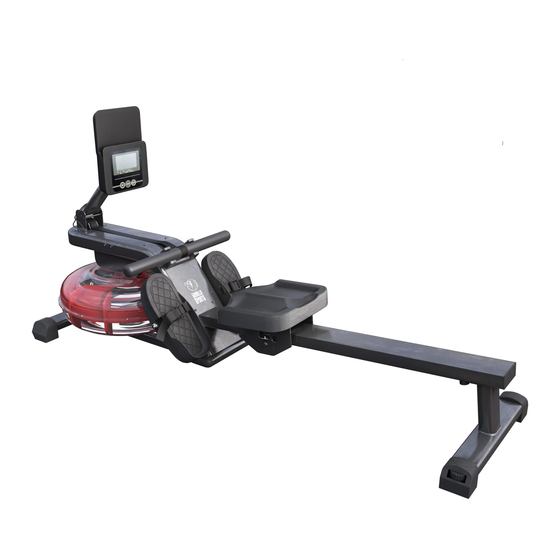
- Page 1 FOLDABLE AQUA ROWER 101198...
-
Page 2: Table Of Contents
TABLE OF CONTENT Page 2 ............................... Table of content Page 3-4 ..........................Safety Instructions Page 5 ..........................Technical data overview Page 6 ................................. Parts list Page 7-10 ............................. Assembling steps Page 11-14 ........................... Filling the Water Tank Page 15 ............................ Adjusting the Pedals Page 16-17 ...................... - Page 3 IMPORTANT INFORMATION AND SAFETY INSTRUCTIONS General information Please ensure that all persons using the device have read and understood the assembly and operating instructions. The assembly and operating instructions must be regarded as part of the product and kept in a safe place so that they can be referred to at any time if necessary. Ensure that the safety and main- tenanceinstructions are followed exactly.
- Page 4 IMPORTANT INFORMATION AND SAFETY INSTRUCTIONS Training clothes and shoes suitable for fitness training with the device must be worn. The clothing must be such that it cannot get caught in the device during training due to its shape (e.g. length). The training shoes should be chosen to match the training equipment, basically give the foot a firm grip and have a non-slip sole.
-
Page 5: Technical Data Overview
TECHNICAL DATA OVERVIEW Max. Load: 120 kg... -
Page 6: Parts List
PARTS LIST Accessories package φ φ φ φ φ... -
Page 7: Assembling Steps
ASSEMBLING STEPS STEP 1: Take out the slide rail(G) and rear feet tube(C), Allen screwM8*15 (1) 4PCS, spring washer φ8(2) 4PCS and flat washer φ8(3) 4PCS in the component bag. Use a #5wrench to lock it together. PIG.1 STEP 2: Take out the seat set(E) and install it into the slide rail along the arrow direction. - Page 8 ASSEMBLING STEPS STEP 3: Take out the block for seat cushion(F) and screw it into the slide rail by hand. PIG.3 STEP 4: Take out the forefeet tube(B), whole rower machine(A), step bolt M8*55(1) 2PCS, washerφ8(2) 2PCS and cap nuts M8(3) 2PCS in the component bag. Use #5 wrench and cross wrench to assemble it as shown in PIG.4. PIG.4...
- Page 9 ASSEMBLING STEPS STEP 5: Take out the Allen screw M8*15 (1) 8PCS, spring washerφ8(2) 8PCS and flat washerφ8(3) 8PCS from the component bag. Use a #5 wrench to lock the assembly(G) assembled in step 3 and the assembly(K) assembled in step 4 together. PIG.5 STEP 6: Take out the Allen screwM6*10(6) 2pcs from the component bag.
- Page 10 ASSEMBLING STEPS STEP 7: Use a cross wrench to take out the cross pan head screw M4*10 (7) and flat washer φ4 (8) that pre-locked on the console (H). Install the console(H) on the rower as shown in the PIG.7. Note: The outlet wire(N) of the console and outlet wire(M) of the console holder should be connected and placed according to the method of PIG.1 to avoid pressing the wire.
-
Page 11: Filling The Water Tank
FILLING THE WATER TANK There is of course a direct link between rowing and the element of water. The Foldable Aqua Rower is therefore the ideal training device on which to implement your rowing training realistically as it provides a realistic simulation of rowing on water. - Page 12 pools. This can damage the device tank. Replace the water in the tank every 6 months and add a water treatment tablet to the tank each time you do this. FILLING THE WATER TANK Water Tank Display and Filling Amount On the water tank there is a water level scale showing 6 different levels of filling.
- Page 13 FILLING THE WATER TANK Filling the Water Tank Step 1: Remove the tank cap. Step 2: Insert the funnel into the opening of the tank. Step 3: Fill the desired amount of water into the tank. CAUTION: Do not overfill above the maximum filling level of Level 6 and do not underfill the minimum filling level of Level 1.This can lead to damages to your training device.
- Page 14 FILLING THE WATER TANK Emptying the Water Tank Step 1: Remove the tank cap. Step 2: Place a suitable container such as a bucket next to the tank of the rowing device. Step 3: Insert the tube on the pump into the tank and place the hose into the container made available. Step 4: Pump out the water completely or to the water level you require.
-
Page 15: Adjusting The Pedals
ADJUSTING THE PEDALS Your rowing machine is equipped with a special support system for your feet. You should wear suitable sports shoes for rowing training. We recommend running shoes because they are ideal for foot movement during rowing due to their slightly curved shape. Make sure that you do not over-tighten the shoes before training as this is can restrict circulation during Adjusting the Pedals exerciseand cause numbness in the feet. -
Page 16: Cleaning/Maintenance/Disposal
CLEANING/ MAINTENANCE/DISPOSAL Cleaning Please use only a slightly damp cloth for cleaning. Attention! Never use gasoline, thinner or other aggressive cleaning products to clean the surface, as this may cause damage. The device is only suitable for private home and for indoor use. Keep the device clean and moisture away from the device. - Page 17 CLEANING/ MAINTENANCE/DISPOSAL Recommended Accessori This accessory is the optimal supplement for your training device. All prod- Dispos ucts are available in our online shop at www.gorillasports.de European Disposal Directive POLAR® Transmitter Chest Belt T34 (uncoded) European Disposal Directive Never dispose of your training equipment in the normal household waste. All consumers are legally obliged to Chest belt with optimised transmission range for determining heart rates.
-
Page 18: Power Supply
POWER SUPPLY The cockpit is powered by two batteries type AA. If the display on the cockpit should become weak or go out completely, replace these batteries with new ones. Please observe the disposal instructions included in this manual when you dispose of the old batteries. The battery compartment is on the back of the cockpit. -
Page 19: Warranty
Claims for compensation for damage that may occur outside the device (unless liability is mandatory regulated by law) are excluded. Manufacturer: Gorilla Sports GmbH Nordring 80 64521 Groß-Gerau Here you can find an overview of our international partners:... -
Page 20: Training Information
TRAINING INFORMATION In the following you will find instructions and tips to help you to do the rowing movements correctly. Rowing Movement – complete body Step 1: Preparation Make sure that your feet are in positioned correctly on the pedals and that they are adjusted correctly to fit yourshoe size with the straps firmly around your feet. - Page 21 In the following you will find instructions and tips to help you to do the rowing movements correctly. Rowing Movement – complete body TRAINING INFORMATION Step 1: Preparation Make sure that your feet are in positioned correctly on the pedals and that they are adjusted correctly to fit your shoe size with the straps firmly around your feet.
- Page 22 TRAINING INFORMATION Rowing Movement – Arms Only Step 1: Preparation Make sure that your feet are in the optimum position, ie, that the shoe size is adjusted correctly and the foot straps are tightened properly. Hold the rowing grip with both hands gripping over the bar. Your hands should be approximately 20 cms apart.
- Page 23 TRAINING INFORMATION Training preparations Before you start training, not only must the training equipment be in perfect condition, but you or your body should also be ready for training. Therefore, if you have not done any strength/endurance training for a long time, you should always consult your family doctor before starting your training and carry out a fitness check-up.
- Page 24 TRAINING INFORMATION Hydration Sufficient fluid intake is essential before and during training. During a training session of 60 minutes, it is quite possible to lose up to 0.5 liters of fluid. To compensate for this fluid loss, apple spritzer in amix- ing ratio of one-third apple juice and two-thirds mineral water is ideal, as it contains and replacesall the electrolytes and minerals that the body loses through sweat.
-
Page 25: Warm-Up/Stretching
WARM-UP/STRETCHING Vordere Oberschenkelmuskulatur Thighs Support yourself with your right hand against a wall or your exercise Stütze Dich mit der rechten Hand an einer Wand oder Ihrem Trainingsgerät ab. Hebe den linken Fuß nach hinten an und halte ihn mit der linken Hand fest. equipment. -
Page 26: Notes
NOTES... - Page 27 NOTES...
- Page 28 NORDRING 80, 64521 GROß-GERAU WWW.GORILLASPORTS.EU...
Need help?
Do you have a question about the 101198 and is the answer not in the manual?
Questions and answers