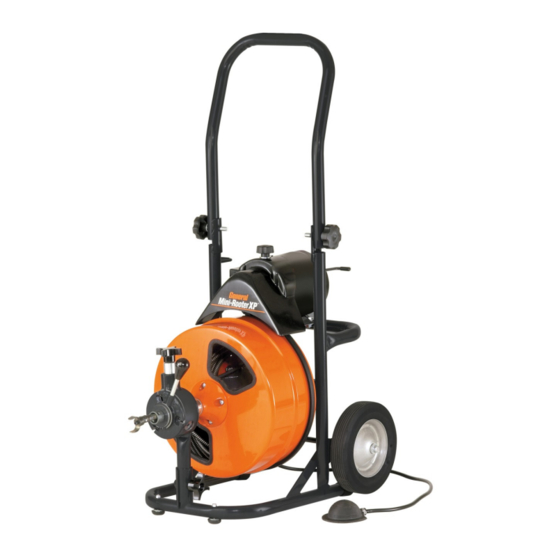
General Pipe Cleaners Mini-Rooter XP Operating Instructions Manual
For 1-1/4” through 4” lines (30mm—100mm)
Hide thumbs
Also See for Mini-Rooter XP:
- Operating instructions manual (13 pages) ,
- Operating instructions manual (9 pages) ,
- Operating instructions manual (12 pages)
Table of Contents
Advertisement
Available languages
Available languages
Quick Links
Your Mini-Rooter XP is designed to
give you years of trouble-free, profitable
service. However, no machine is better
than its operator.
Read, understand and follow all safety
warnings and instructions provided with
the product. Failure to follow the warnings
and instructions may result in electric
shock and/or serious injury. Save all warn-
ings and instructions for future reference.
SAVE THESE INSTRUCTIONS!
Mini-Rooter XP
Operating Instructions
For 1-1/4" through 4" lines
(30mm—100mm)
®
Pour français voir la page 11
Para ver el español vea la paginá 21
Advertisement
Table of Contents

Related Manuals for General Pipe Cleaners Mini-Rooter XP


Summary of Contents for General Pipe Cleaners Mini-Rooter XP
- Page 1 ® Mini-Rooter XP Operating Instructions For 1-1/4” through 4” lines (30mm—100mm) Your Mini-Rooter XP is designed to give you years of trouble-free, profitable Pour français voir la page 11 service. However, no machine is better than its operator. Para ver el español vea la paginá 21 ...
-
Page 2: Safety Symbols
Never grasp a operation and maintenance rotating cable with rag. procedures for the Mini-Rooter XP. These items could become wrapped around the cable and cause serious injury. SAFETY SYMBOLS Always... -
Page 3: General Safety Rules
® Mini-Rooter XP GENERAL SAFETY RULES Personal Safety Stay alert, watch what you are doing and use common sense when operating a power tool. Do not use tool while tired or WARNING under the influence of drugs, alcohol, or medication. A mo- Read and understand all instructions. -
Page 4: Specific Safety Rules
Only wear leather gloves. Never use any other type of glove, such as cloth, rubber, or coated gloves. Never grasp a rotating FEATURES - Closed Drum Mini-Rooter XP cable with a rag. These items could become wrapped around the cable and cause serious injury. - Page 5 Mini-Rooter XP INSTALLING GUIDE TUBE HOLDER FEATURES - Open Drum Mini-Rooter XP 1. The Guide Tube Holder on the Mini-Rooter XP should already be Folding Handle installed when you receive the machine. If not, follow the illustra- tion below for assembly.
- Page 6 DO NOT USE TOO MUCH FORCE – drain opening. Be sure the LET THE CUTTER DO THE WORK. Mini-Rooter XP Guide Tube (XP-GT) is in place. If you Don't leave too much slack in the cable since this will cause can’t place the machine this...
-
Page 7: Special Operations
® Mini-Rooter XP 10. Be careful not to let the cutter get caught in the stoppage as you HOW TO REMOVE DRUM FROM MACHINE work through it. This can cause kinking and breaking of the ca- DISCONNECT MACHINE FROM POWER SOURCE BE- ble. -
Page 8: Maintenance
® Mini-Rooter XP DAMAGED ROLLER Slide the back end of the cable (opposite to the end with basin Excessive use may wear a roller to the point of failure. It is recom- head) through spout and into the drum. The cable will be easier mended that all three rollers be replaced at the same time (Cat # PO- to install if you bend the last inch of cable at a 45-degree angle. - Page 9 ® Mini-Rooter XP TROUBLE SHOOTING GUIDE (Table 3) Problem Probable Cause Solution Cable kinks or breaks. Operator forcing the cable. Do not force the cable. Let the cutter do the work. Too much slack between machine and Allow no more than two feet between machine and drain.
- Page 10 ® Mini-Rooter XP...
- Page 11 ® Manuel d'instructions Pour canalisations de 1-1/4 à 4 pouces (30mm—100mm) Votre débouchoir Mini-Rooter XP est conçu pour vous procurer de nombreuses années de service fiable et rentable. Toutefois aucun appa- reil ne peut donner son plein rendement si l'opé- rateur ne le connaît pas à...
-
Page 12: Symboles De Sécurité
Mini-Rooter XP. Portez toujours des lunettes de sécu-rité et des chaussures à semelles de SYMBOLES DE SÉCURITÉ caoutchouc antidérapantes. L'emploi de équipements... -
Page 13: Consignes De Sécurité Générales
® Mini-Rooter XP CONSIGNES DE SÉCURITÉ GÉNÉRALES correspondant à la fiche de l'outil. L'utilisation de toute autre rallonge ou d’une rallonge endommagée n'assure pas la mise à la AVERTISSEMENT ! terre de l'outil et augmente le risque de choc électrique. -
Page 14: Consignes De Sécurité Particulières
® Mini-Rooter XP 7. Ne faites pas fonctionner cet appareil en marche arrière (REV)La 7. Surveillez le désalignement ou le grippage des pièces mobi- les, les bris de pièce ou toute autre condition qui peut nuire marche arrière ne doit servir qu'à dégager un outil d'un obsta-cle, au bon fonctionnement de l’appareil. -
Page 15: Caractéristiques
® Mini-Rooter XP Sélection du câble (Tableau 1) CARACTÉRISTIQUES Diamètre Diamètre de la Applications typiques Mini-Rooter XP Poignée pliante du câble canalisation à dévidoir fermé 1/2 po 3 à 4 po Colonnes et petits avaloirs (pas de racines) 3/8 po 2 à... -
Page 16: Directives D'utilisation
Mini-Rooter XP DIRECTIVES D'UTILISATION INSTALLATION DU SUPPORT DE-TUBE DE GUIDAGE 1. Le support de tube de guidage du Mini-Rooter XP devrait déjà L’INTERRUPTEUR DE L'APPAREIL DOIT ÊTRE EN être installé lorsque vous recevrez la machine. Si ce n’est pas le POSITION ARRÊT (OFF) ! - Page 17 ® Mini-Rooter XP FONCTIONNEMENT 6. Si vous avez de la difficulté à franchir un coude, essayez en mar- che arrière tout en exerçant une pression constante. (Si vous 1. Pour débuter, tirez le câble du dévidoir et glissez-le dans l’avaloir utilisez l’alimenteur de câble automatique, mettre le moteur en...
- Page 18 ® Mini-Rooter XP OPÉRATIONS SPÉCIALES 6. Remettez l’alimenteur de câble automatique en place et serrez le bouton à la base du pilier avant. CÂBLE COINCÉ DANS UNE CANALISATION Le moteur peut être mis en marche arrière pour dégager le câble lorsqu'il est coincé...
-
Page 19: Entretien
® Mini-Rooter XP ENTRETIEN DÉBRANCHEZ L’APPAREIL AVANT TOUT ENTRETIEN ! Pour maintenir votre appareil en état de marche optimal, il est essen- tiel que tous les roulements et coussinets du tube distributeur soit lubrifiés. La lubrification de toutes les pièces mobiles est particulière- ment importante si l’appareil est exposé... - Page 20 ® Mini-Rooter XP GUIDE DE DÉPANNAGE (Tableau 3) Problème Cause probable Solution Le câble vrille ou casse L’opérateur force le câble Ne forcez pas le câble. Laisser le couteau faire le travail. Trop de mou entre l’appareil et l'avaloir L’appareil doit à être placé à moins de 2 pi de l'avaloir.
- Page 21 ® Instrucciones de operación Para líneas de 1-1/4 a 4 pulgadas (30mm—100mm) Su Mini-Rooter XP está diseñado para darle años de servicio rentable y sin problemas. Sin em- bargo, no hay máquina que sea mejor que el ope- rario. Lea, entienda y cumpla con todas las adverten- cias de seguridad e instrucciones que vienen con el producto.
-
Page 22: Símbolos De Seguridad
Nunca agarre con un trapo un con los procedimientos de operación y cable que esté girando. Estos artí-culos podrían enredarse en el cable y causar mantenimiento seguros del Mini-Rooter XP. graves lesiones. SÍMBOLOS DE SEGURIDAD Use siempre gafas de seguridad y calzado antideslizante con suela de goma. -
Page 23: Reglas Generales De Seguridad
® Mini-Rooter XP REGLAS GENERALES DE SEGURIDAD 8. Use únicamente cordones de extensión de tres alambres que tengan enchufes de conexión a tierra de tres espigas y tomas ADVERTENCIA de tres polos que acepten el enchufe de la herramienta. El uso de otro tipo de extensiones o de extensiones dañadas o inferiores... -
Page 24: Reglas Específicas De Seguridad
® Mini-Rooter XP 5. Coloque la máquina a una distancia de no más de dos pies 6. Mantenga las herramientas con cuidado. Mantenga las herramien- orificio del desagüe. Distancias mayores pueden hacer que el cable tas cortantes afiladas y limpias. Las herramientas mantenidas se tuerza o doble. - Page 25 ® Mini-Rooter XP Cuadro de aplicaciones de cables (Tabla 1) CARACTERÍSTICAS Calibre Tamaño Mini-Rooter XP con Mango plegable de la Capacidad Tambor Cerrado cable tubería Aplicaciones típicas Máx. 3 a 4 Chimeneas de techo y desa- 75 pies pulg. pulgadas gües pequeños de piso (no...
-
Page 26: Instrucciones De Operación
INSTALACIÓN DEL RETENEDOR DEL TUBO ¡ASEGÚRESE DE QUE EL INTERRUPTOR DEL MO- 1. El sujetador del tubo de guía en el Mini-Rooter XP debe estar ya TOR ESTÉ EN LA POSICIÓN APAGADO (“OFF”)! instalado cuando reciba la máquina. Si no es así, siga la ilustra- ción de abajo para su armado. - Page 27 ® Mini-Rooter XP Operación 1. Primeramente, saque cable del tambor y hágalo avanzar en el desagüe lo más que pueda. 2. Apriete la perilla que se encuentra encima del alimentador auto- mático de cable de manera que el rodillo de alimentación presione contra el cable.
-
Page 28: Operaciones Especiales
® Mini-Rooter XP 4. Para instalar un tambor, simplemente OPERACIONES ESPECIALES ponga el tambor en la máquina. El SI EL CABLE QUEDA ATRAPADO EN LA LÍNEA retén cerrará automáticamente. El motor se puede poner en reversa para liberar el cable si éste que- 5. -
Page 29: Mantenimiento
® Mini-Rooter XP el Ensamblado del Rodillo de Alimentación: MANTENIMIENTO ¡DESCONECTE LA MÁQUINA DE LA FUENTE DE ALIMENTACIÓN ANTES DE DARLE CUALQUIER MANTENIMIENTO! Para mantener su máquina operando sin problemas, es esencial que todos los rodamientos y los bujes del tubo distribuidor estén lubrica- dos. - Page 30 ® Mini-Rooter XP GUÍA DE SOLUCIÓN DE PROBLEMAS (Tabla 3) Problema Causa Probable Solución Torceduras o roturas en el El operario forzó el cable. No fuerce el cable. Deje que el cortador haga el trabajo. cable. Demasiado cable suelto entre la máqui- No deje más de dos pies entre la máquina y el desagüe.
Need help?
Do you have a question about the Mini-Rooter XP and is the answer not in the manual?
Questions and answers