
Related Manuals for Oricom TP9


Summary of Contents for Oricom TP9
- Page 1 Slimline Phone with Caller ID Keep this user guide for future reference Always retain your proof of purchase in case of warranty service and register your warranty on line at:-www.oricom.com.au...
-
Page 2: General Information
General Information Warnings • The telephone is designed for indoor use only. Do not install the telephone in areas where there is the risk of an explosion, excessive exposure to smoke, dust, vibrations, chemicals, moisture and heat. • Do not install in damp locations such as a bathroom or laundry, do not expose the unit to direct sunlight. -
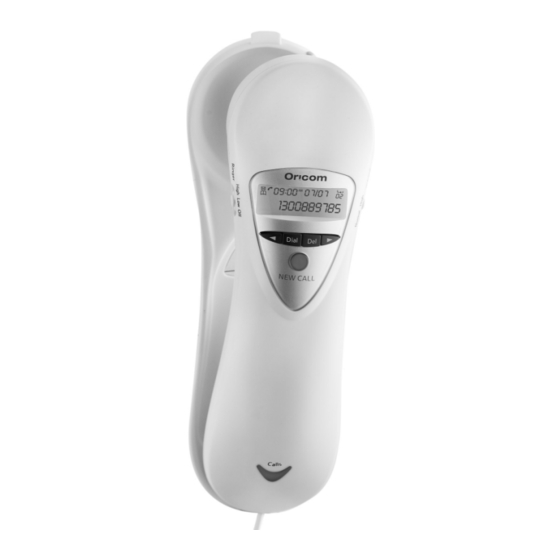
Page 3: Location Of Controls
2 Location of controls 1. Dial Button 10. Redial Button Buttons 11. Hook Switch 3. New Call LED 12. Ringer High/Low/Off Switch 4. Ringer LED 13. One-touch Memory Label 5. Display 14. Store Button 6. Delete Button 15. Keypad 7. Recall 100/600 Switch 16. -
Page 4: Installation
3 Installation Installing batteries (supplied) Three good quality AA batteries are required to allow the display to function. Before opening the battery compartment, make sure the telephone is disconnected from the telephone line. 1. On the underside of the telephone carefully remove the battery cover. 2. -
Page 5: Basic Settings
Basic settings 1. After installing the batteries, the display should flash the word “ENGLISH”. If not press and hold for approximately 4 seconds. 2. Select the desired language using . Press Del button. 3. Select the desired contrast setting (2=Default) using . - Page 6 Redial function If a number that you have dialled is engaged or you were unable to get through to anybody. The last number dialled will be saved in the telephone automatically. To use the redial facility, proceed as follows: 1. Lift the handset. 2.
- Page 7 Receiver volume control The handset earpiece volume can be adjusted during a call using the RECEIVER button. Hearing aid compatible This telephone is hearing aid compatible. Select the T mode on your hearing aid to enable this feature. Memory The telephone also has 3 one-touch and 10 two-touch memories for frequently dialled telephone numbers.
- Page 8 Storing Two-touch Memories 1. Press Store button. 2. Enter the telephone number to be stored (up to 22 digits). Press Store button. 3. Enter the name (up to 16 characters) . Press the corresponding number button one or more times for the first letter (see the above table).
- Page 9 CID Call Types Besides showing telephone numbers, the display can show a number of messages: OUT OF AREA It is an International call or a call from a PBX (no information received). PRIVATE Information on the number is blocked. The call could also be from a PBX.
- Page 10 If the product is then found to be faulty you will be asked to return it directly to us with a copy of the purchase receipt. For further information about the Oricom range of products please visit our website.
Need help?
Do you have a question about the TP9 and is the answer not in the manual?
Questions and answers