Table of Contents
Advertisement
Quick Links
Important: Read and save these instructions.
•
Thank you for purchasing this air purifier.
•
Please read the operation manual carefully and follow it for correct use.
•
Please read the "Safety Precautions" section before use.
•
Please keep the operation manual in a safe place for later reference.
•
For FCC compliance information, please see the last page of this manual.
5
5
* Learn more about the 5 Year Unit Replacement Limited Warranty at www.daikinpureair.com
IO-MCB50YSAU
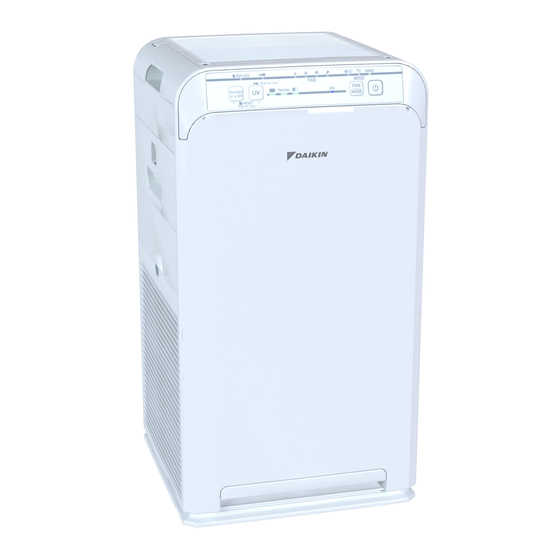
DAIKIN AIR PURIFIER
INSTALLATION &
OPERATION MANUAL
www.daikinpureair.com
FLOOR STANDING OR
DESKTOP TYPE
MODEL
MCB50YSAU
The two-dimensional bar code is
a manufacturing code.
It is not a customer bar code.
Advertisement
Table of Contents
Troubleshooting

Related Manuals for Daikin MCB50YSAU


Summary of Contents for Daikin MCB50YSAU
- Page 1 DAIKIN AIR PURIFIER INSTALLATION & OPERATION MANUAL Important: Read and save these instructions. FLOOR STANDING OR DESKTOP TYPE MODEL • Thank you for purchasing this air purifier. • Please read the operation manual carefully and follow it for correct use.
-
Page 3: Table Of Contents
Read First Contents Read First Safety Precautions ............Names of Parts and Operations ........Preparation Before Operation ......... 10 Using Air purifying Operation .......... 12 Operation (AUTO UV/Hand-operated UV) Changing the Airflow Rate ..........12 LOCK Function ............... 13 Adjusting Indicator Lamp Brightness ......13 Useful Functions Operating MODEs ............ -
Page 4: Safety Precautions
Read First Safety Precautions „Observe these precautions in order to prevent property damage or injury. „The consequences of incorrect use are categorized as follows: WARNING CAUTION DANGER Failure to follow these Failure to follow these Indicates an imminently instructions properly may result instructions properly may hazardous situation which, if in property damage or personal... - Page 5 Read First WARNING Observe in order to prevent fire, electric shock or severe injury. „Do not use in the following places • Places where oil or flammable gases are used or may leak. (Fire or smoke may result from ignition or suction toward the unit, or injury may result from degradation or cracking of plastic) •...
- Page 6 Read First Safety Precautions About the deep ultraviolet (UVC) LED This product is equipped with a deep ultraviolet (UVC) LED for sterilization. Do not operate in the following conditions. „ Do not operate with the carbon filter unit, dust „ Do not touch the UV unit. collection filter and other components removed.
- Page 7 Read First Do not use in the following places „ Positions from where out flowing air flows directly at „ Do not use cosmetics etc., containing silicone* near a wall, furniture, curtains, etc. the unit. (Staining or deformation may result) * Hair care products (split ends coating agents, hair mousse, hair treatment agents etc.), cosmetics, „...
-
Page 8: Names Of Parts And Operations
Read First Names of Parts and Operations CAUTION Do not lift up the unit holding the grip on the carbon filter unit. (Injury may result from the unit falling) Front Back Operating/ Air outlet/Outflow grille Indicator panel ►Page 8, 9 Outflow grill cannot be removed. - Page 9 Read First Operating/Indicator panel Operations and operating status will be notified by tones. • Operation start ... 2 quick beeps • Filter replacement reset ... 2 short beeps • Setting change ... 1 short beep • When not usable ....3 short beeps •...
- Page 10 Read First Names of Parts and Operations When a lamp is blinking ►Page 20 About the LOCK function lamp • Lamp will be lit when the lock function is active. When lit, operations will be restricted. When buttons are pressed, three short beeps will sound. ►Page 13 About the dust/particle sensor lamp •...
-
Page 11: Preparation Before Operation
Read First Preparation Before Operation Positioning the unit in the room Pointers for good positioning Before setting up, remove the tape on the bottom • Choose a position from where airflow can reach all areas of the which is securing the power room. - Page 12 Read First WARNING Preparation Before Operation Be sure to stop the operation and remove the power supply plug before installation. (Electric shock or injury may result) Attaching the carbon filter Remove the carbon filter unit from the main Turn the carbon filter unit over and attach unit.
-
Page 13: Using Air Purifying Operation
Operation WARNING Operation • Do not turn off the unit by removing the power supply plug during operation. (Fire due to overheating or electric shock may result) • Do not operate with the carbon filter unit, dust collection filter and other components removed. (Deep ultraviolet leakage may harm your eyes and skin) Using Air purifying Operation (turning operation ON/OFF) Purifies the air in the room. -
Page 14: Lock Function
Useful Functions Operation LOCK function Button operation is restricted, preventing misoperation. Hold down for about 2 seconds. • Hold down for about 2 seconds again to turn off LOCK function. • Lamp will be lit when the lock function is active. When lit, operations will be restricted. When buttons are pressed, three short beeps will sound. - Page 15 Useful Functions MODE Usage and Function Automatic airflow rate adjustment FAN setting (“Quiet”, “Low”, “Standard”, “High*”) is automatically adjusted according to the degree of air impurity. AUTO FAN Purifying capacity increases as airflow rate rises. ►Page 15, 16 If operating sounds bother you, the airflow rate range can be changed. * The maximum airflow rate during AUTO FAN MODE is “High”, which is less powerful than “Turbo”.
-
Page 16: Dust/Particle Sensor Sensitivity Setting
Advanced Settings Changing the Setting Function Operation can be performed either The FAN lamp corresponding to Dust/Particle Sensor during operation or while operation the currently set sensitivity will is stopped. light up after blinking. Sensitivity Setting Hold down for about “Low”... - Page 17 Advanced Settings Press to change the setting* Press Each press cycles between “Low”, 1 short beep will sound and the set FAN “Normal”, “High”. lamp will blink. “Low” “Low” “Normal” “Normal” “High” “High” While the lamp is blinking, unplug the power supply Press to change the setting* Press...
-
Page 18: Maintenance
Maintenance WARNING Maintenance Be sure to stop operation and unplug the power supply plug before performing maintenance. (Electric shock or injury may result) Unit/Outflow grill Wipe If dirt becomes an issue • Wipe up dirt with a soft damp cloth. •... - Page 19 Maintenance WARNING • Do not use gasoline, benzine, thinner, polishing compound, paraffin, alcohol, etc. (Cracking, electric shock, and ignition of fire may result) • Do not wash the unit with water. (Electric shock and fire or malfunctioning may result) Attention Be sure to operate with a dust collection filter, and carbon filter unit attached.
-
Page 20: When Not Using The Unit For A Prolonged Period
Maintenance Maintenance When Not Using the Unit for a Prolonged Period Unplug the power supply. Clean the parts. ►Page 17, 18 • In particular, parts cleaned with water should be completely dry. (Mould may result from remaining moisture) Cover the air outlet and other openings with a plastic bag or similar to prevent dust entry, and store the unit upright in a dry place. -
Page 21: About The Indicator Lamps
Troubleshooting About the Indicator Lamps Operating/Indicator panel Check the indicator lamp and take the following actions. Indicator lamp Cause/Solution Blinks if the carbon filter is removed or the carbon filter unit is not pushed all the way in. The odor sensor lamp (When blinking, the airflow rate decreases.) blinks ►Page 11, 18... -
Page 22: Faqs
Troubleshooting FAQs Please check first before contacting us. Q: Is it possible to see if UV emission is being performed while the UV function is ON? For safety, the unit is structured so that UV emission cannot be seen. Q: The sensitivity of the dust/particle sensor seems to be poor... If the dust/particle sensor lens is dirty, the sensitivity may become poor, so clean it ►Page 17 regularly. -
Page 23: Troubleshooting
Troubleshooting Troubleshooting „ Please check the following before requesting repairs or making an inquiry. If there is still an abnormality, contact your dealer or the customer service center. Not a problem Check This case is not a problem. Please check again before requesting repairs. „... - Page 24 Troubleshooting Troubleshooting Phenomenon Check points The dust/particle sensor lamp • Is there a buildup of dust on the air intake for dust/particle sensor or remains orange or red the surrounding area? ¼ Vacuum off any dust from the air intake using a vacuum cleaner. ►Page 17 •...
- Page 25 Troubleshooting Phenomenon Check points Air does not come out • Is the air outlet or air inlet blocked? If the air outlet is not blocked, an electrical component is malfunctioning. ¼ Contact your dealer or the customer service center. The airflow rate cannot be adjusted •...
-
Page 26: Specifications
Troubleshooting Specifications Model name MCB50YSAU Power supply Single phase 120V 60Hz Air Purifying Operation mode Turbo Standard Quiet Airflow rate (CFM) [m³/h] 176 [300] 113 [192] 70 [120] 38 [66] 19-11/16 (H) × 10-5/8 (W) × 10-5/8 (D) External dimensions (in.) [mm] [500 (H) ×... -
Page 28: Fcc Compliance Information
Daikin North America LLC, except to the extent This equipment generates, uses and can radiate radio frequency required for installation or maintenance of recipient’s energy and, if not installed and used in accordance with the equipment.
Need help?
Do you have a question about the MCB50YSAU and is the answer not in the manual?
Questions and answers