Table of Contents
Advertisement
Advertisement
Table of Contents
Troubleshooting

Related Manuals for Daikin MC401VE


Summary of Contents for Daikin MC401VE
-
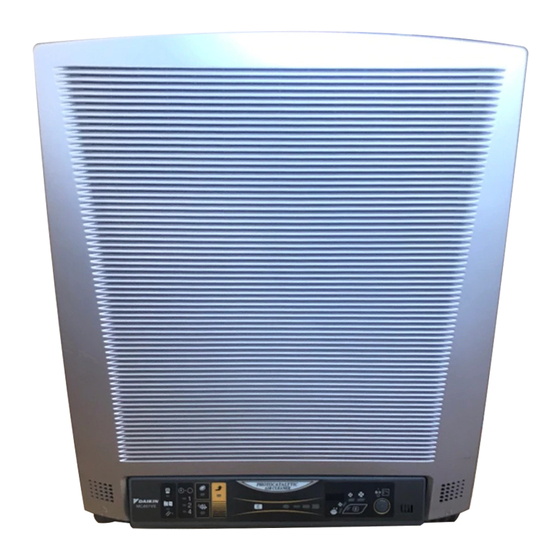
Page 1: Air Cleaners
SiE74-202 Service Manual Air Cleaners MC401VE... -
Page 2: Table Of Contents
1.3 Remote Controller Fails to Operate Equipment........23 1.4 Photocatalytic Operation does not Activate........... 24 Part 3 Removal Procedure ............27 1. Removal Procedure of MC401VE ............28 1.1 Removal of External Accessories............28 1.2 Removal of Ionizing Wire............... 30 1.3 Removal of Electrical Parts (Inverter Lamp).......... 31 1.4 Removal of PCB .................. - Page 3 SiE74-202 2.1 Parts Illustration..................41 2.2 Parts List....................42 Index .................... i Drawings & Flow Charts ..............iii Table of Contents...
-
Page 4: Safety Cautions
SiE74-202 Safety Cautions 1. Safety Cautions Cautions and Warnings Read the following warnings and cautions BEFORE operating the system and use it correctly. This manual classifies the precautions to the user into the following two categories. Each mention important cautions on safety, so be sure to keep them. WARNING Failure to follow a warning is very likely to result in such grave consequences as death or serious injury. - Page 5 Safety Cautions SiE74-202 Caution Do not use the equipment in a Do not use in humid places or Do not use the equipment near a place filled with oily smoke such places which might be wet, such lighting fixture (keep a distance of as a kitchen or in a place filled as bathrooms.
-
Page 6: Using Icons
SiE74-202 Safety Cautions Caution Do not place water containers Do not wipe with benzene or If not using the unit for long such as fish bowls and flower thinner, or spray with insecticide. periods of time, unplug the power vases near the equipment. Such cable. -
Page 7: Using Icons List
Safety Cautions SiE74-202 Using Icons List Icon Type of Description Information Note A “note” provides information that is not indispensable, but may nevertheless be valuable to the reader, such as tips and tricks. Note: Caution A “caution” is used when there is danger that the reader, through incorrect manipulation, may damage equipment, loose data, get Caution an unexpected result or has to restart (part of) a procedure. -
Page 8: Part 1 Operation Manual
SiE74-202 Part 1 Operation Manual 1. Operating Manual..................2 1.1 Names and Functions of Parts ..............4 1.2 Indicator Lamps and their Functions ............4 1.3 Accessories ..................... 5 1.4 Tips for appropriate use................6 1.5 CAUTION ....................7 1.6 Names and Functions of The Operating Section........8 1.7 Names and Functions of The Indicator Lamps........ -
Page 9: Operating Manual
Operating Manual SiE74-202 1. Operating Manual OPERATING MANUAL MODEL MC401VE PHOTOCATALYTIC AIR CLEANER Operation Manual... - Page 10 SiE74-202 Operating Manual Thank you for purchasing this Daikin Air Cleaner. This instruction manual explains how to use the equipment and important safety precautions. READ IT CAREFULLY BEFORE using the equipment. Keep this manual handy for future reference. Your warranty is included in the product package. Check your warranty has been properly filled out by the place of purchase and keep it in a handy but safe place.
-
Page 11: Names And Functions Of Parts
Operating Manual SiE74-202 Names and Functions of Parts Indicator Lamps and their Functions Operation Manual... -
Page 12: Accessories
SiE74-202 Operating Manual 1 Photocatalytic deodorizing, Eliminates odors 3 times bacteria removal and faster than earlier models. antiviral effect 2 Plasma dust collection Clears air of cigarette smoke and pollen. 3 7-year filter roll Longer-lasting and less troublesome. 4 Silent running Just 34.5 dB in “High”... -
Page 13: Tips For Appropriate Use
Operating Manual SiE74-202 Tips for appropriate use To remove house dust, set the unit near to the floor. To remove cigarette smoke, install the unit high on a wall. Installing the air cleaner as shown below improves air circulation in the room. While heating or cooling the room, air can be cleaned and temperature fluctuation minimized. -
Page 14: Caution
SiE74-202 Operating Manual CAUTION Read this section carefully BEFORE using the equipment. Do not use the power cable if it is damaged. Using a damaged power cable is extremely hazardous; if the power cord becomes damaged, you must obtain a replacement from the manufacturer or from a properly-authorized service agent. -
Page 15: Names And Functions Of The Operating Section
Operating Manual SiE74-202 When used in conjunction with a humidifier, keep mist from being directly drawn into the unit. Mists can lead to electric shock and/or equipment damage. Do not use in the place of kitchen fans or cooker hood fans. Adverse conditions of use can shorten service-life of the prefilter and ion filter, as well as lead to equipment damage. -
Page 16: Names And Functions Of The Indicator Lamps
SiE74-202 Operating Manual Names and Functions of The Indicator Lamps A “Ionizer needs cleaning” lamp Flashes when the ionizer is dirty. See page 14. B Time to cut filter lamp/Reset button This lamp lights up when it is time to change the ion filter. After fitting a new filter, press with ball-point pen, etc. -
Page 17: Setup
Operating Manual SiE74-202 Setup How to Fit the Ion Filter Roll. CAUTION Always fit the prefilter and ion filter roll before use. Use without filters can damage the equipment. 1. Remove the front panel. Hold the front panel by the sides, pull up and out. Front panel Front panel 2. -
Page 18: Installation
SiE74-202 Operating Manual Installation Selecting an Installation Site. The unit can be place on a flat surface such as a desk. <To place on a desk> Min. 100 cm Min. 10cm Min. 10cm Select a wall, shelf or floor that is sturdy enough to support the unit. The unit weighs 6.9 kg. -
Page 19: How To Operate The Unit
Operating Manual SiE74-202 1.10 How to Operate the Unit Before attempting to use the unit, plug the power cable into a single phase 220 – 240 V/220 V (50/60 Hz) socket. Note For the first 2 seconds after the front panel has been reattached or the power cable plugged in, the unit does not respond to remote controller commands - not even the buttons in The buttons and their functions are explained below. -
Page 20: How To Clean The Prefilter
SiE74-202 Operating Manual 1.11 How to Clean the Prefilter When to clean ··· Once every 2 weeks or so. 1. Stop the unit and remove the power cable from its socket. 2. Remove the front panel. Hold the front panel by the sides, pull up and out. Front panel Front panel 3. -
Page 21: How To Clean The Lonizer
Operating Manual SiE74-202 1.13 How to Clean the lonizer (see page 4) on the front panel begins to flash, clean the ionizer. 1. Stop the unit and remove the power cable from its socket. 2. Remove the front panel. See step 2 on page 13. 3. - Page 22 • Be careful not to break the ionizing wires. If somehow broken, contact the place of purchase or Daikin’s Customer Service Center for replacements. If the unit is used with broken ionizing wires, the Clean lonizer lamp will flash.
-
Page 23: How To Change The Ion Filter (Roll)
Operating Manual SiE74-202 8. Reattach the ionizer to the ion filter (roll) case. Insert the pegs on the ionizer into the holes on the ion filter (roll) case. Snap the ionizer onto the case. Ion filter (roll) case Ionizing wires Hook Ionizer seen from backside Ionizing wires... -
Page 24: Optional Accessories
A short acoustic buzzer can be heard when the sensor is reset. 1.15 Optional Accessories Replacement ion filter rolls can be obtained from your supplier. Model Model Number MC401VE KAC15A 1.16 Specifications Model MC401VE Required power supply 220-240/220 50/60Hz 425 × 500 × 225... - Page 25 Operating Manual SiE74-202 Operation Manual...
-
Page 26: Part 2 Troubleshooting
SiE74-202 Part 2 Troubleshooting 1. Troubleshooting ..................20 1.1 Equipment does not Operate..............20 1.2 Indicator does not Change from "Dirty" to "Clean" ........ 22 1.3 Remote Controller Fails to Operate Equipment........23 1.4 Photocatalytic Operation does not Activate........... 24 Troubleshooting... -
Page 27: Troubleshooting
Troubleshooting SiE74-202 1. Troubleshooting Equipment does not Operate Method of Malfunction Detection Malfunction Equipment cannot be operated by remote controller or switch on main unit. Decision Conditions Supposed Faulty door switch (safety switch assembly) Causes Blown fuse Faulty printed circuit board (control PCB assembly, display PCB assembly) Troubleshooting Be sure to turn off power switch before connect or disconnect connector, Caution... - Page 28 SiE74-202 Troubleshooting Troubleshooting From previous page Check 5-volt power supply (between X6A (1) and (2)). Is voltage higher than 5.0 Replace control PCB A1P VDC? (control PCB assembly). Check connector connection of A2P display PCB assembly. Is connection Correct connector normal? connection.
-
Page 29: Indicator Does Not Change From "Dirty" To "Clean
Troubleshooting SiE74-202 Indicator does not Change from "Dirty" to "Clean" Method of Malfunction Detection Malfunction Air contamination indicator does not change to "clean" even when equipment is operated in Decision ventilated room for a whole day. Conditions Supposed Faulty harness Causes Faulty sensor Troubleshooting... -
Page 30: Remote Controller Fails To Operate Equipment
SiE74-202 Troubleshooting Remote Controller Fails to Operate Equipment Method of Malfunction Detection Malfunction Switches on main unit work properly, but remote controller fails to operate equipment. Decision Conditions Supposed Noise generated by fluorescent lamps Causes Faulty remote controller Faulty PCB Troubleshooting Be sure to turn off power switch before connect or disconnect connector, Caution... -
Page 31: Photocatalytic Operation Does Not Activate
Troubleshooting SiE74-202 Photocatalytic Operation does not Activate Method of Malfunction Detection Malfunction Photocatalytic operation does not activate during equipment operation (lamp does not light). Decision Conditions Supposed Faulty lamp Causes Faulty transformer Faulty PCB Troubleshooting Be sure to turn off power switch before connect or disconnect connector, Caution or parts damage may be occurred. - Page 32 SiE74-202 Troubleshooting Power supply voltage check Troubleshooting...
- Page 33 Troubleshooting SiE74-202 Troubleshooting...
-
Page 34: Part 3 Removal Procedure
SiE74-202 Part 3 Removal Procedure 1. Removal Procedure of MC401VE ............28 1.1 Removal of External Accessories............28 1.2 Removal of Ionizing Wire............... 30 1.3 Removal of Electrical Parts (Inverter Lamp).......... 31 1.4 Removal of PCB ..................34 1.5 Removal of Fan Motor ................36 1.6 Removal of Safety Switch.............. -
Page 35: Removal Procedure Of Mc401Ve
Removal Procedure of MC401VE SiE74-202 1. Removal Procedure of MC401VE Removal of External Accessories Procedure Warning Be sure to turn off all power supplies before disassembling work Step Procedure Points External appearance Remove front panel. Removal Procedure... - Page 36 SiE74-202 Removal Procedure of MC401VE Step Procedure Points Disengage hooks located at four corners of the filter to remove prefilter located at rear side of the front panel. Hold the ion filter (roll) case by the left and right side handles, and lift upward and out.
-
Page 37: Removal Of Ionizing Wire
Removal Procedure of MC401VE SiE74-202 Removal of Ionizing Wire Procedure Warning Be sure to turn off all power supplies before disassembling work Step Procedure Points Press the hook and lift the ionizing wire slightly upwards and pull it to remove. -
Page 38: Removal Of Electrical Parts (Inverter Lamp)
SiE74-202 Removal Procedure of MC401VE Removal of Electrical Parts (Inverter Lamp) Procedure Warning Be sure to turn off all power supplies before disassembling work Step Procedure Points Turn main body over, then remove back panel. Disconnect CN12 connector located at bottom left of main body rear side. - Page 39 Removal Procedure of MC401VE SiE74-202 Step Procedure Points Remove the photocatalyst filter retainer by unscrewing two screws. Remove the photocatalyst filter. Removal Procedure...
- Page 40 SiE74-202 Removal Procedure of MC401VE Step Procedure Points Remove inverter lamps. Removal Procedure...
-
Page 41: Removal Of Pcb
Removal Procedure of MC401VE SiE74-202 Removal of PCB Procedure Warning Be sure to turn off all power supplies before disassembling work Step Procedure Points Unscrew two screws at the both side of the main body. Disengage 6 hooks. Disengage the 6 hooks to remove display PCB. - Page 42 SiE74-202 Removal Procedure of MC401VE Step Procedure Points Remove the control PCB by unscrewing three screws. Removal Procedure...
-
Page 43: Removal Of Fan Motor
Removal Procedure of MC401VE SiE74-202 Removal of Fan Motor Procedure Warning Be sure to turn off all power supplies before disassembling work Step Procedure Points Remove back panel to remove fan securing nut. Caution When reassembling fan, match the D-cut direction of fan and shaft. -
Page 44: Removal Of Safety Switch
SiE74-202 Removal Procedure of MC401VE Removal of Safety Switch Procedure Warning Be sure to turn off all power supplies before disassembling work Step Procedure Points To remove safety switch, push it out from back side. Removal Procedure... - Page 45 Removal Procedure of MC401VE SiE74-202 Removal Procedure...
-
Page 46: Part 4 Reference Data
SiE74-202 Part 4 Reference Data 1. Wiring Diagram ..................40 1.1 MC401VE ....................40 2. Parts List ....................41 2.1 Parts Illustration..................41 2.2 Parts List....................42 Reference Data... -
Page 47: Wiring Diagram
Wiring Diagram SiE74-202 1. Wiring Diagram MC401VE Reference Data... -
Page 48: Parts List
SiE74-202 Parts List 2. Parts List Parts Illustration MC401VE Reference Data... -
Page 49: Parts List
Parts List SiE74-202 Parts List MC401VE Parts No. Parts Name Drwg. No. Parts Model Specification Q’ty/Unit Wiring Notes Symbol MC401VE 1127201 SIROCCO FAN ASS’Y 3P040480-2 1119541 PRE-FILTER 3P040468-1 1119565 AIR FILTER 3P037627-1 1119572 AIR FILTER 3P037627-2 1204038 ROLL FILTER ASS’Y... -
Page 50: Index
Tips for appropriate use .......... 6 Troubleshooting ............ 20 Names and Functions of Parts .........4 Names and Functions of The Indicator Lamps ..9 Wiring Diagram Names and Functions of The Operating Section ..8 MC401VE ............40 Operating Manual .............2 Optional Accessories ..........17 Index... - Page 51 SiE74-202 Index...
-
Page 52: Drawings & Flow Charts
Do not position the equipment on its side Parts Illustration or tilt it during use ..........v MC401VE ............41 Do not use in humid places or places Photocatalytic Operation does not Activate ..24 which might be wet, such as bathrooms ..iv Prevent combustibles (hair sprays, etc.), sparks... - Page 53 Daikin Europe N.V. is approved by LRQA for its Quality Daikin units comply with the European regulations that Management System in accordance with the ISO9001 guarantee the safety of the product. standard. ISO9001 pertains to quality assurance regarding design, development, manufacturing as well as to services related to the product.
Need help?
Do you have a question about the MC401VE and is the answer not in the manual?
Questions and answers
mi servirebbe un pezzo d ricambio dove posso trovarlo
Replacement ion filter rolls for the Daikin MC401VE can be obtained from your supplier.
This answer is automatically generated
Buona sera ,dove posso comperare un pezzo di ricambio di un MC401VE, a me servirebbe il codice E17 che e sul l'esploso