Table of Contents
Advertisement
Quick Links
Installation
and Operation
Manual
Congratulations on your choice - the choice of high quality heaters.
Compliance with this Manual guarantees
excellent quality and maximum service
life of the Grill'D brand heaters.
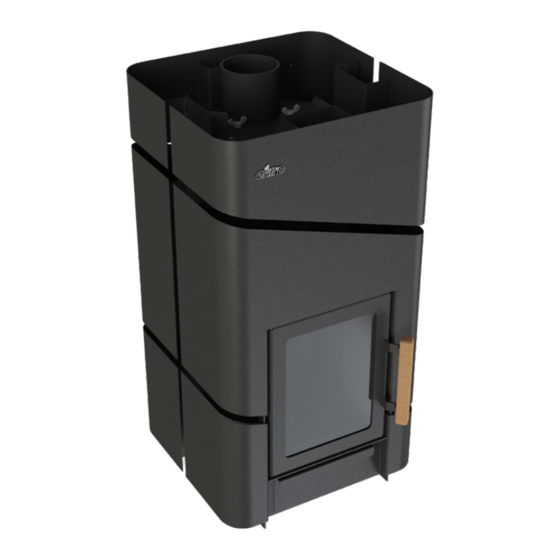
Zorro Short
Read the manual carefully before
commencing installation and operating
the heater. Keep it for future use.
Zorro Long
Advertisement
Table of Contents

Related Manuals for Grill'D Soul Stell


Summary of Contents for Grill'D Soul Stell
- Page 1 Installation and Operation Manual Congratulations on your choice - the choice of high quality heaters. Compliance with this Manual guarantees Read the manual carefully before excellent quality and maximum service commencing installation and operating life of the Grill’D brand heaters. the heater.
-
Page 2: Table Of Contents
CONTENTS Technical data GENERAL DATA OPERATION MANUAL 2.1. Safety measures 2.2. Heater design and operation 2.3. Heater commissioning 2.4. Combustion material 2.5. Stones for stone heater 2.6. Heater operation 2.7. Water in the sauna 2.8. Maintenance 2.9. Typical faults and troubleshooting methods INSTALLATION MANUAL 3.1. -
Page 3: Technical Data
Table 1. Technical data Note: heater dimensions are specified in Appendix 1 Zorro Short Zorro Long Specifications Steam room volume 6-16 6-16 Heater flue outlet connection diameter Mass of stones in the outer stone heater kg max Mass of stones in the inner stone heater kg max Stone size 70-150... -
Page 4: Operation Manual
2. OPERATION MANUAL Read this manual carefully before commencing installation and operating the heater. Keep it for future use. 2.1. Safety measures IMPORTANT! Consult your doctor about your health-related limitations. Bear in mind that prolonged exposure to hot sauna environment can be harmful. Avoid being in a heated sauna and steam bathing under the influence of alcohol, drugs, medications, etc. -
Page 5: Heater Commissioning
IMPORTANT! Unauthorized modification of the heater is prohibited. The Manufacturer reserves the right to make modifications to the design of the heater that do not impair its consumer properties. Zorro series A special feature of the Zorro heater is the possibility of installing a closed stone heater. In basic configuration it is a heater with a stone mesh. -
Page 6: Combustion Material
2.4. Combustion material Approved fuel types: dry wood, fuel briquettes without artificial binder resins with a maximum burning point less than 820 °C. Recommended fuel types: hardwood with a moisture content not more than 20 % with a maximum burning point less than 820 °C. The moisture contained in the firewood has a significant impact on the combustion process and the heater efficiency, hence to reduce the rate of soot formation on the walls of the chimney and the flues of the firebox, it is necessary to use the recommended fuel... - Page 7 2. Put 3-4 logs on the grate in such a way as to ensure free access of air to the combustion area, namely: lay the firewood loosely, adjust the ash drawer gap to be within 50 mm. In heater models of Short version firewood can be loaded vertically. 3.
-
Page 8: Water In The Sauna
In case there is a hot water tank, water shall be drained from the tank every time • after termination of the heater operation, if the room temperature drops below + 5 °С during interruptions of the heater operation. 2.7. Water in the sauna The water poured onto the stones shall be clean tap water. -
Page 9: Typical Faults And Troubleshooting Methods
frequently operated. Remove the destroyed stones and their parts from the stone heater, replace them with new ones. Before laying the stones, clean the heater with a wet cloth. The ash drawer shall be cleaned at all times before heating, so that the combustion air passing through the ash drawer to cool the grate, thereby increasing its service life. -
Page 10: Installation Manual
4) Fault: The operating mode of the heater cannot be controlled during wind /heater firing/ low chimney draft during operation. Smoke partly escapes through the firebox door. Smoke enters the sauna. Possible cause: • Blockage in the chimney or flue channels of the heater. •... - Page 11 Figure 1. Self-ventilation � � А А 50-100 50-100 А ɸ50-100 Естественная вентиляция Естественная вентиляция Figure 2. Mechanical exhaust ventilation � � А ɸ50-100 А А 50-100 50-100 Естественная вентиляция Естественная вентиляция 3.1.2. Sauna floor protection Figure 3. A) Concrete floor without finish The heater can be installed on the floor without any special precautions, if the concrete thickness is not less than 60 mm.
- Page 12 Figure 3. Sauna floor protection min 60 mm C) Floor made of combustible materials. You can use special racks to protect the floor under the heater or arrange an understructure rack consisting of layers of heat-insulating, non-combustible, heat-reflecting materials of sufficient thickness.
-
Page 13: Heater Installation
(E) - Distance to the walls made of non-combustible materials. (F) - Distance to the walls made of non-combustible materials in the alcove. The gap between the heater and the walls made of non-combustible materials (E, F) is necessary for air circulation. Table 2. - Page 14 The procedure for installing the pipe at an angle: 1. Install the heater on the place of permanent operation. 2. Install a water tank, if any. Keep in mind the requirements of its operations manual. 3. A valve can be installed on the connecting pipe, if additional adjustment of draft is necessary.
- Page 15 Figure 5. Stone chimney connection Figure 6. Steel chimney connection...
-
Page 16: Warranty
4. WARRANTY The warranty period for the Product is 12 months from the date of purchase by the Consumer, but not more than 24 months from the date of shipment of the Product to the Dealer, with the filled-in marks on the last page of this manual, namely: date of sale, seller’s signature, store stamp. -
Page 17: Appendix 1. Heater Dimensions
APPENDIX 1. Heater dimensions Note: dimensions are in millimeters ɸ115 Zorro Short... - Page 18 665-765 180-280 ɸ115 Zorro long...
-
Page 19: Appendix 2. Heater Structural Elements
Zorro APPENDIX 2. Heater structural elements 1 – Heater firebox 2 – Cladding 3 – Door 4 – Decorative frame 5 – Ash drawer 6 – Heating flue 7– Heater flue outlet connection 8 – Cap 9 – Closed stone heater 11 –... -
Page 20: Appendix 3. Internal Design And Operation Of Heaters
APPENDIX 3. Internal design and operation of heaters Zorro heater with cap Zorro heater with a closed stone heater... -
Page 21: Appendix 4. Heater Parts Installation
APPENDIX 4. Heater parts installation IMPORTANT! The works shall be carried out in an extremely careful way, eliminating the possibility of damage to the paint coating. Grate The grate consists of four separate plates. A separate seat is provided for each plate. Ash drawer Place of installation and installation method for the ash drawer are shown in... - Page 22 Telescopic heating flue Note: correct installation of the telescopic part of the heating flue precludes air inflow through the gap between flue parts, which allows maintaining the process of burning within the prescribed limits. Procedure: 1) Unscrew the transport self-tapping screws in the upper part of the heating flue, take its telescopic part out.
- Page 23 5.2) Fill the gap between the telescopic and fixed parts with the sealant while compacting the sealant with an elastic applicator (for example, a rubber one) of a necessary size. Note: in case the surface of the flue was not properly cleaned of leftover sealant after application, then it can peel off after hardening and further heating of the heater.
- Page 24 Closed stone heater The following is necessary for installing the closed stone heater: 1. Unscrew the winged nuts that are holding the heater cap. Remove the baffle plate included into the package. х6 2. Install the baffle plate included into the closed stone heater package on supports all the way to the back wall of the heater.
- Page 25 плита отбойника 3. Lower the inner stone heater into the top plate hole onto the corresponding support, having previously treated the hole with the thermal sealant. 4. Install the funnel and tighten the winged nuts. Каменку опустить в отверстие верхней плиты до соответствующей опоры. Предварительно необходимо обработать отверстие в верхней плите термостойким герметиком. Каменку...
- Page 26 Decorative screen Note: install the screen only after installation of the heater on the place of permanent operation. Procedure: 1) Match the mounting holes on the screen and on the heating flue frame; 2) Fix the screen with the self-tapping screws (included into the contents of delivery). х5 х8...
-
Page 27: Appendix 5. Delivery Packages
APPENDIX 5. Delivery packages Zorro Short Zorro Long Delivery package Heater firebox with metal cladding Door Ash drawer Grate plate M8 winged nut Decorative frame Self-tapping screw for the screen Metal self-tapping screw for 8 mm wrench Installation and Operation Manual... - Page 28 QCD mark: _________________________________________________________________ (Name, signature, stamp) Date of sale: ________________________________________________________________ (Date, Seller’s signature, store stamp) I have read and understood this manual: ________________________________________ (Buyer’s signature) IMPORTANT! The Manufacturer disclaims warranty liability in the absence of a store stamp.
Need help?
Do you have a question about the Soul Stell and is the answer not in the manual?
Questions and answers