
Subscribe to Our Youtube Channel
Related Manuals for Kleenmaid CCT3010


Summary of Contents for Kleenmaid CCT3010
- Page 1 Instructions for use and warranty details To register your warranty or make a warranty claim, scan this QR code: Ceramic Cooktop Model.: CCT3010...
- Page 2 Once installation is complete, please read this instruction manual carefully and get to know the controls and the features of your new Kleenmaid appliance. These simple instructions will enable you to achieve excellent results from the very first time you use it.
-
Page 3: Table Of Contents
Content Safety Warnings..............4 Installation ................4 Electrical Shock Hazard ..........4 Cut Hazard ............. 4 Important Safety Instructions ........4 Operation and Maintenance ............5 Electrical Shock Hazard ..........5 Health Hazard ............5 Hot Surface Hazard ..........5 Cut Hazard ..............5 Important Safety Instructions ........6 Product Introduction .............8 Top View ...................8 Control Panel ................8... -
Page 4: Safety Warnings
Your safety is important to us. Please read this information before using or installing your cooktop. The latest version of this manual is available on our website. (See back cover for details.) INSTALLATION • Disconnect the appliance from the mains electricity supply before carrying out any work or maintenance on it. -
Page 5: Cut Hazard
OPERATION and MAINTENANCE • Do not cook on a broken or cracked cooktop. If the cooktop surface should break or crack, switch the appliance off immediately at the mains power supply (wall switch) and contact a qualified technician. • Switch the cooktop off at the wall before cleaning or maintenance. -
Page 6: Important Safety Instructions
Important Safety Instructions • Never leave the appliance unattended when in use. Boilover causes smoking and greasy spill that may ignite. • Never use your appliance as a work or storage surface. • Never leave any objects or utensils on the appliance. •... - Page 7 •This appliance is intended to be used in household and similar applications such as: -staff kitchen areas in shops, offices and other working environments; -farm houses; -by clients in hotels, motels and other residential type environments; -bed and breakfast type environments. •WARNING: The appliance and its accessible parts become hot during use.
-
Page 8: Product Introduction
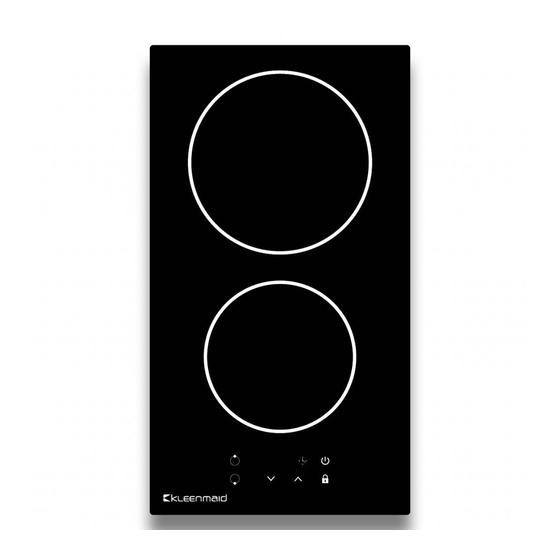
Product Overview Top View 1. Max. 1200 W zone 2. Max. 1800 W zone 3. Glass plate 4. Control panel Control Panel 1. ON/OFF Key 2. Power / Timer Regulating Keys 3. Cooking Zone Selection Key 4. Timer Function Key 5. -
Page 9: Operation Of Product
Operation of Product Using the Touch Controls • The controls respond to touch so you don’t need to apply any pressure. • Use the ball of your finger, not its tip. • You will hear a beep each time a touch is registered. •... -
Page 10: Using Your Ceramic Cooktop
Using your Ceramic Cooktop Start Cooking • After power on, a single beep sounds, and all the indicators light up for 1 second then go out, indicating that the ceramic cooktop has entered the state of standby mode. key, all the displays will 1. -
Page 11: Safety Features/Locking The Controls
Safety Features Locking the Controls • You can lock the controls to prevent unintended use (for example children accidentally turning the cooking zones on). • When the controls are locked, all the controls except the ON/OFF key are disabled. To lock the controls key. -
Page 12: Using The Timer
Using the Timer The timer can be used in two ways: • You can use it as a minute minder. In this case, the timer will not turn any cooking zones off when the set time expires. • You can set it to turn one or more cooking zones off after the set time expires. Note: The timer can be set for up to 99 minutes. - Page 13 Setting the timer to turn off one cooking zone 1.Touch the cooking zone selection key of the zone for which you want to set the timer (e.g. zone 2). 2.Touch the timer key and the timer display will start flashing and will show “30”.
- Page 14 Setting the timer to turn off more than one cooking zone 1. If the timer is used for more than one cooking zone, the timer will show the shortest time (e.g. Zone 1 has a set time of 3 minutes and zone 2 has a set time of 6 minutes so the timer display shows “3”.) NOTE: A flashing red dot next to a power level display means the timer display is showing the remaining set time for that cooking zone.
-
Page 15: Cooking Guidelines
Cooking Guidelines Cooking Tips • When food comes to the boil, reduce the power setting. • Using a lid will reduce cooking times and save energy by retaining the heat. • Minimise the amount of liquid or fat to reduce cooking times. •... -
Page 16: Care And Cleaning
4. Wipe the area completely dry with a paper towel. 5. Switch the power to the cooktop back on. Technical Specification Cooktop CCT3010 Cooking Zones 2 Zones Supply Voltage 220-240V~ Installed Electric Power 2745-3267W Product Size L×W×H(mm) 288x520x52 Building-in Dimensions A×B (mm) -
Page 17: Troubleshooting Guide
(see back cover of this manual for details). When booking a service please provide your Model No: CCT3010 and the individual Serial Number of your appliance. This is found on the rating label on the underside of the cooktop or on your appliance paperwork. -
Page 18: Installation
NOTE: Before making preparations for or commencing installation, the installer should refer to the current online version of the User Manual, which is available on the Kleenmaid website (see back cover for details). Benchtop Preparation Cut out the work surface according to the sizes shown in the drawing. For the purpose of installation and use, a minimum of 50mm space shall be preserved around the hole. -
Page 19: Locating The Fixing Brackets
Locating the Fixing Brackets The unit should be placed on a stable, smooth surface (use the packaging as padding). Do not apply force onto the controls protruding from the cooktop. Fix the cooktop on the work surface by attaching the four brackets to the bottom of cooktop after checking placement within the cutout (see picture). -
Page 20: Connecting To The Mains Power Supply
Connecting to the Mains Power Supply The power supply should be connected in compliance with the relevant standard, or a single-pole circuit breaker. The method of connection is shown below. 1. If the supply cord is damaged or needs replacing, it must be replaced by the manufacturer, its service agent or similarly qualified technician using the proper tools in order to avoid a hazard. - Page 21 The benefits given to you under this Kleenmaid Warranty are in addition to other rights and remedies to which you may be entitled under the Australian Consumer Law in relation to the Product to which this Kleenmaid Warranty relates. Subject to the conditions below, the Product is warranted by Kleenmaid and/or its agents to be free from defects in materials and workmanship for the Warranty Period for normal Domestic Use.
-
Page 22: Warranty
13. Kleenmaid accepts no liability for items that are lost, damaged, or stolen as a result of freight, transport or storage. If you are required to transport the Product to an authorised service centre, you must ensure that it is securely packed and insured. - Page 23 This page intentionally left blank.
- Page 24 Other products available in the Kleenmaid range of appliances Washing machines Clothes dryers Dishwashers Ovens Cooktops Steam ovens Microwave ovens Built in espresso coffee machines Rangehoods Freestanding ovens Refrigerators & Freezers Beverage Serving Cabinets Water Dispensers Vacuum Cleaners Compass Capital Services Pty Limited...
Need help?
Do you have a question about the CCT3010 and is the answer not in the manual?
Questions and answers