Table of Contents
Advertisement
Quick Links
Advertisement
Table of Contents

Subscribe to Our Youtube Channel
Related Manuals for KEENCUT Excalibur 3S


Summary of Contents for KEENCUT Excalibur 3S
- Page 1 Excalibur 3S installation manual The world’s finest cutting machines www.keencut.com +44 (0) 1536 263158 sales@keencut.co.uk (UK HQ) Scan the QR code or +1 (716) 748 6203 sales@keencut.com (US sales) click here to view this document online > Page 1 of 35...
-
Page 2: Table Of Contents
Excalibur 3S installation manual Contents 1. Before you start ..............................1.1 Assembly time ..............................1.2 Be careful when lifting ............................1.3 Components ..............................1.4 Tools Included ..............................1.5 Tools not included ............................. 1.6 Symbols and icons ............................2. Installation ................................. -
Page 3: Before You Start
Excalibur 3S installation manual 1. Before you start 1.1 Assembly time You will need approximately 1 hour to install and calibrate your cutter The world’s finest cutting machines www.keencut.com +44 (0) 1536 263158 sales@keencut.co.uk (UK HQ) Scan the QR code or +1 (716) 748 6203 sales@keencut.com (US sales) -
Page 4: Be Careful When Lifting
Excalibur 3S installation manual 1.2 Be careful when lifting To prevent injury and damage, lift the box and the machine with 2 people. NOTE: * When lifting the main body from the box, DO NOT lift using the black handles on the cutters. -
Page 5: Components
Excalibur 3S installation manual 1.3 Components The world’s finest cutting machines www.keencut.com +44 (0) 1536 263158 sales@keencut.co.uk (UK HQ) Scan the QR code or +1 (716) 748 6203 sales@keencut.com (US sales) click here to view this document online > Page 5 of 35... - Page 6 Excalibur 3S installation manual The world’s finest cutting machines www.keencut.com +44 (0) 1536 263158 sales@keencut.co.uk (UK HQ) Scan the QR code or +1 (716) 748 6203 sales@keencut.com (US sales) click here to view this document online > Page 6 of 35...
- Page 7 Excalibur 3S installation manual The world’s finest cutting machines www.keencut.com +44 (0) 1536 263158 sales@keencut.co.uk (UK HQ) Scan the QR code or +1 (716) 748 6203 sales@keencut.com (US sales) click here to view this document online > Page 7 of 35...
- Page 8 Excalibur 3S installation manual NOTE: Free Standing Kit (Part L) sold separately The world’s finest cutting machines www.keencut.com +44 (0) 1536 263158 sales@keencut.co.uk (UK HQ) Scan the QR code or +1 (716) 748 6203 sales@keencut.com (US sales) click here to view this document online >...
- Page 9 Excalibur 3S installation manual The world’s finest cutting machines www.keencut.com +44 (0) 1536 263158 sales@keencut.co.uk (UK HQ) Scan the QR code or +1 (716) 748 6203 sales@keencut.com (US sales) click here to view this document online > Page 9 of 35...
-
Page 10: Tools Included
Excalibur 3S installation manual 1.4 Tools Included The world’s finest cutting machines www.keencut.com +44 (0) 1536 263158 sales@keencut.co.uk (UK HQ) Scan the QR code or +1 (716) 748 6203 sales@keencut.com (US sales) click here to view this document online >... -
Page 11: Tools Not Included
Excalibur 3S installation manual 1.5 Tools not included The world’s finest cutting machines www.keencut.com +44 (0) 1536 263158 sales@keencut.co.uk (UK HQ) Scan the QR code or +1 (716) 748 6203 sales@keencut.com (US sales) click here to view this document online >... -
Page 12: Symbols And Icons
Excalibur 3S installation manual 1.6 Symbols and icons Muscle = do this firmly Feather = do this gently Be careful when lifting The world’s finest cutting machines www.keencut.com +44 (0) 1536 263158 sales@keencut.co.uk (UK HQ) Scan the QR code or +1 (716) 748 6203 sales@keencut.com (US sales) -
Page 13: Installation
Excalibur 3S installation manual 2. Installation 2.1 Adjusting the legs The first stages of assembly are carried out with the machine laying on the floor. NOTE: When lifting the main body from the box do not lift using the black handles on the cutters. DO NOT untie balance weight cord at this stage. -
Page 14: Preparing To Fit The Squaring Arm
Excalibur 3S installation manual 2.2 Preparing to fit the squaring arm Move the lower cutting head to the middle of the main body. Remove one screw from each leg, using 5mm Allen (hex) key. The world’s finest cutting machines www.keencut.com +44 (0) 1536 263158 sales@keencut.co.uk (UK HQ) - Page 15 Excalibur 3S installation manual Two sets of hexagon headed bolts, washers and nuts from the main body using 17mm spanners. Remove small screw and two washers from the back of the squaring arm (part B)using the 3mm Allen (hex) key. (Right hand side ONLY).
-
Page 16: Fitting The Squaring Arm
Excalibur 3S installation manual 2.3 Fitting the squaring arm Slide the squaring arm in from the left hand side through the gap in the main body and align the corresponding screw holes. Fit the two hexagon bolts from the back of the main body, fit the washers and nuts finger tight only. - Page 17 Excalibur 3S installation manual Fit the screws through the squaring arm into the leg using the 5mm Allen (hex) key, do not tighten fully. Do this gently Refit the squaring adjuster block by firstly sliding the steel bar into the opening in the squaring arm, then align the heads of the two screws in the leg to fit the top and bottom holes in the adjuster block.
- Page 18 Excalibur 3S installation manual Tighten the two hexagon bolts and screws. Do this firmly Untie and release the balance weight cord, ensure the clamp is closed by pushing down on the clamp handle then slide the both cutting heads to the bottom.
-
Page 19: Fitting The Support Arms & Wall Mounted Bracket
Excalibur 3S installation manual 2.4 Fitting the support arms & wall mounted bracket Get help to slowly lift the machine and lean it so the front faces towards the wall. Carefully place a scrap of card or board between the top end of the machine and the wall to prevent any damage. - Page 20 Excalibur 3S installation manual Fit the two screws to secure the legs at the top of the main body using the 6mm Allen (hex) key, tighten both screws fully. Tighten the other two adjacent screws. Do this firmly NOTE: The screws fit into special grooves in the underside of the supports. The grooves have teeth on their sides to match the teeth of the screw thread, the screw can be fitted in the groove anywhere along its length but be careful to make sure the screw is kept perpendicular to the Support and not screwed in out of line.
- Page 21 Excalibur 3S installation manual If a free standing kit is to be fitted to the machine proceed directly to Fitting the optional free standing kit > Fit the wall mounting bracket to the top of the main body, fasten the screws finger tight only.
-
Page 22: Attaching Machine To Wall With Mounting Bracket
Excalibur 3S installation manual 2.5 Attaching machine to wall with mounting bracket If you are going to fit the free standing kit (optional) proceed to Fitting the optional free standing kit > Ensure the wall is stable and use the appropriate fixings. - Page 23 Excalibur 3S installation manual Move the machine away and remove the wall mounting bracket. Be careful when lifting Attach the bracket to the wall in the marked position with appropriate fixings then reposition and fasten the machine to the bracket.
-
Page 24: Fitting The Optional Free Standing Kit
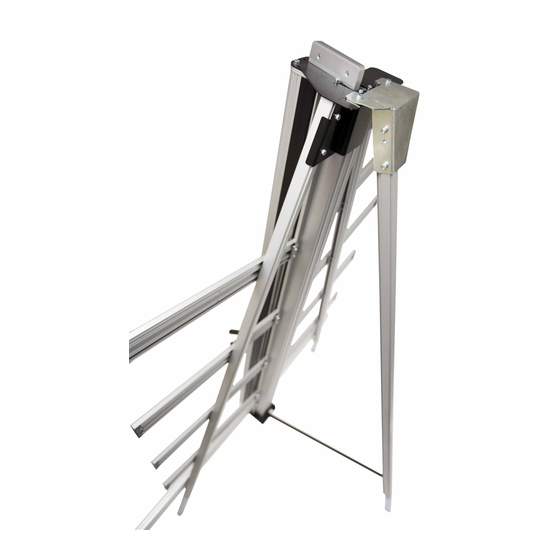
Excalibur 3S installation manual 2.6 Fitting the optional free standing kit NOTE: The free standing kit is an optional extra and does not come packed with the main machine. Extend the telescopic leg to the same length as the front legs less 12cm (5”). - Page 25 Excalibur 3S installation manual Swing down the stay and attach the fixing block to the back of the main body, tighten all three screws on the stay (using the 5mm & 6mm Allen (hex) keys). Extend the telescopic leg so the machine stands evenly.
-
Page 26: Squaring And Calibration
Excalibur 3S installation manual 3. Squaring and Calibration 3.1 Checking the machine for squareness For your machine to produce accurate square cuts the main body needs to be set so that is is 90° to the squaring arm, for the following procedure you will need a piece of card or mount board at least 60cm x 100cm (2’ x 3’). The larger the board the more accurate you can set the machine. - Page 27 Excalibur 3S installation manual Unclamp and turn the board around (like the page in a book) and place it back in the machine so the same edge is still on the squaring arm but do not clamp it. Align and engage the blade so it enters the previous made cut at the bottom edge of the board.
-
Page 28: Adjusting The Squareness
Excalibur 3S installation manual 3.2 Adjusting the squareness NOTE: Before making any adjustments carry out the squareness check as described in Checking the machine for squareness> It is assumed that the board used for the test is still clamped in the machine. - Page 29 Excalibur 3S installation manual Use a 17mm spanner to slacken the left hand nut (A) joining the squaring arm to the main body, make sure the right hand nut (B) is tight Release the clamp and position the board such that the blade is held in the cut on the bottom edge of the board.
- Page 30 Excalibur 3S installation manual Repeat the squareness check. Tighten the screws using a 5mm Allen (hex) key and a 17mm spanner to tighten nut A once the squareness has been adjusted. The world’s finest cutting machines www.keencut.com +44 (0) 1536 263158 sales@keencut.co.uk (UK HQ)
-
Page 31: Calibrating The Vertical Scale
Excalibur 3S installation manual 3.3 Calibrating the vertical scale Trim the bottom of the scale at zero with scissors Remove the paper backing tape and carefully place the rule adjacent to its groove in the main body and with the zero end resting inside the material channel of the squaring arm. -
Page 32: Calibrating The Squaring Arm Scales
Excalibur 3S installation manual 3.4 Calibrating the squaring arm scales The top edge of the squaring arm slides left to right to enable calibration. Use the 3mm Allen (hex) key to loosen the screw in the back of the squaring arm if adjustment is necessary. - Page 33 Excalibur 3S installation manual Cut the card and measure, adjust the sliding scale so that the production stop indicates the measured size. Repeat the process for the other side of the machine. The world’s finest cutting machines www.keencut.com +44 (0) 1536 263158 sales@keencut.co.uk (UK HQ)
-
Page 34: Using Your Machine
Excalibur 3S installation manual 4. Using your machine 4.1 Register your machine Registering your SmartFold machine will activate your 5 year guarantee. Register your cutter to activate your guarantee > The world’s finest cutting machines www.keencut.com +44 (0) 1536 263158 sales@keencut.co.uk (UK HQ) -
Page 35: User Guide
Excalibur 3S installation manual 4.2 User guide See the Excalibur 3S User Guide for advice on cutting techniques, using the different cutting heads and care and maintenance of your machine. Visit the Excalibur 3S User Guide > The world’s finest cutting machines www.keencut.com...
Need help?
Do you have a question about the Excalibur 3S and is the answer not in the manual?
Questions and answers