Table of Contents
Advertisement
Quick Links
Advertisement
Table of Contents

Subscribe to Our Youtube Channel
Related Manuals for KEENCUT Excalibur 6000


Summary of Contents for KEENCUT Excalibur 6000
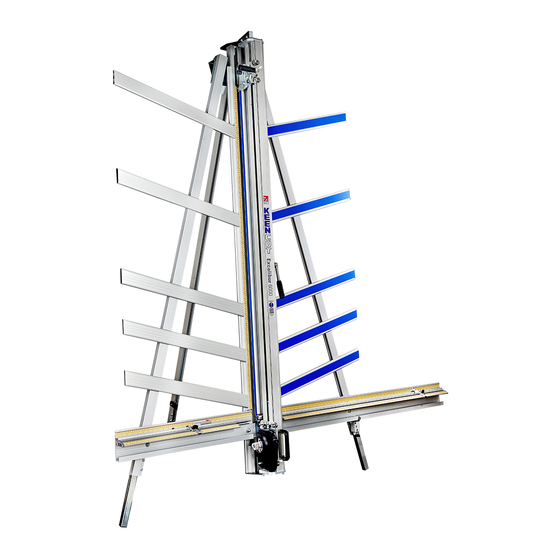
- Page 1 Excalibur 6000 user guide The world’s finest cutting machines www.keencut.com +44 (0) 1536 263158 sales@keencut.co.uk (UK HQ) Scan the QR code or +1 (716) 748 6203 sales@keencut.com (US sales) click here to view this document online > Page 1 of 37...
-
Page 2: Table Of Contents
Excalibur 6000 user guide Contents 1. Introduction ................................. 1.1 The Excalibur 6000 user guide ..........................2. Get to know your cutter ............................2.1 Using the measuring stops ............................ 2.2 Using the clamp ..............................2.3 The multi-tool cutter and the twin wheel cutter ...................... -
Page 3: Introduction
Excalibur 6000 user guide 1. Introduction 1.1 The Excalibur 6000 user guide This User Guide for the Excalibur 6000 gives advice on cutting techniques, care and maintenance of your machine. Before using your machine make sure that you have installed and calibrated it correctly. -
Page 4: Get To Know Your Cutter
Excalibur 6000 user guide 2. Get to know your cutter 2.1 Using the measuring stops The right and left hand measuring stops enables the operator to slide in and position the materials to be cut at a set length, as decided by the fixed position of the stop. - Page 5 Excalibur 6000 user guide Rotate the black knob on the measuring stop clockwise to fasten the stop and set the material (to be cut) against the measuring stop. The world’s finest cutting machines www.keencut.com +44 (0) 1536 263158 sales@keencut.co.uk (UK HQ)
-
Page 6: Using The Clamp
Excalibur 6000 user guide 2.2 Using the clamp The clamping system enables the operator to control the grip pressure by means of an integral friction brake, that maintains the clamping force at the pressure applied by the operating lever. Soft materials can be held firmly without sustaining damage and solid materials are held rigidly without movement. -
Page 7: The Multi-Tool Cutter And The Twin Wheel Cutter
2.3 The multi-tool cutter and the twin wheel cutter The Excalibur 6000 is fitted with two Cutting Heads running on two vertical stainless steel tracks. The lower or multi-tool cutter head has a rotating turret arrangement where any one of the three cutting tools can be selected: 1) Cutting Blade –... - Page 8 Excalibur 6000 user guide The indicator label on the turret handle, that faces the user, shows which cutter is active. The world’s finest cutting machines www.keencut.com +44 (0) 1536 263158 sales@keencut.co.uk (UK HQ) Scan the QR code or +1 (716) 748 6203 sales@keencut.com (US sales)
-
Page 9: Cutting Using The Ratchet Latch
Excalibur 6000 user guide 2.4 Cutting using the ratchet latch A unique feature of the Excalibur is the ‘ratchet latch’. This enables thick dense materials such as PVC foam board to be cut easily in stages. Count the number of ‘clicks’ to position the blade just below the surface of the material to make your first cut, and then add an extra ‘click’... -
Page 10: Using The Cutting Blade
Excalibur 6000 user guide 2.5 Using the cutting blade Select the cutting blade position on the turret and clamp the material in the machine. Press to engage the cutter. Draw the cutter down to the bottom of the machine where it will disengage automatically. -
Page 11: Using The Cutting Blade Support Plates
Excalibur 6000 user guide 2.6 Using the cutting blade support plates The two support plates either side of the blade are designed to give maximum rigidity of the blade when cutting hard or dense materials. To adjust the support plates, swing down the cutter guard by undoing the black locking knob (on the guard) facing towards the operator. - Page 12 Excalibur 6000 user guide For cutting most materials the support plates can be set about 12mm (1/2”) from the blade tip The world’s finest cutting machines www.keencut.com +44 (0) 1536 263158 sales@keencut.co.uk (UK HQ) Scan the QR code or +1 (716) 748 6203 sales@keencut.com (US sales)
-
Page 13: Using The Scoring Blade
Excalibur 6000 user guide 2.7 Using the scoring blade CAUTION: ALWAYS USE HAND AND EYE PROTECTION WHEN SNAPPING PLASTIC NOTE : The scoring blade is designed to score acrylics, Plexiglas and other similar rigid plastics. Trials should be carried out on scrap materials first to ensure you obtain the required standard of cut. - Page 14 Excalibur 6000 user guide Position and depress the cutting head so the blade touches the plastic at the top. Apply thumb pressure to the cutter and draw the blade down the material in one continuous motion. Remove the plastic from the machine and snap it by hand.
-
Page 15: Using The Glass Cutter
Excalibur 6000 user guide 2.8 Using the glass cutter CAUTION: ALWAYS WEAR EYE PROTECTION AND GLOVES WHEN CUTTING GLASS Select the glass cutting position on the turret and place the glass on the machine from the right hand side. Clamp the glass lightly in the machine. - Page 16 Excalibur 6000 user guide Gently draw the cutter onto the glass and down to the bottom of the machine in one gentle smooth and continuous motion where it will disengage automatically. Check the score line, as it should be very faint and continuous.
- Page 17 Excalibur 6000 user guide To break the glass, apply firm pressure to the left hand side of the score line adjacent to the top edge of the glass. The glass should break easily, however if it resists breaking or feels springy, check the spring pressure setting.
-
Page 18: Using The Twin Wheel Cutter
Excalibur 6000 user guide 2.9 Using the twin wheel cutter The twin wheel cutter is mounted on the upper cutting head and is used for cutting rigid materials such as medium density fibreboard (MDF, also known as SBS) and standard hardboard up to 3mm (1/8”) or harder materials like high density fibreboard (HDF) up to 2mm (1/16”). - Page 19 Excalibur 6000 user guide 3) The board trying to turn under the clamp when being cut (also check the clamp pressure). The world’s finest cutting machines www.keencut.com +44 (0) 1536 263158 sales@keencut.co.uk (UK HQ) Scan the QR code or +1 (716) 748 6203 sales@keencut.com (US sales)
-
Page 20: Maintenance
3. Maintenance 3.1 Clean your machine Keencut machines are designed to be virtually maintenance free, however we do recommend regular cleaning Do not wipe the Squaring Arm channels or remove any debris with fingers, as it may contain sharp particles such as glass. -
Page 21: Lubrication
Excalibur 6000 user guide 3.2 Lubrication NOTE: It is important to use the correct lubrication (defined below for the respective areas) as ordinary oils and solvents can adversely affect the materials. NOTE: Do not use penetrating oils (i.e. WD-40) for lubrication on this machine. - Page 22 Excalibur 6000 user guide Balance weight: Silicon Lubricant sprayed in from the top of the balance weight opening whilst the Twin Wheel Cutting Head is parked at the top of the machine. Lubrication frequency: After 2 weeks of use and then every month thereafter.
-
Page 23: Adjusting The Clamp Pressure
Excalibur 6000 user guide 3.3 Adjusting the clamp pressure The pressure of the clamp is in relation to the amount of pressure applied to the operating handle, however in time the maximum clamping pressure can reduce due to wear on the friction block (hidden within the machine). -
Page 24: Adjusting The Clamp Alignment
Excalibur 6000 user guide 3.4 Adjusting the clamp alignment When cutting tough materials it is essential that the clamping system operates at its’ optimum, the moving clamp bar must press evenly onto the board being cut and not clamp it only at the top or bottom. - Page 25 Excalibur 6000 user guide The ‘adjuster’ is the hexagonal bar between the two nuts, and by turning it with the spanner it alters the clamps alignment with the back of the machine. Rotate the adjuster whilst observing the clamp from the side and bring the clamp into parallel.
-
Page 26: Changing The Blue Support Boards
Excalibur 6000 user guide 3.5 Changing the blue support boards Replacement Blue Support Boards are available from Keencut or your distributor. The Blue Support Boards on the Main Body and Support Arms offer an element of protection to materials being cut, in particular coated glass surfaces. - Page 27 Excalibur 6000 user guide Remove the protective film. NOTE: Blue Support Boards on the support arms should naturally be raised compared to those on the main body. Removing from the main body: Loosen the two screws using the 6mm Allen key (hex key) on the mount plate of the machine, as indicated.
- Page 28 Excalibur 6000 user guide You will feel the balance weight cord (A) working against you and try to twist the slideway back, open the slideway carefully and watch that the balance weight cord (A) does not become trapped. Tighten the bottom Allen screw (B), as shown, to hold the slideway open in the maintenance position.
- Page 29 Excalibur 6000 user guide Peel the release paper off the double sided tape and align the bottom face of the top board. Ensure that the flat face identified is also aligned with the face of the Main Body. Proceed to lower the top Blue Support Board onto the Main Body, starting from the aligned edges.
-
Page 30: Changing The Cutting Blade
Excalibur 6000 user guide 3.6 Changing the cutting blade Replacement medium utility blades are available from Keencut or your distributor. Move the multi-tool cutter to a comfortable height and lock it in position using the white nylon locking screw. Ensure that this is done tightly. - Page 31 Excalibur 6000 user guide To change the cutting blade, loosen the blade clamping screw to release the blade. Change or turn over the blade, insert it back into the turret as far as it will go. At this point the position of the blade support plates can be adjusted to suit the thickness of material being cut, and further tightening of the screw will clamp the blade in position.
-
Page 32: Changing The Scoring Blade
Excalibur 6000 user guide 3.7 Changing the scoring blade Replacement medium utility blades are available from Keencut or your distributor. Move the multi-tool cutter to a comfortable height and lock it in position using the white nylon locking screw. Ensure that this is done tightly. - Page 33 Excalibur 6000 user guide Release the blade clamping screw. Eject the medium duty utility blade using the black ejector pin. Replace the blade to the right of the clamping plate, push the blade in as far as it will go, and tighten the blade clamping screw.
-
Page 34: Changing The Glass Cutting Wheel
Excalibur 6000 user guide 3.8 Changing the glass cutting wheel Replacement wheels are available from Keencut or your distributor. Move the multi-tool cutter to a comfortable height and lock it in position using the white nylon locking screw. Ensure that this is done tightly. - Page 35 Excalibur 6000 user guide A small screwdriver or piece of stiff wire (opened paperclip) can be used to push the edge of the triangular clip and rotate it out of the groove. Pull the clip to remove the wheel with it. Then replace it with the new wheel and clip assembly.
-
Page 36: Changing The Twin Wheel Cutter
Excalibur 6000 user guide 3.9 Changing the twin wheel cutter Replacement twin wheel cutters are available from Keencut or your distributor. Move the twin wheel cutter to the top of the machine (adjacent to the open channel) and lock it in position using the white nylon locking screw. - Page 37 Excalibur 6000 user guide Slide the twin wheel cutter out through the open channel in the main body and lift it out. Reverse the procedure to fit the replacement twin wheel cutter, ensuring it is properly located flat against the Cutting Head before fastening the screw with the 6mm Allen Key.
Need help?
Do you have a question about the Excalibur 6000 and is the answer not in the manual?
Questions and answers