Table of Contents
Advertisement
Quick Links
Sabre Series 2
Inspired Design – Precision Engineering
USER INSTRUCTIONS
Thank you for choosing the Keencut Sabre Series 2. Every effort
has been made to bring you a precision engineered product
with the promise of many years of valuable service. In order to
obtain maximum benefit from your machine please read these
instructions carefully. For advice and assistance or replacement
parts please contact your distributor or Keencut.
Keencut Limited, Baird Road, Willowbrook Industrial Estate, Corby, Northants, ENGLAND NN17 5ZA.
Telephone: 01536 263158 Fax: 01536 204227 E-mail: info@keencut.co.uk
www.keencut.co.uk
Advertisement
Table of Contents

Summary of Contents for KEENCUT Sabre 2 Series
- Page 1 For advice and assistance or replacement parts please contact your distributor or Keencut. Keencut Limited, Baird Road, Willowbrook Industrial Estate, Corby, Northants, ENGLAND NN17 5ZA. Telephone: 01536 263158 Fax: 01536 204227 E-mail: info@keencut.co.uk www.keencut.co.uk...
-
Page 2: Table Of Contents
Contents Contents Safety & Preparation Installation Recommendations Safety Set-up Blades and bldae holders Changing the blade holder Inserting the GRAPHIK Blade and setting the Depth Operation Cutting, Scoring hard plastics, Cutting PVC foamboards The Aluminium Squaring Arm (Optional) Using the Rotary Cutter (Optional) Changing the Rotary Blade Maintenance Cleaning and Lubrication - (warning note) -
Page 3: Safety & Preparation
Safety & Preparation CHECKING THE FLAT SURFACE (TABLE TOP) Please note! It is essential that the cutter is used on a flat surface to cut accurately. A warped or bowed table top can induce a twist in the Cutter Bar resulting in a bowed cut. -
Page 4: Set-Up
13mm (0.5”). A range of blade holders are available to fit the Sabre, including the optional Rotary blade holder for cutting textiles and other flimsy materials. Please refer to the Keencut website for up to date details on the others. -
Page 5: Changing The Blade Holder
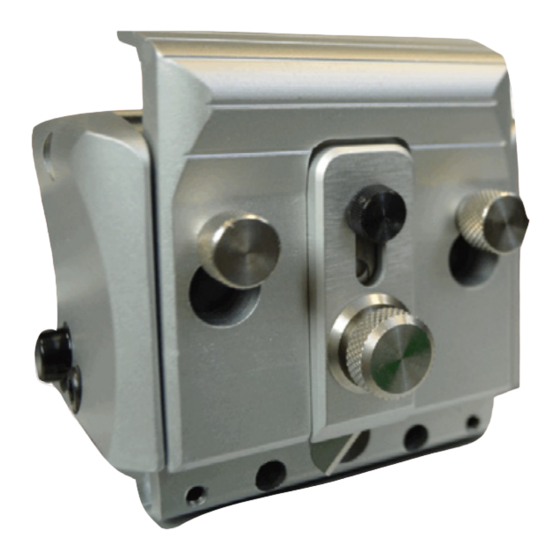
Set-up CHANGING THE BLADE HOLDER Before removing a blade holder make sure the blade has been removed or guarded (dependant on type). Loosen both of the small knurled knobs by about two turns, raise the blade holder to align the knobs with holes in the blade holder then pull towards you to release. Reverse the procedure to attach a blade holder to the cutting head. -
Page 6: Inserting The Graphik Blade And Setting The Depth
Set-up INSERTING THE GRAPHIK BLADE AND SETTING THE DEPTH Remove the blade clamping plate by undoing the large black clamping knob, if there is a blade already in the holder it will come away with the magnetic clamping plate . You will notice the blade depth adjuster with the small black knob is free to slide along its slot and the raised pip on its underside locates in the small hole in... -
Page 7: Operation
Operation CUTTING The standard GRAPHIK blade holders can be set to cut at different depths and in either direction by simply adjusting or flipping the blade over in the holder. You can also push or pull the cutting head to suit your own comfort. DEEP CUT DEEP CUT SHALLOW CUT... -
Page 8: The Aluminium Squaring Arm (Optional)
Operation THE ALUMINIUM SQUARING ARM (Optional) Attach the Squaring Arm using the two screws and nuts provided. When tightening the screws ensure that the arm is at right angles to the cutting edge using a piece of paper or card cut at 90°, as shown . To fix the scales in the correct position, place a piece of card on the Squaring Arm and slide the measuring stop to the back corner then fasten it in position. -
Page 9: Using The Rotary Cutter (Optional)
Operation THE ROTARY CUTTER (Optional) The optional Rotary Blade Holder is used to cut textiles, thin papers and other flimsy materials, it uses a circular blade to press down onto a cutting mat or sheet of suitable plastic placed on the base of the machine. The red plastic blade guard protects the blade and makes it safe to handle, however, be very careful as the blade is extremely sharp. -
Page 10: Changing The Rotary Blade
Operation CHANGING THE ROTARY BLADE The circular knives are extremely sharp - handle with care. Undo the clamping knob to release the clamp plate then carefully remove the blade with the red guard and the blade centre boss. Separate the blade from the red guard and push out the magnetic centre boss be extremely careful, the point of a pencil can be used to help push the boss free of the... -
Page 11: Maintenance
Repeat this on the other screw, further finer adjustment on each screw may be needed to achieve an easy sliding movement with zero side play. KEENCUT Limited E-mail: sales@keencut.co.uk KEENCUT Limited accepts no liability if the product is not assembled and used in the correct way.


Need help?
Do you have a question about the Sabre 2 Series and is the answer not in the manual?
Questions and answers