Table of Contents
Advertisement
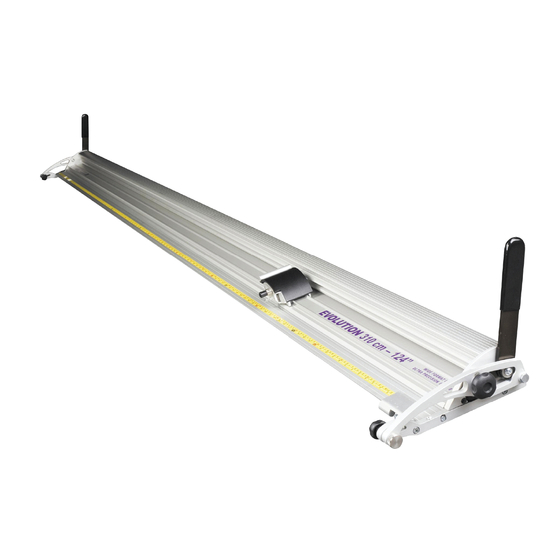
Evolution E2
Inspired Design – Precision Engineering
USER INSTRUCTIONS
Thank you for choosing the Keencut Evolution E2. Every effort
has been made to bring you a precision engineered product
with the promise of many years of valuable service. In order to
obtain maximum benefit from your machine please read these
instructions carefully. For advice and assistance or replacement
parts please contact your distributor or Keencut.
Keencut Limited, Baird Road, Willowbrook Industrial Estate, Corby, Northants, ENGLAND NN17 5ZA.
Telephone: 01536 263158 Fax: 01536 204227 E-mail: info@keencut.co.uk
www.keencut.co.uk
Advertisement
Table of Contents

Subscribe to Our Youtube Channel
Related Manuals for KEENCUT Evolution E2


Summary of Contents for KEENCUT Evolution E2
- Page 1 For advice and assistance or replacement parts please contact your distributor or Keencut. Keencut Limited, Baird Road, Willowbrook Industrial Estate, Corby, Northants, ENGLAND NN17 5ZA. Telephone: 01536 263158 Fax: 01536 204227 E-mail: info@keencut.co.uk www.keencut.co.uk...
-
Page 2: Table Of Contents
Contents Contents Before Set Up Installation Recommendations Check and Adjust Worktop Flatness The Fixing Bracket Jacking Screws Position the Fixing Brackets Set Up Fit the Lift Handles (remove strapping) Adjust for Alignment Position the Base Fixing Brackets Check and Adjust the Clamping Adjust for Flatness and Grip - paper test Build up Bench Surface Operation... - Page 3 The Evolution E2 Cutter Bar can be fixed to a KEENCUT Proteus bench or to an existing work bench. The bench should be rigid with a flat worktop (within 3mm (1/8") overall) and made from MDF or similar material to accept fixing screws.
- Page 4 Before Set Up CHECK & ADJUST THE WORKTOP FLATNESS Check the flatness of the worktop by stretching a thin piece of strong thread between two blocks (of the same height) approximately over the line. Measure the highest and lowest part of the worktop under the thread, the difference between the two measure- ments should be no more than 3mm (1/8").
-
Page 5: Before Set Up
G Example: Evolution 160, 4 base fixing brackets 18cm 43.5cm (17 ") 43.5cm (17 ") 43.5cm (17 ") (7") Evolution E2 160cm (64”) - Page 6 Before Set Up Lift the Evolution E2 cutter bar from its crate but do not remove the clear plastic stretch-wrap bands holding the base to the cutter bar. Place the Evolution E2 centrally on the Brackets and manoeuvre it until the base is located properly down on each of the Brackets.
- Page 7 FIT THE LIFTING HANDLES Fit the Lift & Hold Handles at each end of the cutter bar. Position the machined section of the handle towards the centre of the Evolution E2 and insert it into place at the angle shown (Fig ).
-
Page 8: Set Up
Set Up ? = ? ? < ? Adjust the straightness of the Base by adjusting the front " " and rear " " grub screws in the Base Fixing Brackets: To move the cutting groove towards " " loosen the rear grub screw " " in the nearest Brackets and tighten the front grub screw "... - Page 9 Set Up Place two of the long wood screws " " in the front holes of the Fixed Arms and partially insert them into the bench surface but do not tighten. Loosen, by one full turn anti- clockwise, the four hexagon socket screws " " joining the Fixed Arms to the Base. Fully insert the two wood screws "...
- Page 10 E2 Base to grip the underside of the material and two similar grip cords set into the underside of the Cutter Bar. These should be periodically checked for good condition and replacements obtained from your Keencut distributor. There is an integral Levelling Adjustment that enables the full width of the cutter bar to lay flat on any thickness of material.
- Page 11 Set Up CHECK AND ADJUST FOR FLATNESS AND GRIP Check the grip of the cutter bar using a sheet of office copy paper. Starting at one end, lift the cutter bar and place the paper under it, when lowered, the weight of the cutter bar should grip the paper.
-
Page 12: Build Up Bench Surface
BUILD UP BENCH SURFACE Once the Evolution E2 has been installed all that remains is to raise the level of the remaining surface of the bench by 15 - 16 mm (5/8") The best way is to add a new top made of MDF or similar solid material. -
Page 13: Operation
Operation INSERT AND ALIGN THE MATERIAL Use one of the two Lift Handles to raise the Cutter Bar. With the cutter bar raised place the material to be cut on the Base. Lower the Cutter Bar by pushing the Lift Handle towards the cutting edge of the machine. -
Page 14: Blades And Blade Holders
Operation BLADES AND BLADE HOLDERS The Evolution E2 is fitted with an all-new vertical action cutting head which reliably controls the blade depth and eliminates the need for heavy downward hand pressure when cutting tough materials such as PVC foamboard. Providing a smooth consistent cutting action on just about every flexible material used in the Graphics and Sign making Industries. -
Page 15: Changing The Blade Holder
Operation CHANGING THE BLADE HOLDER Before removing a blade holder make sure the blade has been removed or guarded (dependent upon type). Loosen both of the small knurled knobs by about two turns, raise the blade holder to align the knobs with holes in the blade holder then pull towards you to release. Reverse the procedure to attach a blade holder to the cutting head. -
Page 16: Inserting The Graphik Blade
Operation INSERTING THE GRAPHIK BLADE AND SETTING THE DEPTH Remove the blade clamping plate undoing the large black clamping screw , if there is a blade already in the holder it will come away with the magnetic clamping plate . You will notice the blade depth adjuster with the small black knob is free to slide along its slot and the raised pip on its underside... - Page 17 Operation The VA (vertical action) cutting head holds two cutters which can be changed and used independently of each other. Each of the standard GRAPHIK blade holders can be set to cut at different depths and in either direction by simply adjusting or flipping the blade over in the holder.
-
Page 18: The Rotary Cutter (Textile Cutting Attachment)
The third (furthest) position is also for cutting textile but uses a different part of the Cutting Strip should it become worn. The Cutting Strip can also be removed, turned around or flipped over to allow eight tracks to be used before the strip requires replacement. Replacement Cutting Strips are available from your Keencut agent. -
Page 19: Using The Rotary Cutter
Operation USING THE ROTARY BLADE CUTTER Position the material to be cut on the machine and lower the cutter bar. Rotate the safe- ty guard grip clockwise to reveal the blade. Apply downward pressure to the blade holder whilst drawing the cutting blade along the material in one continuous motion. Some materials will cut better if a harder plastic base is used in place of the plastic strip embedded in the machine. -
Page 20: Changing The Rotary Blade
Operation CHANGING THE ROTARY BLADE The circular blades are extremely sharp - wear protective gloves and handle with care. Unscrew the clamping knob to release the clamp plate then carefully remove the blade with the red guard and the blade centre boss. Separate the blade from the red guard and push out the magnetic centre boss... -
Page 21: Medium Duty Blade Holder
Operation MEDIUM DUTY BLADE HOLDER Fitting the blade. Remove the magnetic blade guide by releasing the blade clamping knob Place blade onto the guide ensuring the blade notches are properly located and the back face of the blade is lying flat on the guide. -
Page 22: Maintenance
Repeat this on the other screw, further finer adjustment on each screw may be needed to achieve an easy sliding movement with zero side play. KEENCUT Limited E-mail: sales@keencut.co.uk KEENCUT Limited accepts no liability if the product is not assembled and used in the correct way.
Need help?
Do you have a question about the Evolution E2 and is the answer not in the manual?
Questions and answers