Advertisement
Quick Links
Advertisement

Related Manuals for LaserLiner ZipLevel Plus 30


Summary of Contents for LaserLiner ZipLevel Plus 30
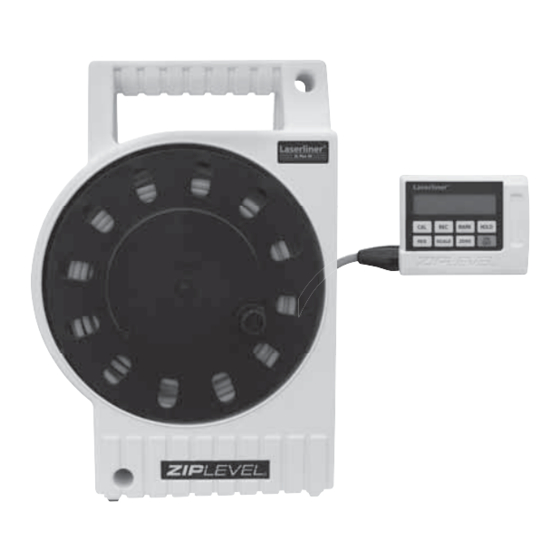
- Page 1 ZipLevel Plus 30 Operation manual...
- Page 3 ZipLevel Plus 30 Read the operating instructions and the enclosed brochure „Guaran- tee and additional notices“ completely. Follow the instructions they contain. Safely keep these documents for future reference. Professional precision altimeter The ZipLevel is a professional altimeter which enables you to scale and level on your own also around corners with accuracy within 2 mm.
- Page 4 Inserting batteries into the measuring module – Open the battery compartment (E) and insert the batteries according to the installation symbol. Pay attention to the correct polarity. Close the battery compartment again. Console The keys HOLD and ON/OFF react instantaneously, all the other keys have to be pressed for 2 seconds in order to activate or deactivate the particular function.
- Page 5 ZipLevel Plus 30 Quick start of the ZipLevel Open the bottom protective cap of the basic unit and remove the measuring module. Lay the basic unit on the floor with the back facing down. Slowly pull a sufficient length of line off the cable reel. The altitude will be transferred from the basic unit to the measuring module.
- Page 6 Quick start of the ZipLevel Give a place of reference to the measuring module (press ZERO-key) and move it to a different height. The appliance shows the difference in height between the place of reference and the measuring point. Now you can hold the appliance against any point and it always shows you the current height towards the place of reference.
-
Page 7: Keys And Functions
ZipLevel Plus 30 Keys and functions ON/OFF With this key you switch the unit on and off. If no key has been pressed or the measuring module has not been moved within 4 minutes, the unit will switch itself off automatically. After 3 minutes without any activity the unit will sound a warning by giving 2 long bleeps. - Page 8 Examples for the HOLD-function: 2. Press HOLD 1. ZERO ZERO Press the ZERO-key for 2 seconds in order to make the present height (location of the measuring module) the point of reference. The unit must not be moved in this process! New level of reference When set zo zero at the top...
- Page 9 ZipLevel Plus 30 SCALE With this you choose the required measurements in millimetres, centime- tres or meters. Press the SCALE-key for 2 seconds and hold. Now the gauges the bottom right of the display will change. Release the key once the required measurement appears.
- Page 10 HighPrecision mode For particularly demanding measurements, the accuracy can be switched from ± 2 mm to ± 0.2 mm. To do so, keep the RES button pressed and press the ON/OFF button at the same time. Repeat the process to leave HighPrecision mode.
- Page 11 ZipLevel Plus 30 The ZipLevel can also be used for different calculations and shows an average, minimum and maximum. 1) Press the REC-key for 2 seconds. The word ‘REC’ appears on the left side of the display. 2) Stabilize the measuring module on the first measuring point and shortly press HOLD to keep the data.
- Page 12 ADDER (add) To carry out accurate measurements indoors, the ADDER-function auto- matically adds the height, respectively thickness of the measuring module on the measured data. Make sure that the device is set to „boot off“. Press HOLD to keep the data. Then press CAL-key for 2 seconds and hold.
- Page 13 ZipLevel Plus 30 „Boot on“ / „Boot off“ HOLD 2 seconds „Boot on“ „Boot off“ ADDER-function MARK + Height + Thickness 8,8 cm 5 cm HOLD HOLD ZERO ZERO Base Back Base Back...
- Page 14 The appliance has been calibrated at the factory. Please only calibrate, in case the measuring results are wrong or the letters ‘CAL’ are blinking on the display. A benchmark of 1.219 m above the base unit is important for the gauging. Ideally, you should use the feeler rod for calibration. Calibrating the ZipLevel: 1) Put the basic unit on its back onto a level surface and switch the measuring module on.
- Page 15 ZipLevel Plus 30 Calibration in 3 steps Step 1: Lay the measuring module on its base or back next to the basic unit and press the CAL-key again. (0) is blinking on the display. Step 2: Press CAL again. (121.9) is blinking on the display.
- Page 16 MARK With the MARK-function you can produce tones to indicate the following states: a) a chosen height, b) height within a defined scope or c) height beyond a defined scope. 1) Start of this function: Get the measuring module into the required height and press the MARK-key for 2 seconds.
- Page 17 ZipLevel Plus 30 Define scopes a) Tone at a certain height: for accurate levelling Tone MARK b) Tone within a scope: for less accurate levelling No tone Tone Scope No tone MARK c) Tone beyoned a scope: for rough levelling...
- Page 18 TIPS FOR USERS 1) Check the point of reference often when carrying out critical/serious levelling jobs or press ZERO often at the point of reference. (CAL is not necessary for levelling!) Hold the height differences between line, basic unit and measuring module as low as possible. 2) If possible, avoid high differences in temperature between line and measuring module (e.g.
-
Page 19: Technical Data
ZipLevel Plus 30 Technical data (Subject to technical alterations. 10.2012) 12 m (6 m over and under Vertical measuring range the basic unit) Horizontal measuring range ± 30 m (60 m Ø) Levelling precision ± 2 mm / HighPrecision mode: ± 0,2 mm HighPrecision-Mode ±... - Page 20 ZipLevel Plus 30 SERVICE Umarex GmbH & Co KG – Laserliner – Möhnestraße 149, 59755 Arnsberg, Germany Tel.: +49 2932 638-300, Fax: +49 2932 638-333 laserliner@umarex.de Umarex GmbH & Co KG Donnerfeld 2 59757 Arnsberg, Germany Tel.: +49 2932 638-300, Fax: -333...
Need help?
Do you have a question about the ZipLevel Plus 30 and is the answer not in the manual?
Questions and answers